Using P5.SerialServer
Learning the basics of connecting your Arduino to JavaScript in order to interact with webpages.
Mac Instructions
Step 1:
Make sure you have p5.serialserver, ws and serialport installed by typing in your terminal...
npm view version
The package version will be returned confirming it’s installed.
Step 2:
Open up a web browser and in the URL bar paste the following...
You will be given an HTML file that will display your results of the echo program.
Step 3:
In the terminal change your directory to the following by typing...
cd /usr/local/lib/node_modules/p5.serialserver/examples/echo
Step 4:
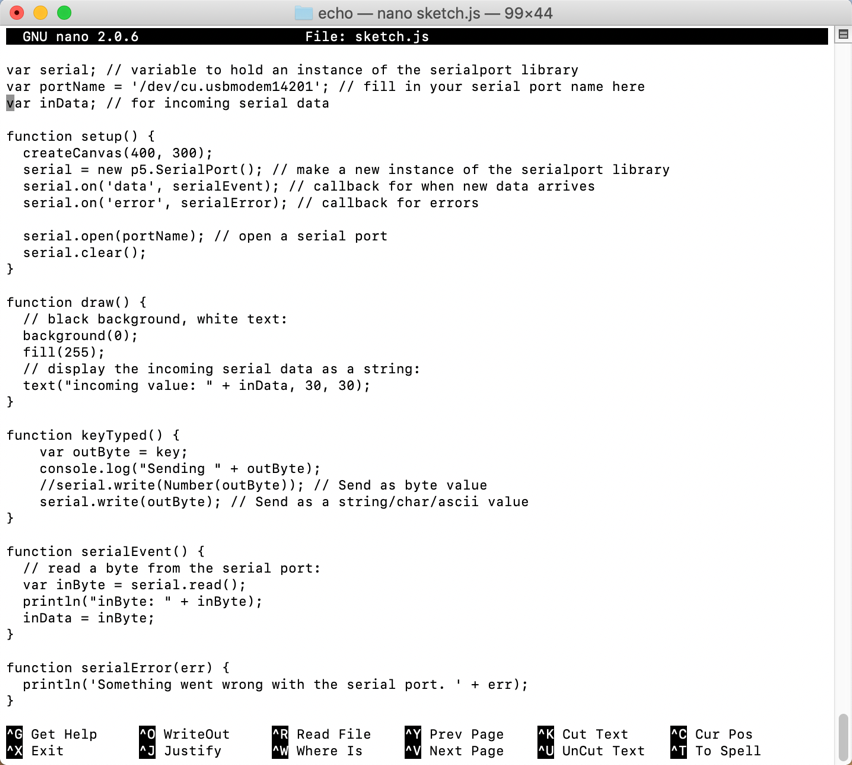
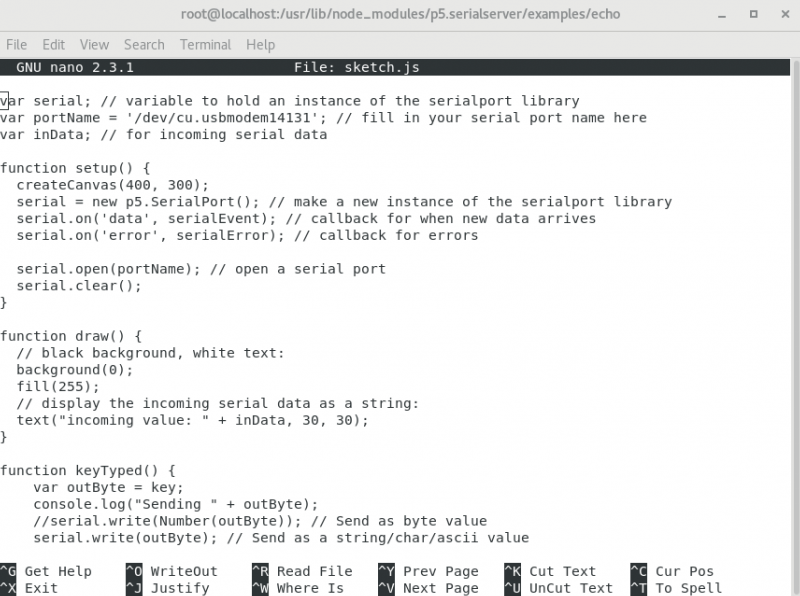
Using Nano or an IDE/Text Editor we want to open the sketch.js file. In the terminal we will type...
sudo nano sketch.js
Step 5:
Open the Arduino IDE.
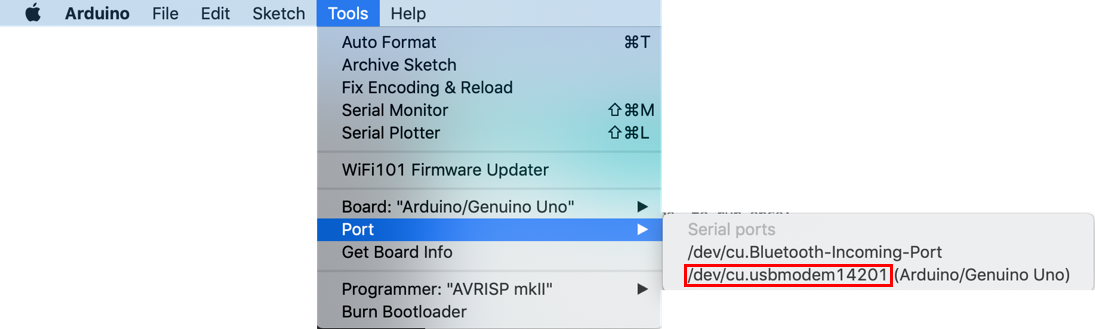
In top of your desktop click “Tools” then look at “Port”.
Take note of what ports are currently active.
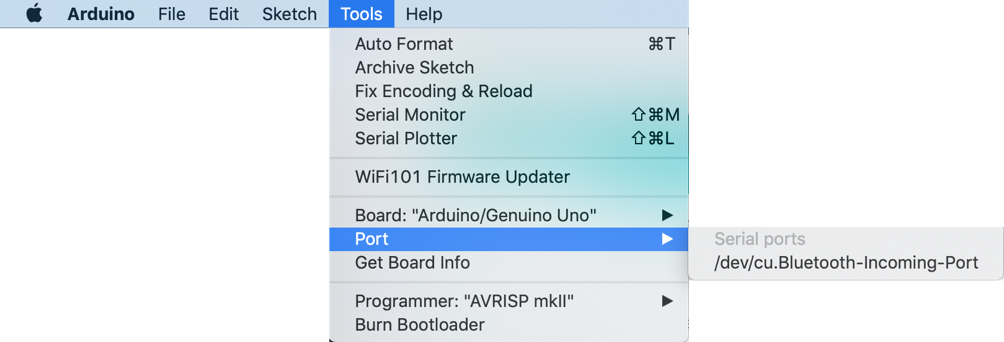
Step 6:
Plug in your USB connection cable to the computer and then the Arduino.
Then look at the ports again.
Identify the new port added to the list.
Note: This port name is unique to the system you're using.
Step 7:
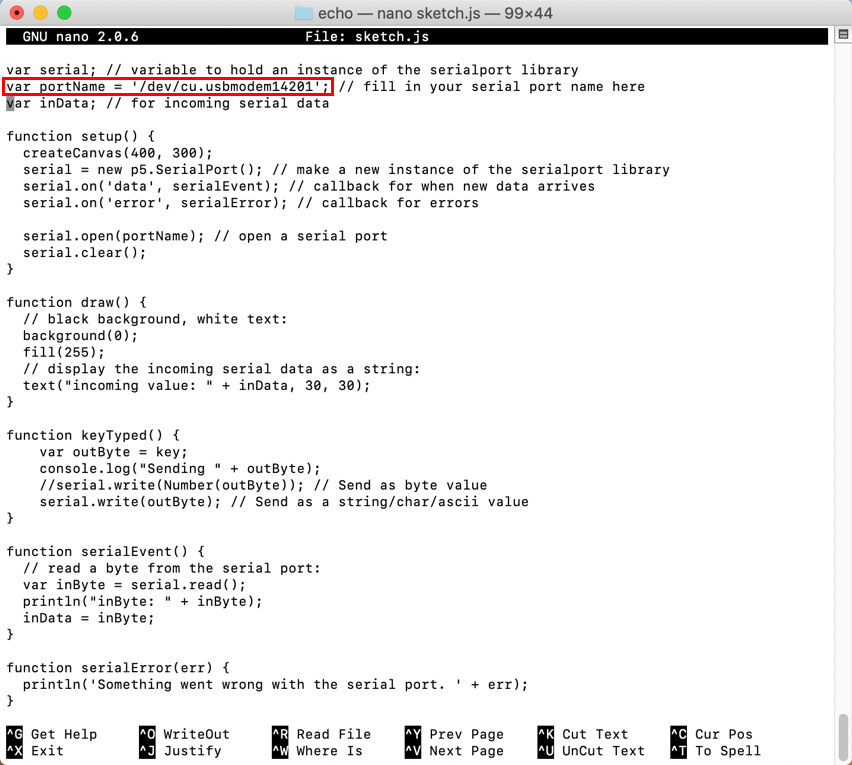
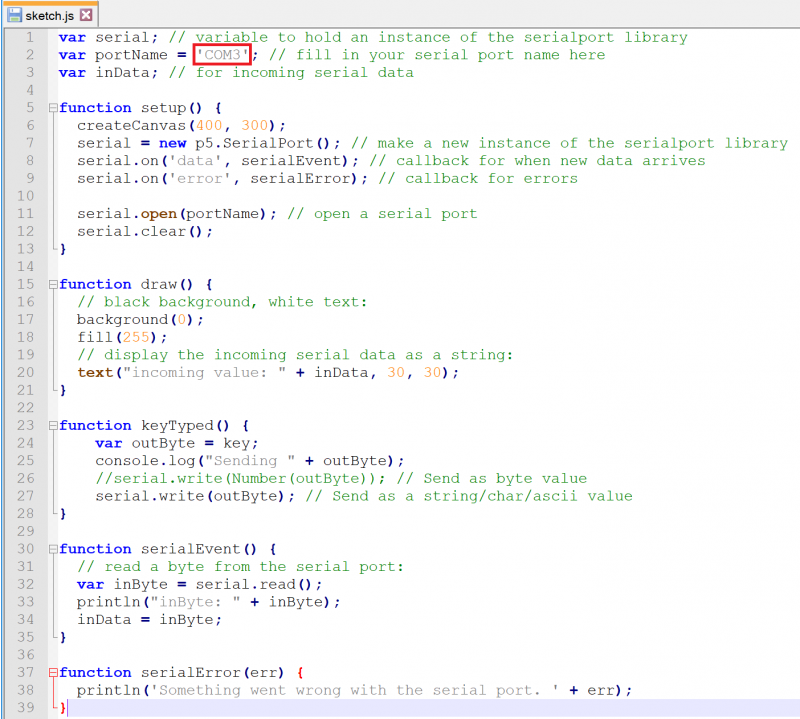
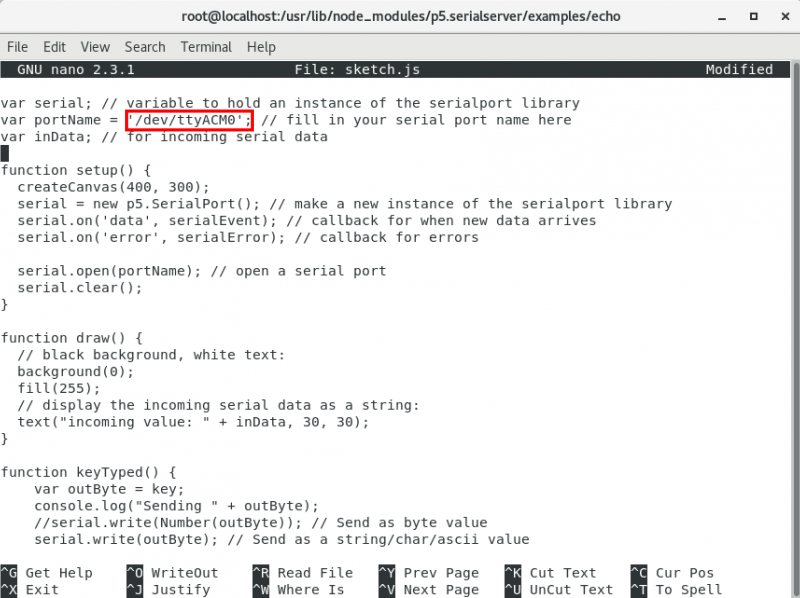
Let’s go back to the sketch.js file and change the variable in the file called ”portName”.
Change the variable to the new port you found in the Arduino IDE.
Make sure to save the file.
In Nano just press (control + x) and then save by pressing Y. Then press enter/return.
Step 8:
In the terminal let's run the command to start the p5.serialsever package by type...
p5serial
Step 9:
Look at the browser page and refresh the page. Wait a second the “incoming value:” will change rapidly with numbers.
This means the echo program is passing data to the JavaScript file which is then being display through the HTML webpage.
Windows Instructions
Step 1:
Make sure you have p5.serialserver, ws and serialport installed by typing in your terminal...
npm view version
The package version will be returned confirming it’s installed.
Step 2:
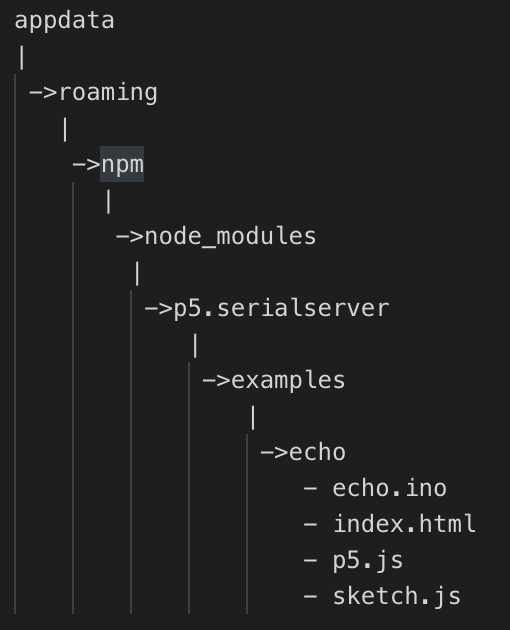
Let’s open the folder that contains where your echo example is located.
In the windows search bar look for “%appdata%”.
Follow the folder structure below to get to the files you need.
Step 3:
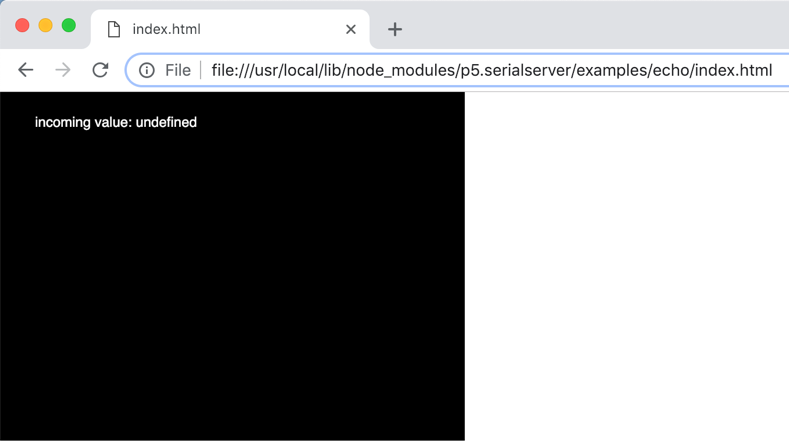
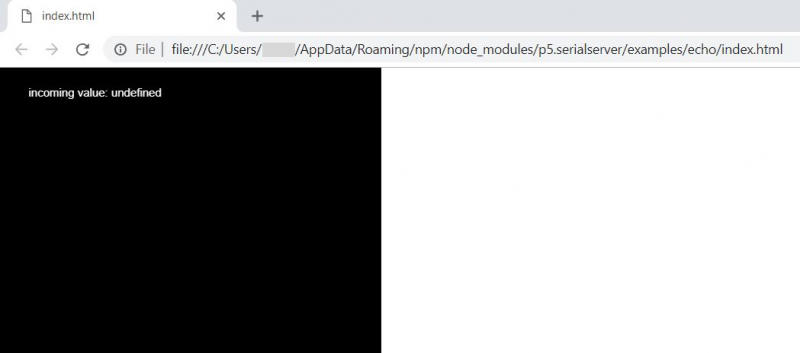
Open the index.html file in a browser other than Microsoft Edge.
You will be given an HTML file that will display your results of the echo program.
Step 4:
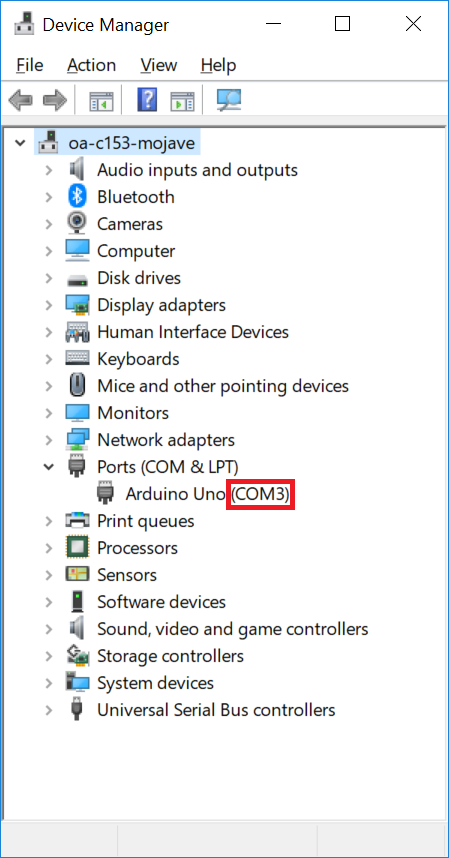
In you windows search look for “device manager” and look for a listing named “Ports”. Take note of the available ports on your computer. If Ports isn’t listed then you have no active ports.
Now connect you Arduino to the PC. The Ports listing should appear if it wasn’t and a new port will be available in the list.
Remember this port name.
Step 5:
In the echo files open the sketch.js file with an IDE/Text Editor.
You want to change the variable called “portName” to the name of the port you got in device manager.
Then save the file.
Step 6:
Open up the command prompt. You want to change your directory to the echo folder. Just copy the file explorer path for the echo folder into the command line as following...
cd C:\Users\myUser\appdata\roaming\npm\node_modules\p5.serialserver\examples\echo
Step 7:
Once in the echo folder type the following to start the p5.serialserver...
p5serial
The server should launch.
Step 8:
Look at the browser page and refresh the page. Wait a second the “incoming value:” will change rapidly with numbers.
This means the echo program is passing data to the JavaScript file which is then being displayed through the HTML webpage.
Step 1:
Make sure you have p5.serialserver, ws and serialport installed by typing in your terminal...
npm view version
The package version will be returned confirming it’s installed.
Step 2:
Open up a web browser and in the URL bar paste the following...
You will be given an HTML file that will display your results of the echo program.
Step 3:
In the terminal change your directory to the following by typing...
cd /usr/lib/node_modules/p5.serialserver/examples/echo
Step 4:
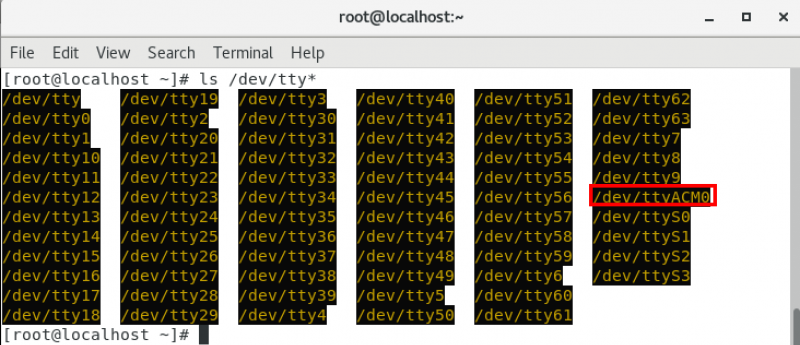
Connect the Arduino to the machine, then in the terminal enter:
ls /dev/tty*
The device ending in ACM for example:
Step 5:
Using Nano or an IDE/Text Editor we want to open the sketch.js file. In the terminal we will type...
sudo nano sketch.js
Step 6:
Change the variable to the new port you found in the /dev/tty*.
Make sure to save the file.
In Nano just press (control + x) and then save by pressing Y. Then press enter/return.
Step 7:
Once in the echo folder type the following to start the p5.serialserver...
sudo p5serial
The server should launch.
Step 8:
Look at the browser page and refresh the page. Wait a second the “incoming value:” will change rapidly with numbers.
This means the echo program is passing data to the JavaScript file which is then being displayed through the HTML webpage.
For this installation there will be no use of a GUI in CentOS. Due to this you will have to host the p5.SerialServer on a http server and access the server on another machine.
I will be using two VMs using VirtualBox and are both under the same NAT Network.
Follow steps 3-6 from the steps above
Step 1:
If dhclient is not enabled, enable it by enter in the terminal:
sudo dhclient
Then use ip a to find the ip address of the machine.
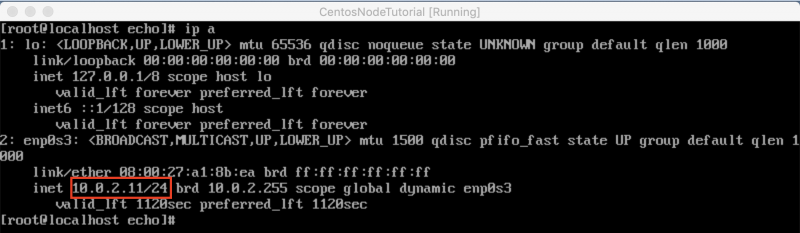
Step 2:
Take the ip from the step above and input into the sketch.js into the serial = new p5.SerialPort();
Then save using Ctrl+x and save.

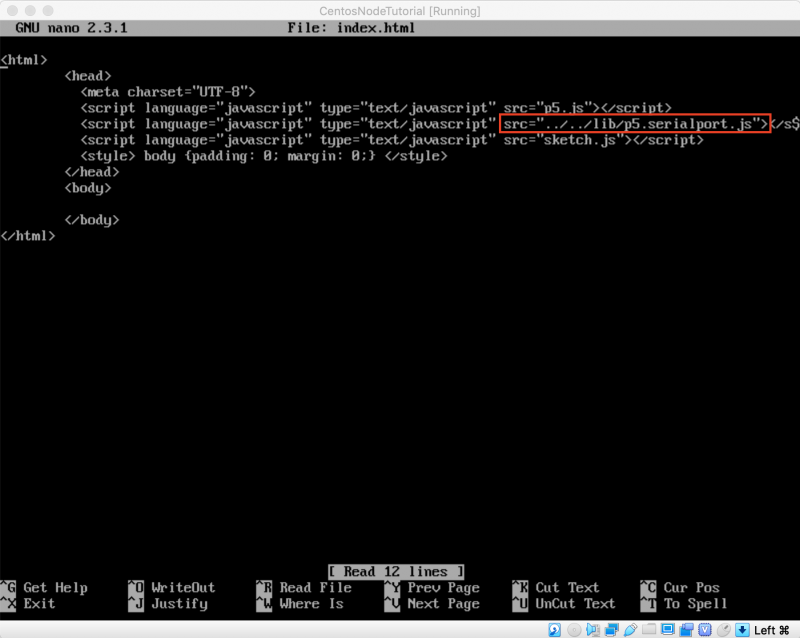
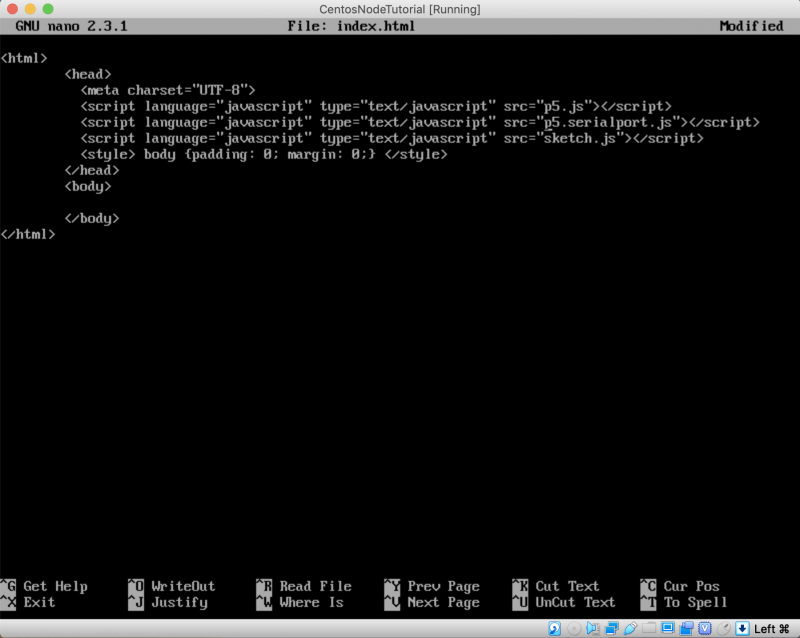
Step 3:
Then edit the index.html file and remove the ../../lib/ from the fifth line
Step 4:
Next is to install the HTTPD apache web server by entering into the terminal
sudo yum -y install httpd
Step 5:
Allow ports 80 and 8081 through the firewall then reload the firewall
sudo firewall-cmd —add-port=80/tcp —permanent
sudo firewall-cmd —add-port=8081/tcp —permanent
sudo firewall-cmd —reload
Step 6:
Then start and enable the HTTPD service
sudo systemctl start httpd
sudo systemctl enable httpd
Step 7:
Then change into the html directory by using the command:
cd /var/ww/html
Now copy the echo folder into the current directory by entering:
cp -r /usr/lib/node_modules/p5.serialserver/examples/echo .
Be sure to include the period.
Then copy the p5.serialport.js file into the echo folder using the following command
cp /usr/lib/node_modules/p5.serialserver/lib/p5.serialport.js echo
Step 8:
Once in the echo folder type the following to start the p5.serialserver...
sudo p5serial
The server should launch.
Step 9:
Now start the second VM that has a GUI installed (not only command line). You can use any OS when testing the p5.SerialServer. For this example I am using Ubuntu 18.04.2 LTS
Step 10:
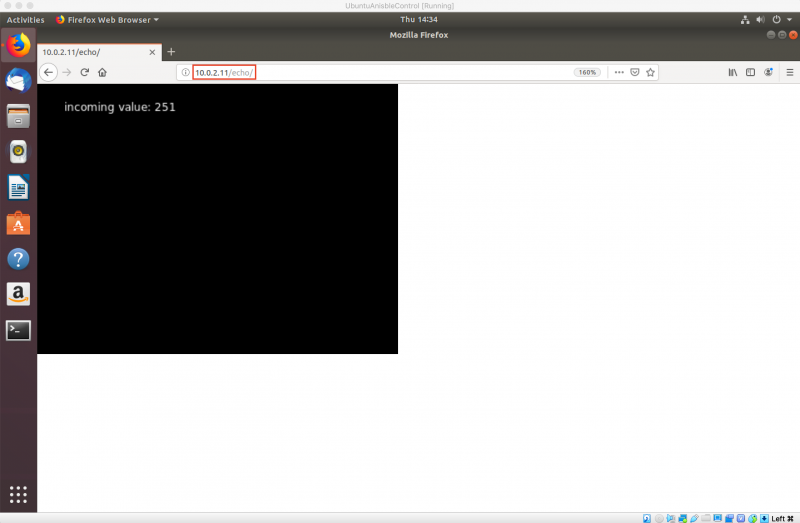
Launch a web browser and enter the ip of the first VM, which we found in Step 1
Step 11:
Then add /echo at the end of the IP in the search bar and you should have the P5.SerialServer page updating