The Mac Techs @ Sheridan
Game Design: Unity Engine Editor Software Installation
Introduction
Here you will find links to installing the Unity Engine.
Unity is a game engine for creating games in both 2D and 3D. Unity allows creating games for many platforms such as iOS, Android, Windows, Mac, PlayStation, Xbox, Oculus Rift, and more.
NOTE: This installer will also install the MS Visual Studio Community 2019 application. It's recommended you install this as well (Unity and Visual Studio should be 'checked' by default).
The Unity Install procedure can take some time. Please make sure to go through the following steps carefully.
1. Installing Unity Hub
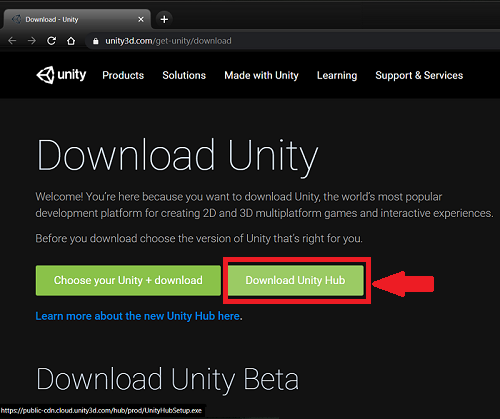
1. To install Unity Hub, you can navigate to the following URL, and download the Unity Hub Installer:
https://unity3d.com/get-unity/download
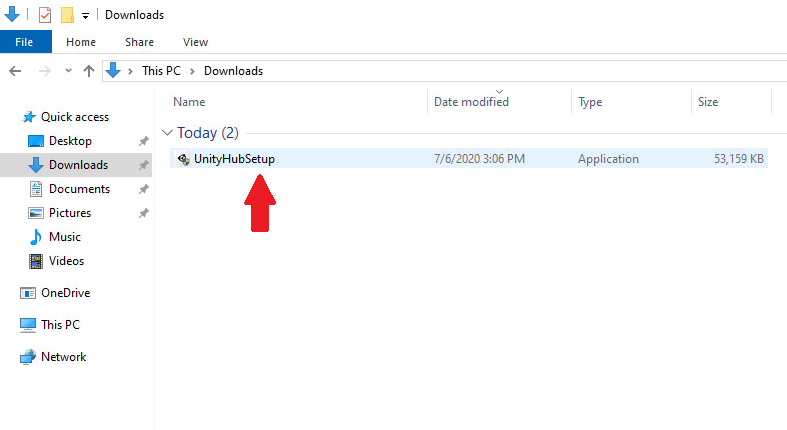
2. By default, the installer should be in your "Downloads" folder. Double-click to launch the installer.
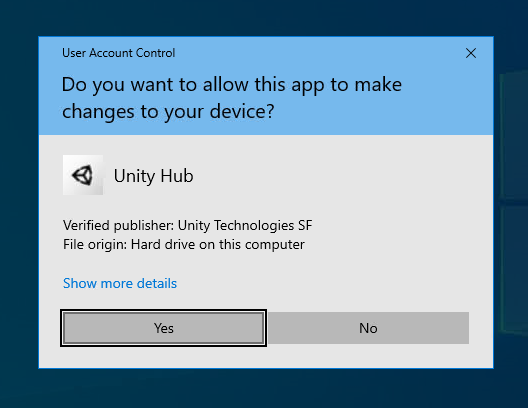
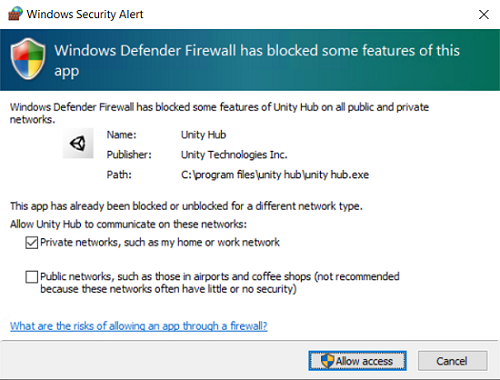
3. Depending on your security and firewall settings, you may have to click "Yes" to allow the install to continue, and 'Allow access', as shown.
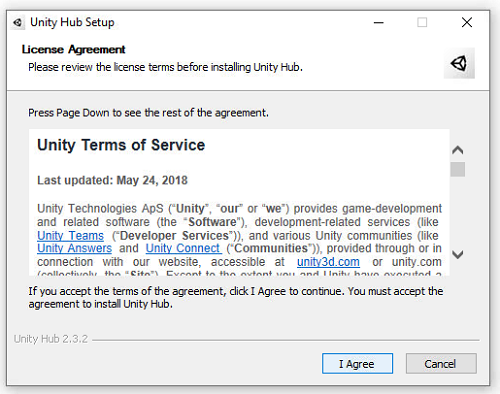
4. You will need to accept the License Agreement to continue.
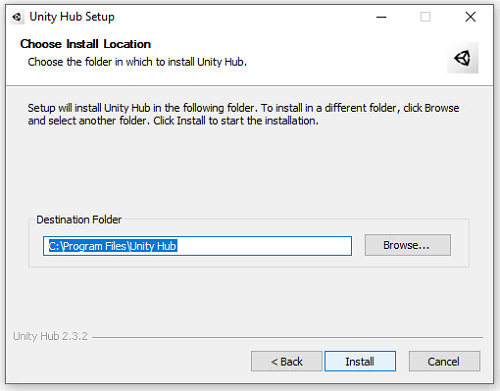
5. Choose your Install Location.
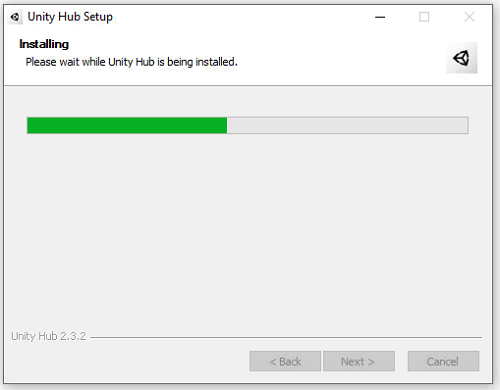
6. Depending on the speed of your computer, the Unity Hub install should only take a few seconds.
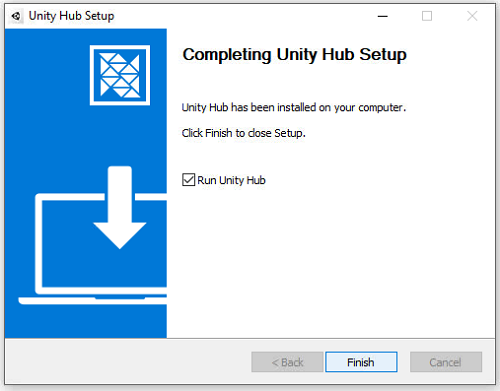
7. Once complete, you will see this screen. Click "Finish" and let Unity Hub launch.
2. Download - Unity Engine / MS Visual Studio Community
1. At this point, you're now ready to download the Unity Engine and MS Visual Studio Community Components.
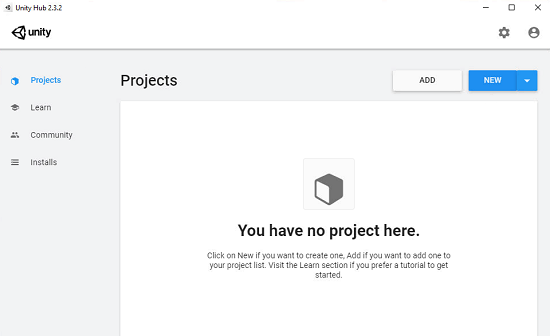
When Unity Hub starts, you might be shown a screen like the following or similar. If you see the 'back' arrow as shown in this example (Pic1), 'click it' to return to the main menu, which is shown in (Pic2)
(Pic1)
(Pic2)
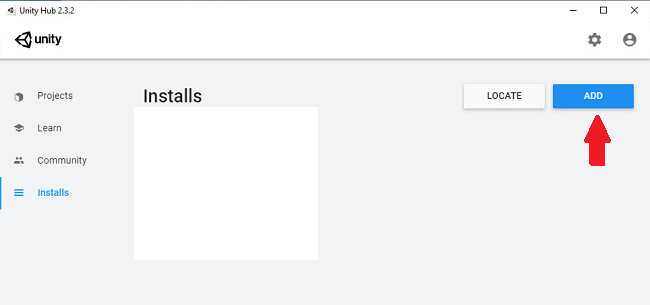
2. Click on 'Installs' as show below.

3. Click on the blue 'Add' button as shown below.
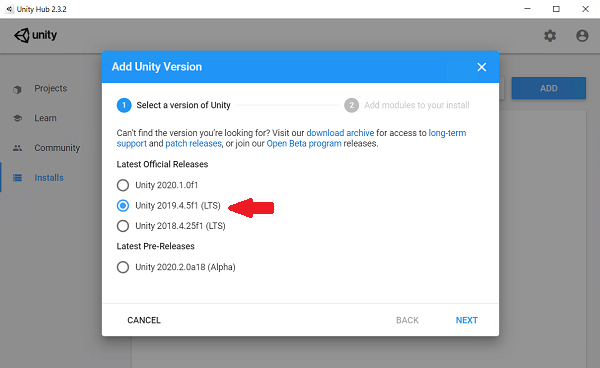
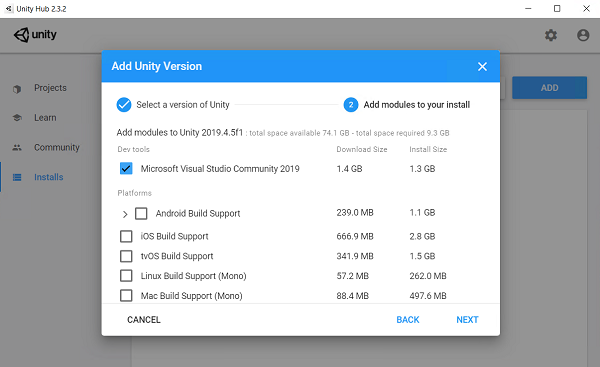
4. You will now see a choice of Unity Engine versions. It's recommended to pick the newest version that has the (LTS) suffix. For example in the screenshot, it would be: Unity 2019.4.5f1 (LTS). Click 'Next' when done choosing.
Depending on when you install, you could have a different version from what is shown. You can also have multiple versions of the Unity Engine installed.
If you are unsure, please contact your professor, as to what will be used in class.
5. Next, make sure that 'Microsoft Visual Studio Community 2019' is 'checked'. Unity uses Visual Studio as the default text/code editor. At this time, you do not need the extra platforms shown, unless you wish to experiment building to those type devices/platforms. Each extra module will take up extra disk space, so do be aware of each requirement. Click 'Next' to continue.
6. Next, you'll need to Agree to the terms to use MS Visual Studio, as shown below. Click 'Done' to continue.

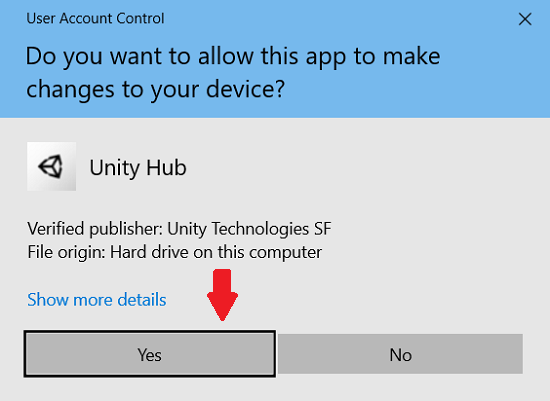
7. You may see the following Windows User Account Control window be displayed. Click on 'Yes' to continue.
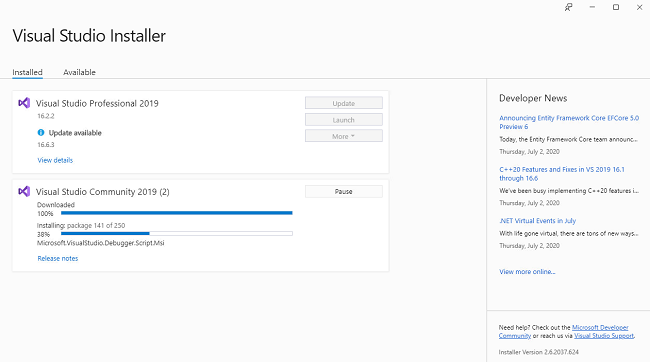
8. Next, you'll see the installers begin to download Unity and MS Visual Studio Community. Depending on the speed of our internet connection, and your computer, this can take awhile. It's best if you are using a wired connection, but if you are on WiFi, make sure your signal strength is adequate. It's also advisable not to have your computer go to SLEEP, as this will abruptly stop the install process.
You can however, still continue to use your computer during this time.
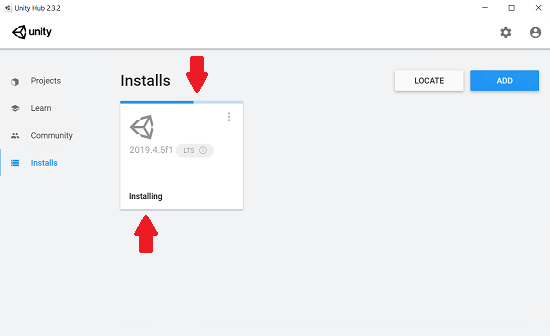
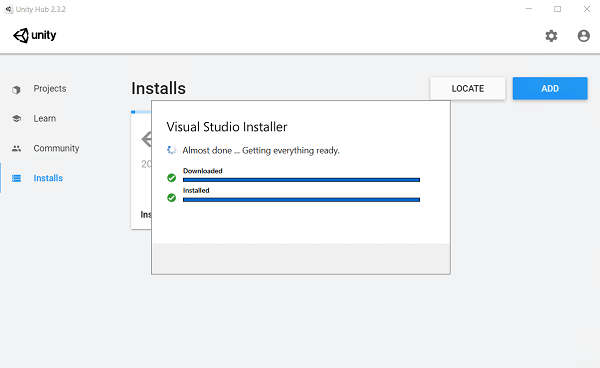
9. Once the installers are complete, you should see the Unity Engine you picked earlier, as shown below.

3. Creating a Unity Account ID & Personal License
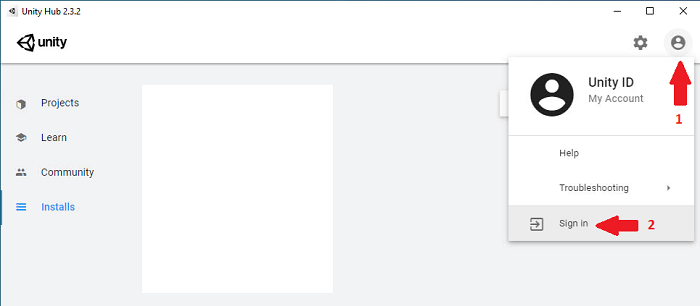
Now before we can use Unity, we need to create a Unity Account (or sometimes called Unity ID), and obtain a personal Unity Engine license.
1. In the top right corner, you'll see a user sign-in button. Click that icon, then click on 'Sign In'.
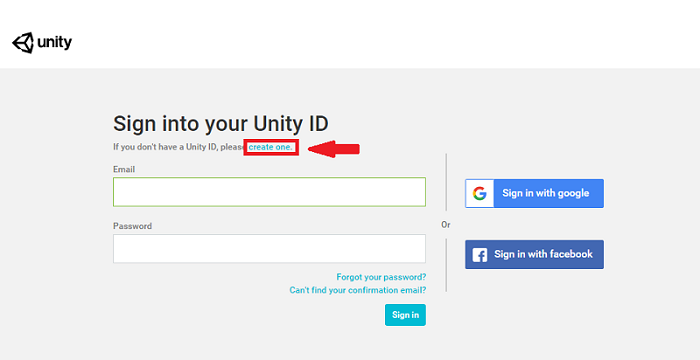
2. When the Sign In window opens, click-on 'create one'.
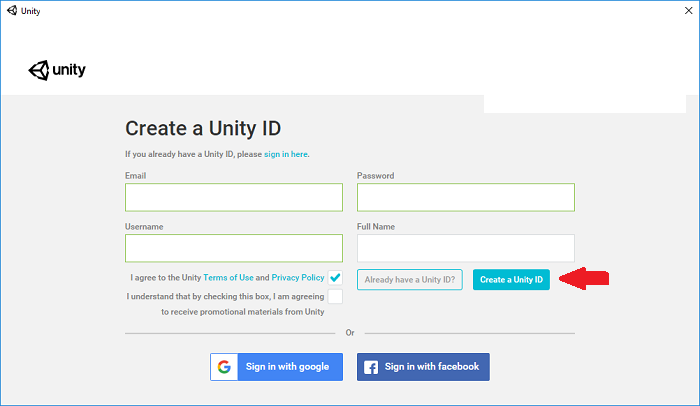
3. Fill in the fields to create your Unity account. Then click “Create a Unity ID”.
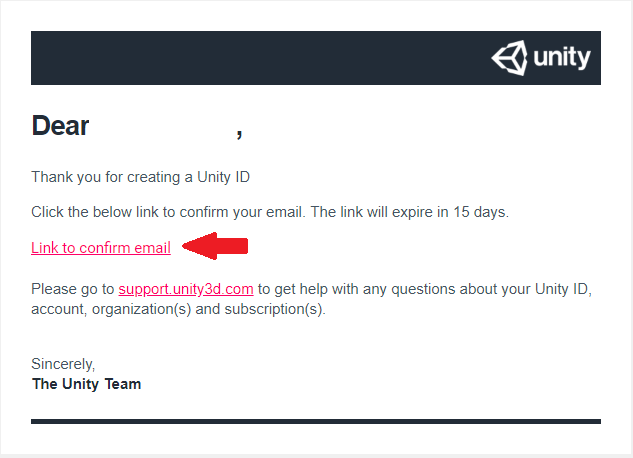
4. In a few moments, you should receive a confirmation email, sent to the email used to signup for the Unity Account. Click “Link to confirm email” within that email, to confirm your email.
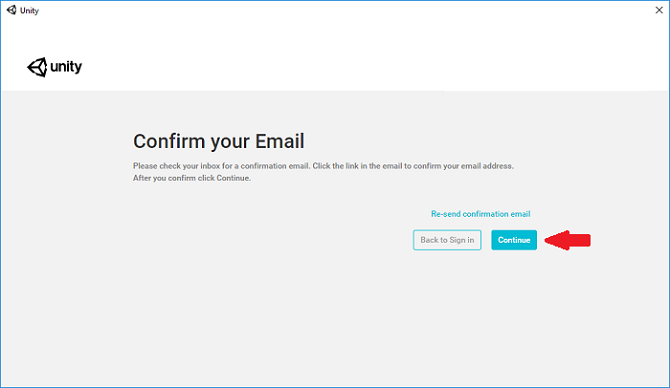
5. Go back to the Unity application and click “Continue” after confirming your email.
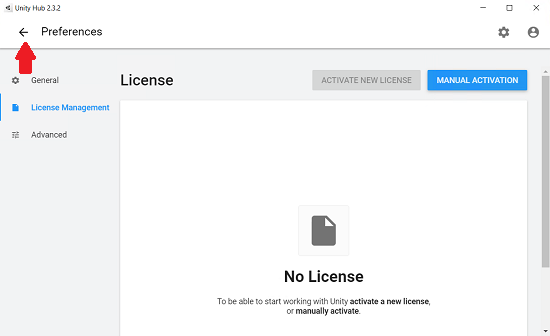
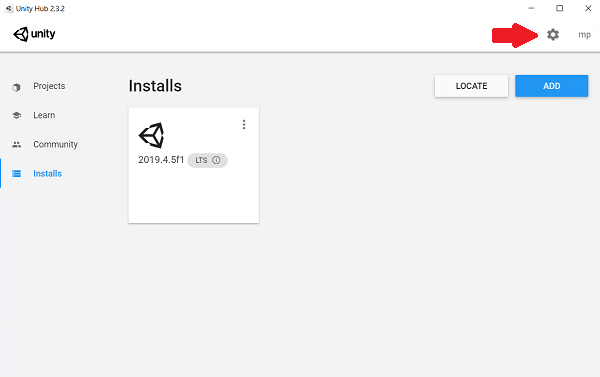
6. You will now be logged in, and brought back to the Unity Hub interface. Click on the 'gear' icon as shown.
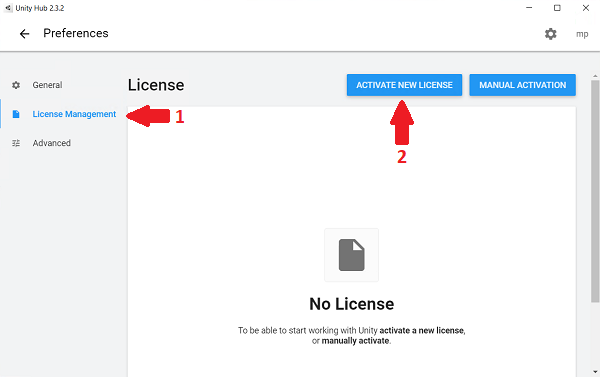
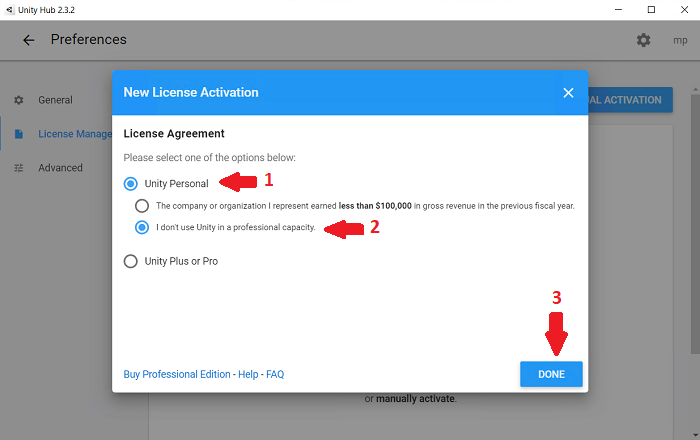
7. Click on 'License Management on the left side, then click 'Activate New License', as shown.
8. Choose 'Unity Personal', then pick 'I don't use Unity in a professional capacity', then click 'Done' to continue, as shown.
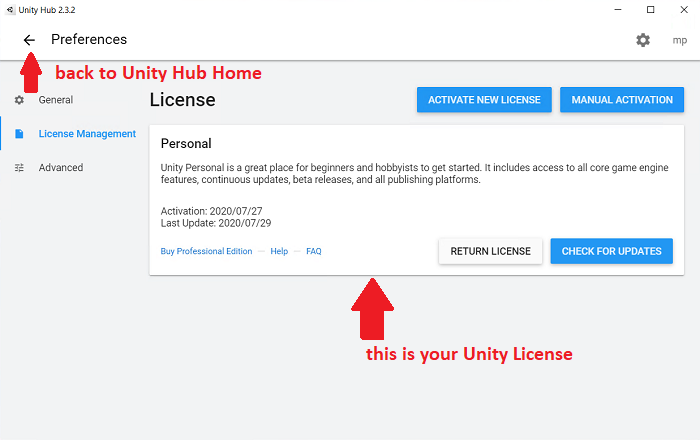
9. In a few seconds, you should be granted your Unity Personal License as shown.
NOTE: 'Return License' is if you switch, or move to a new computer. You return the license on the old computer, and re-activate on the new computer.
Now click on the 'Back arrow' to return to the Unity Hub homepage.
4. Creating a new Unity Project
You should now be ready with your newly created Unity ID, to start using Unity 3D Personal Edition on your computer. Below, are steps on how to create a new Unity project.
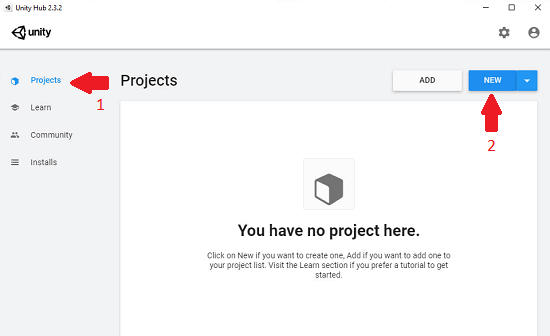
1. Once back on the Unity Hub homepage, click on 'Projects' on the left sidebar, then click on 'New', in the top right as shown.
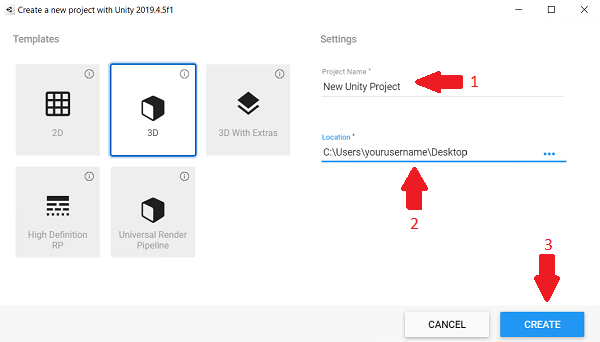
2. Here you can choose your project type (2D and 3D are the most used modes). Give your project a name, choose a save location, then click 'Create'.
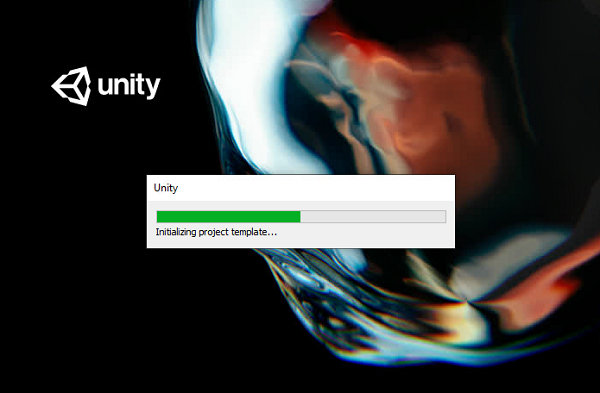
3. Unity will now take a few moments to build the project, tools, assets, etc. You will see several progress bars during the setup. Depending on the speed of your computer, this can take several minutes.
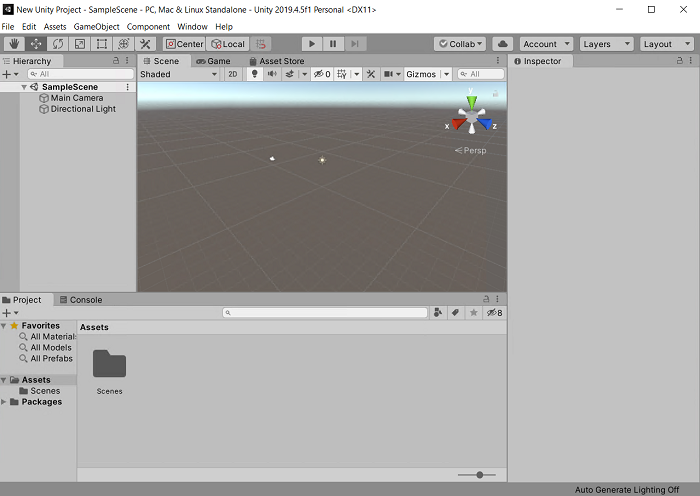
4. Here we go. Unity has finished it's setup, and you are now presented the Unity user interface. That's it! Now you can venture forth to create some great games! :)
Support
If you have any questions on the above, please contact us at game.support@sheridancollege.ca