Using Visual Studio Code with Phoenix
Step 1:
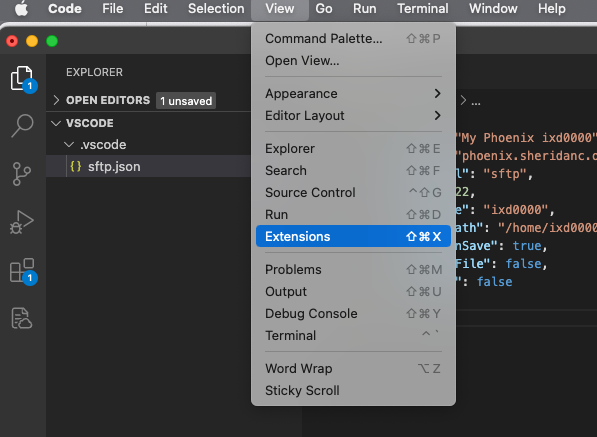
- Download the SFTP extension in Visual Studio Code
- Click on View in the Menu bar, then select Extensions
Step 2:
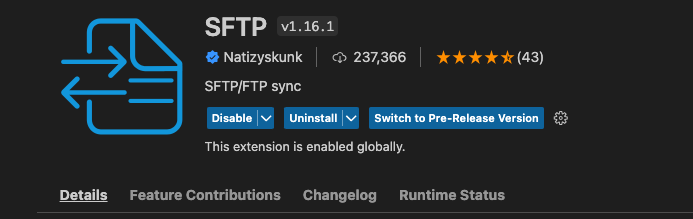
- Use the search field in the upper left to search for SFTP
- select the SFTP/FTP sync by Natizyskunk
Step 3:
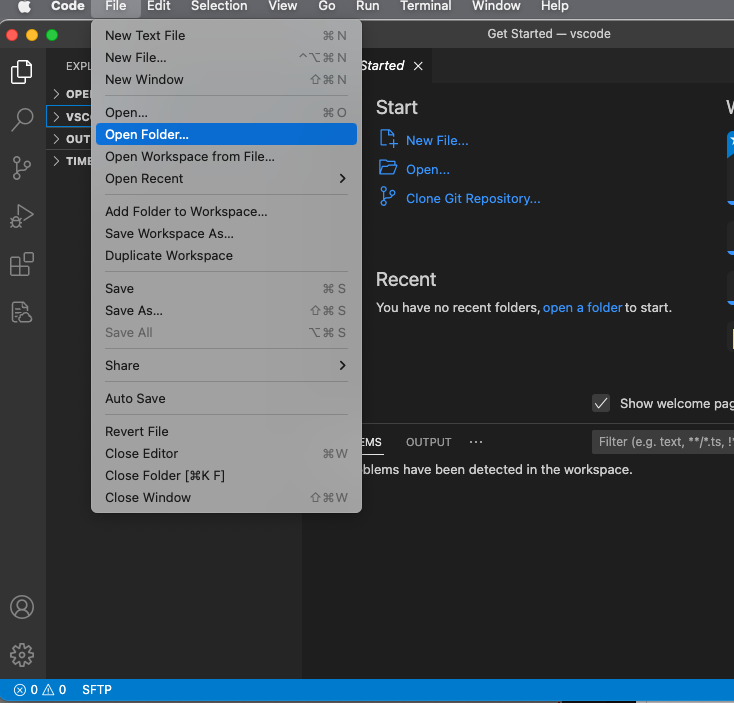
In VS Code, open a local directory you wish to sync to the remote server (or create an empty directory that you wish to first download the contents of a remote server folder in order to edit locally).
- Click on File --> Open Folder
- Choose your Documents folder from the left navigation pane
- Click on New Folder
- Create a folder the same name as your account on the server
Step 4:
- Choose the folder you just created and click on open

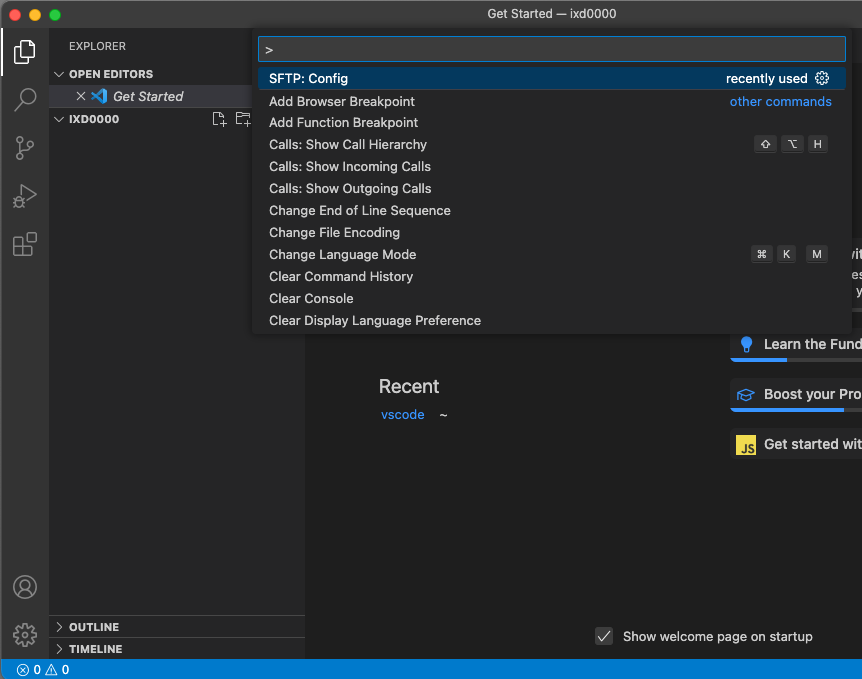
Step 5:
Press Ctrl+Shift+Pon Windows/Linux orCmd+Shift+Pon Mac to open the command palette, and then type theSFTP: configcommand.- A basic configuration file will appear named
sftp.jsonunder the.vscodedirectory, double click on the sftp.json file to open it for editing
Step 6:
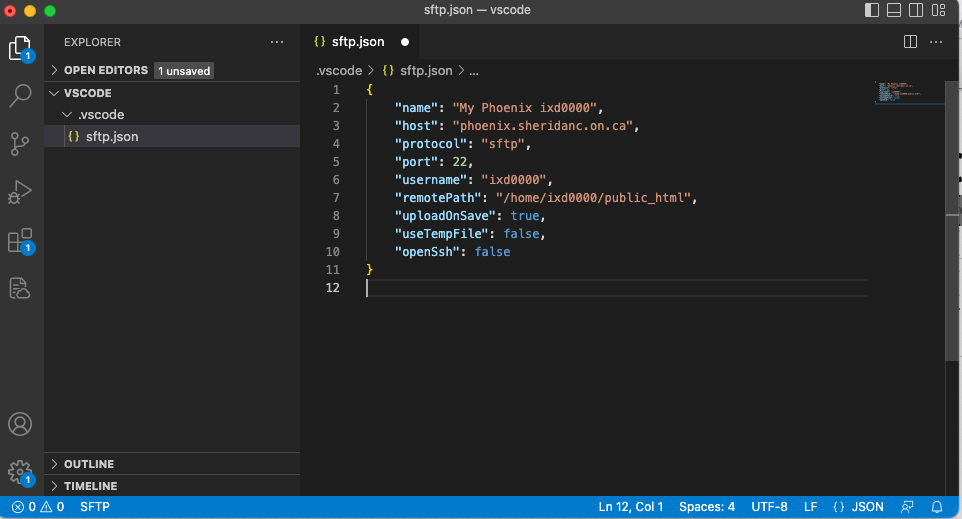
- Edit the SFTP configuration file and insert your login credentials for Phoenix
- Note: (replace ixd0000 with your account name in the example below)
{
    "name": "My Phoenix ixd0000",
    "host": "phoenix.sheridanc.on.ca",
    "protocol": "sftp",
    "port": 22,
    "username": "ixd0000",
    "remotePath": "/home/ixd0000/public_html",
    "uploadOnSave": true,
    "useTempFile": false,
    "openSsh": false
}
Step 7:
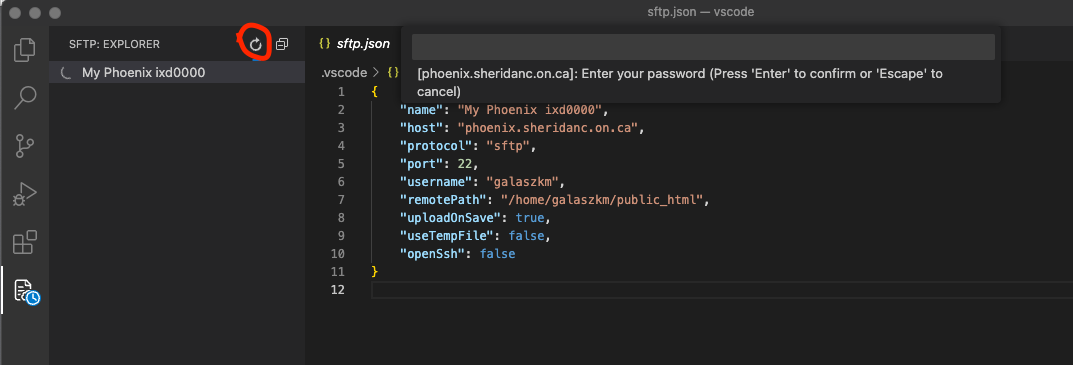
- Save the sftp.json file
- Click on the remote file explorer icon on the bottom of the left icon menu
Step 8:
- Click on the refresh icon to connect to phoenix, it will ask for your password at the top
- Right click on your account name and choose "download folder" to bring down the files on the server to your local project directory
Step 9:
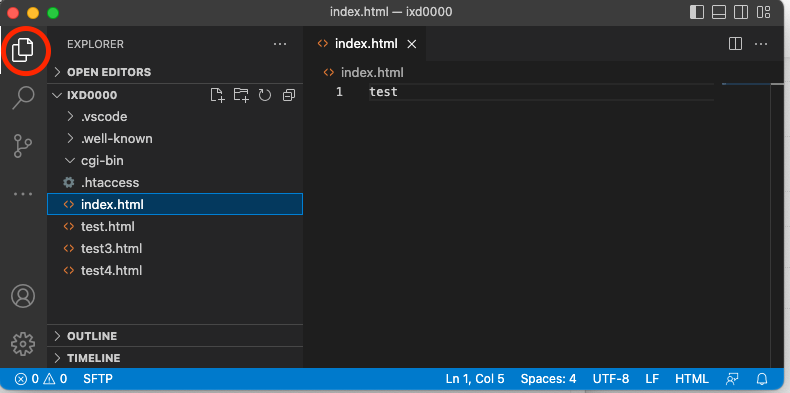
- Click on the top left icon on the left icon bar to view your local project directory
- If you create a file, remember to right-click and upload it after your edits
-
Author's Usage notes:
If the latest files are already on a remote server, you can start with an empty local folder, then download your project, and from that point sync.
- In
VS Code, open a local directory you wish to sync to the remote server (or create an empty directory that you wish to first download the contents of a remote server folder in order to edit locally). Ctrl+Shift+Pon Windows/Linux orCmd+Shift+Pon Mac open command palette, runSFTP: configcommand.- A basic configuration file will appear named
sftp.jsonunder the.vscodedirectory, open and edit the configuration parameters with your remote server information.
- In
- The password parameter in
sftp.jsonis optional, if left out you will be prompted for a password on sync. Note: backslashes and other special characters must be escaped with a backslash.- Save and close the
sftp.jsonfile. Ctrl+Shift+Pon Windows/Linux orCmd+Shift+Pon Mac open command palette.- Type
sftpand you'll now see a number of other commands. You can also access many of the commands from the project's file explorer context menus. - A good one to start with if you want to sync with a remote folder is
SFTP: Download Project. This will download the directory shown in theremotePathsetting insftp.jsonto your local open directory. - Done - you can now edit locally and after each save it will upload to sync your remote file with the local copy.
- Enjoy!
For detailed explanations please go to https://github.com/Natizyskunk/vscode-sftp/wiki
- Save and close the