The Mac Techs @ Sheridan
Guide: LimeSurvey for IXD Students
The IXD program at Sheridan has a LimeSurvey server at the hostname survey.firebird.sheridanc.on.ca To access it you must have the login provided to you by your instructor. Using the LimeSurvey site you will be able to create surveys and invite participants to take them. You may then close the survey and download the results data.
Contents
Getting Started with LimeSurvey
Admin Login:
HAVING ISSUES?
- Come by C153 any time between 10am and 5pm.
Login as a survey admin
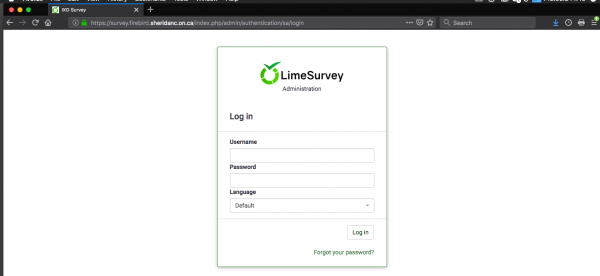
Access the IXD survey server
Step 1
- Obtain the login and password provided to you by your instructor.
Step 2
- Go to the URLhttps://survey.firebird.sheridanc.on.ca/index.php/admin/authentication/sa/login and login. This URL and login will not be given to the survey participants.
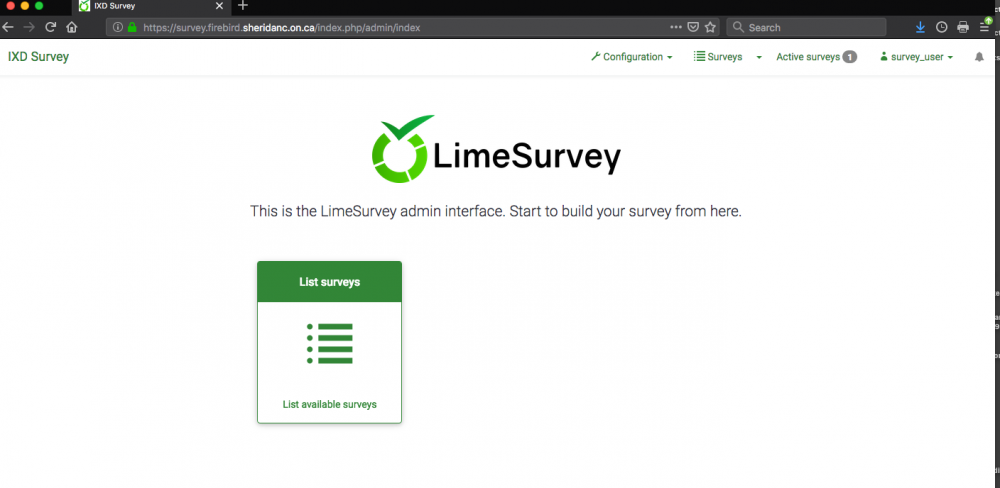
Step 3
- Once you have successfully logged in you will be presented with the option of "List Surveys". Click that square button.
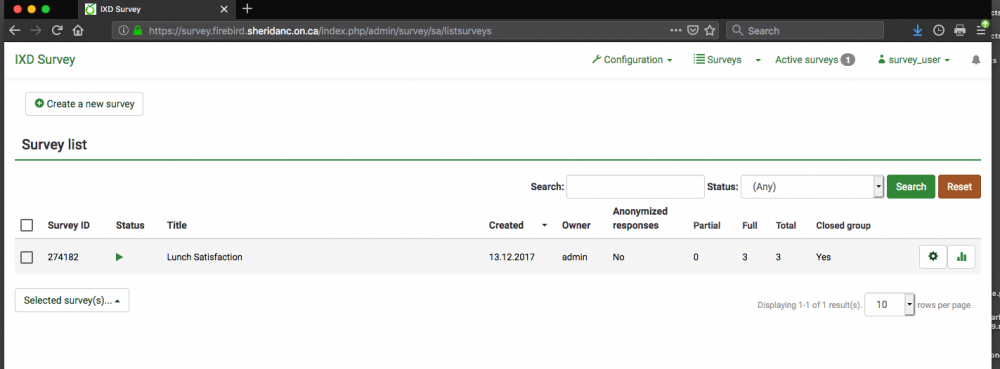
Step 4
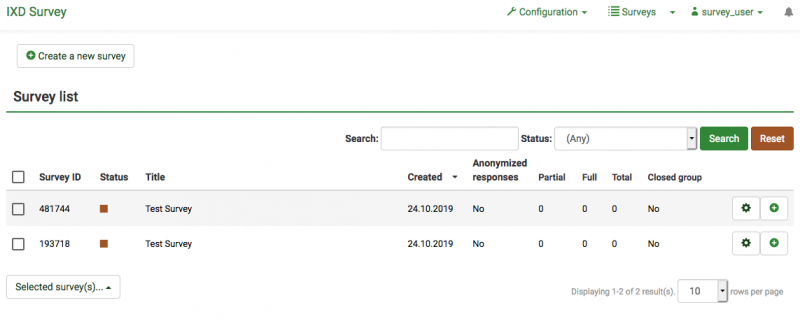
- There will be a list of all surveys on this survey presented. Do not modify any surveys that do not belong to your group.
Creating a Survey
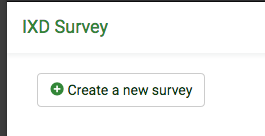
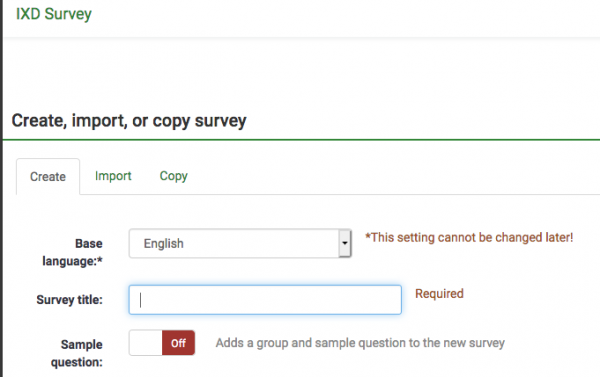
Step 1
- In the upper right hand corner click on the button labeled "Create a new survey"
Step 2
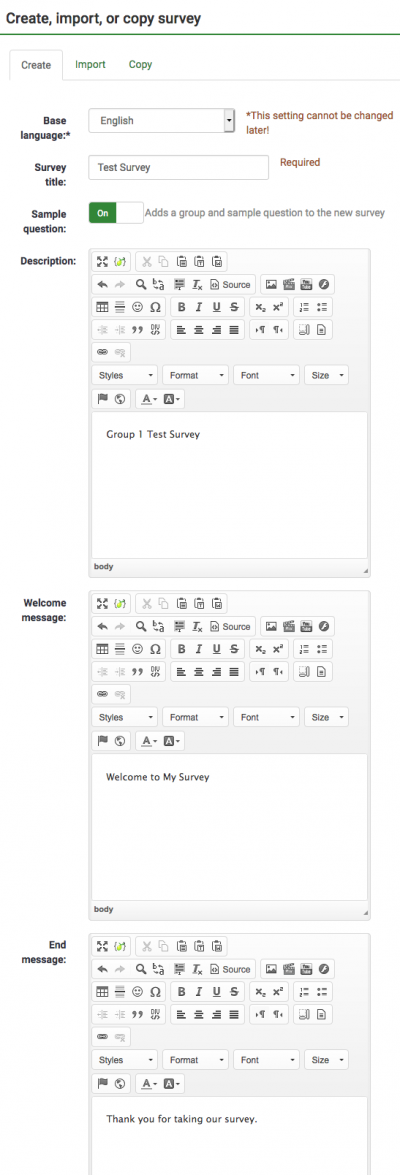
- You will taken to the create survey screen. The minimum required is to give the survey a title, you many leave the rest of the fields blank. IMPORTANT! Click on the "Sample Question" choice so the system creates a default question group and default question for you automatically.
- It's recommended you put one sentence into the "Description", "Welcome Message" and "End Message" fields that will be displayed before and after a participant does a survey.
- In the description field, please note which group you have been assigned.
Step 3
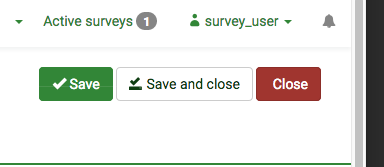
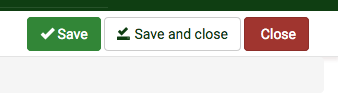
- Click on "Save and Close"
Step 4
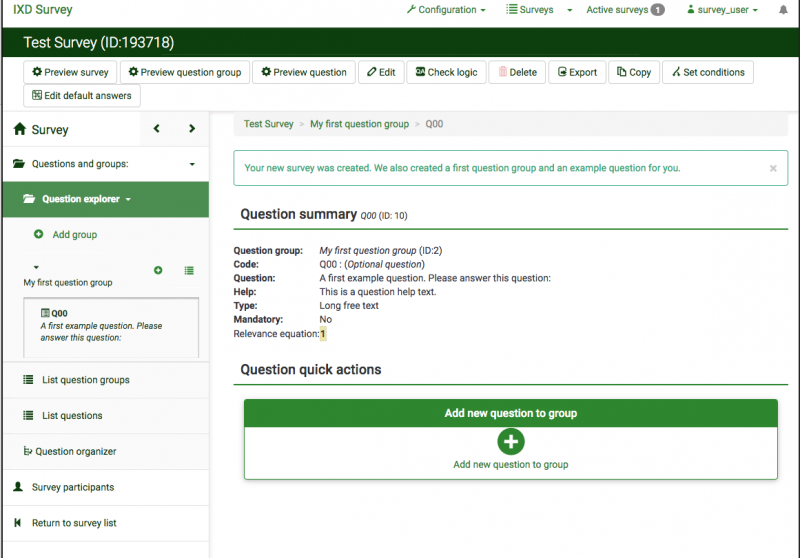
- You will be viewed a Question summary by navigating to Question explorer and clicking the first question group that appears on the side menu
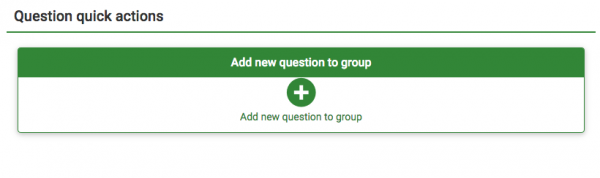
Step 8
- Add a new question to this survey by clicking on the "Add new question to group" button
Step 5
- We will edit this first sample question by navigating to the question under Question Explorer and selecting the question you would like to edit
- Click the edit button on the top menu

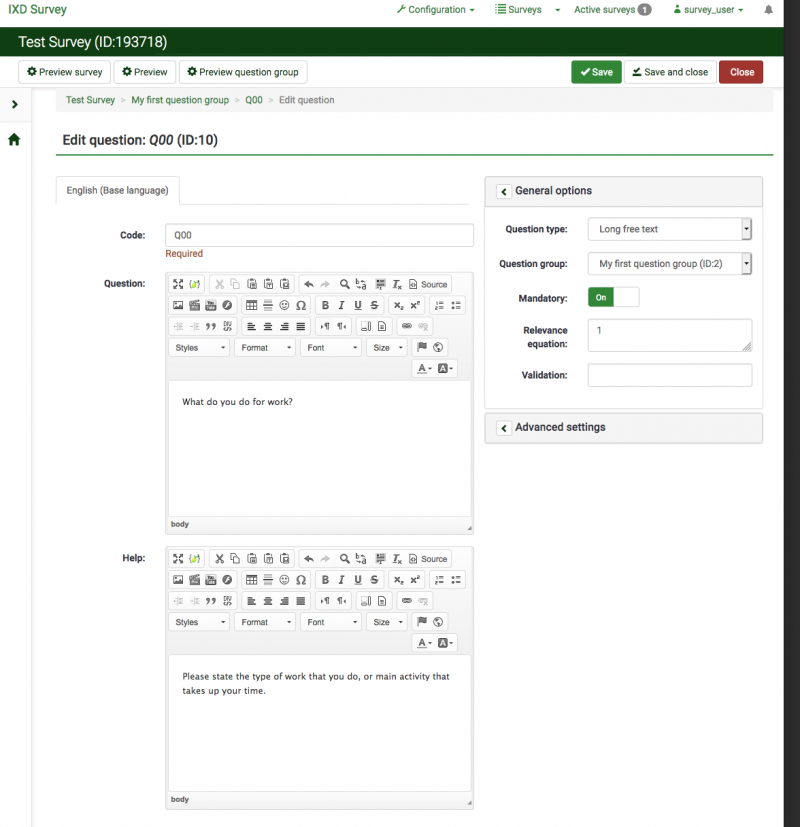
Step 6
- The code field is required, it shoud be set to Q00 for the first question, Q01 for the next, and so on
- To make a question mandatory, toggle the mandatory button to ON under general options on the right side
- Use the question type to select whether you want a free text answer, multiple choice, or radio button. Below are some examples of some common types you can create.
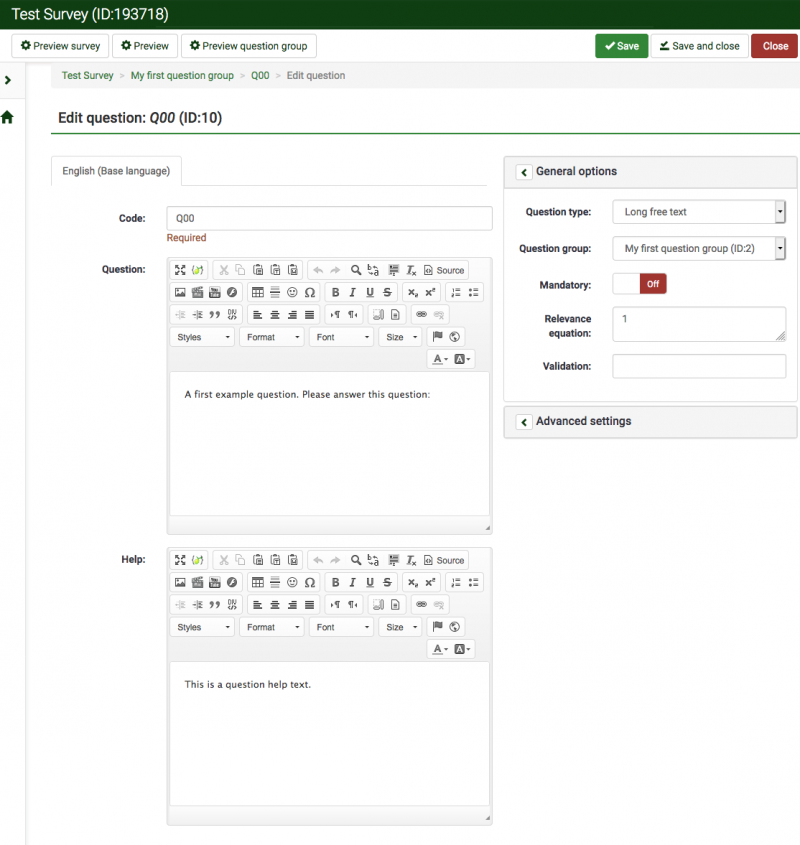
- Click on preview on the top menu to preview your survey
Examples
Text Question
- For this first question, we will create a "Long free text" type question. A Long free text question is an essay question.
Multiple Choice
- Increment the question code to Q01
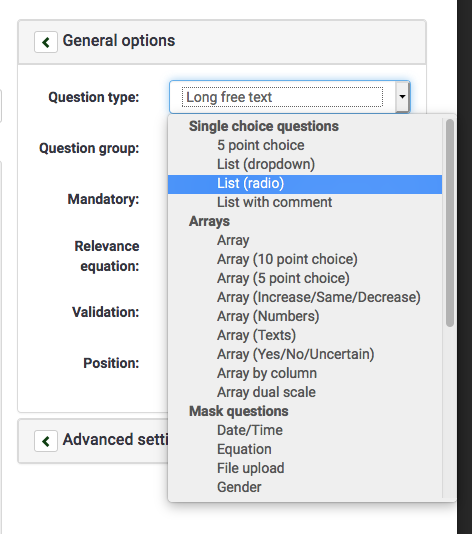
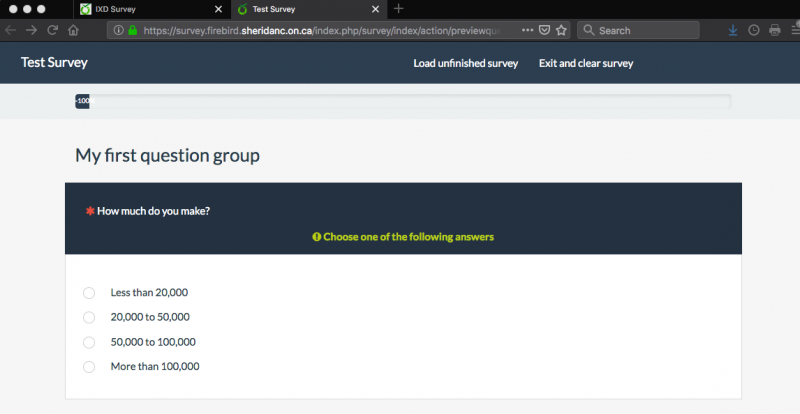
- Choose "List (Radio)" from question type
- Cick on Mandatory to "on" (if you would like the question to be answered before continuing)
- Fill the Question text field
Step 10
- Select save and close
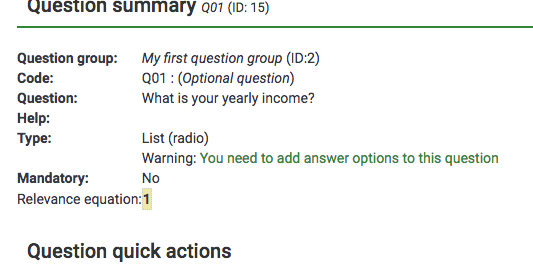
- The system will warn that we have not populated the answer choices for this question when we exit and will display a link to create them
Step 11
- Click on the link "You need to add answer options to this question"
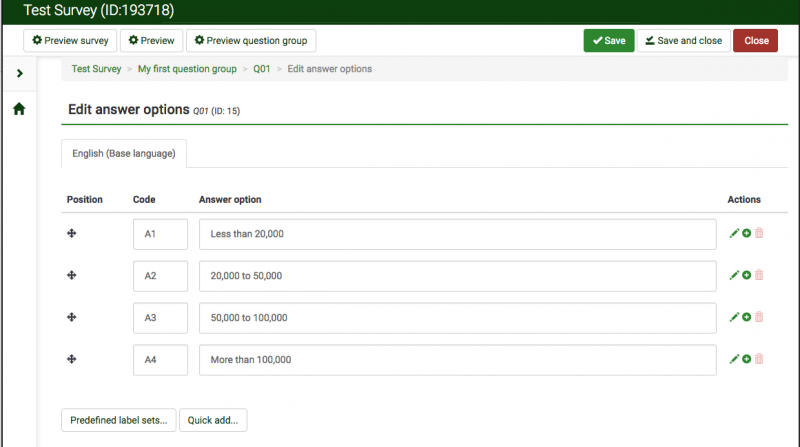
- Fill in the text fields for the Answer option
- Click the "Quick Add" button to create the next answer option
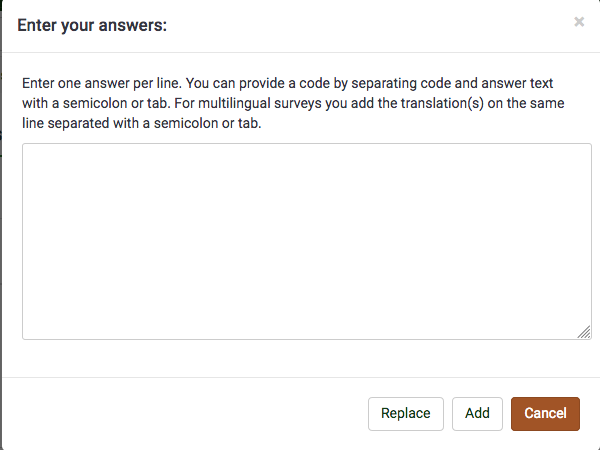
Step 12
- Click on add on the pop-up dialog box that appears as shown below
Step 13
- Click on save before previewing
- Click on the "Preview Question Group" button on the top menu to see how the question will look
- The preview will open in a new window or tab, close it to get back to the answer options
- To edit answer choices of a question, click on the edit subquestions on the top menu

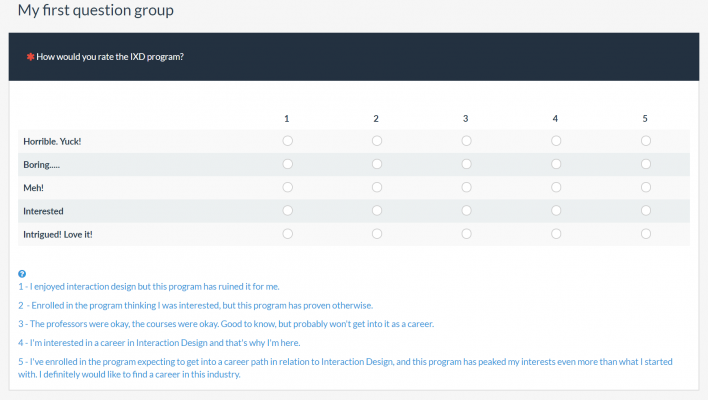
Rating Question
- Click on Array (5 point choice) for a rating scale of 5
- Type in your question in the question box
- Type in any information to assist the participant in answering the question
- Toggle mandatory to "on" if you would prefer the question to not be skipped.
- Other options, you can change to your own preferences

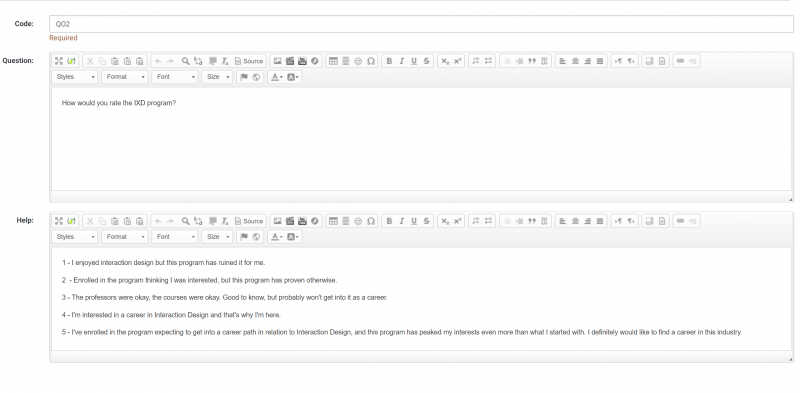
- Add answer choices to the question, by clicking on "You need to add answer options to this question" in your Question Summary
- Click on preview question group on the top left hand corner

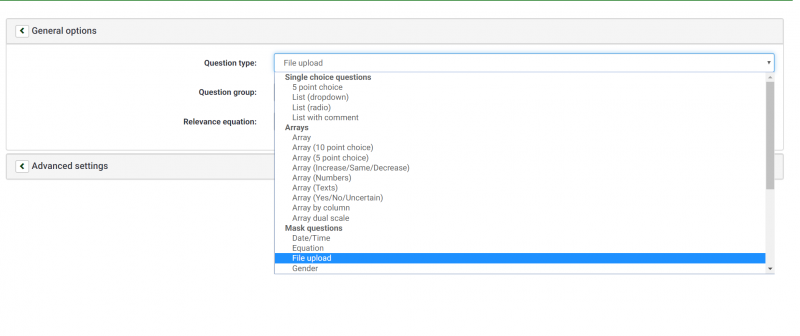
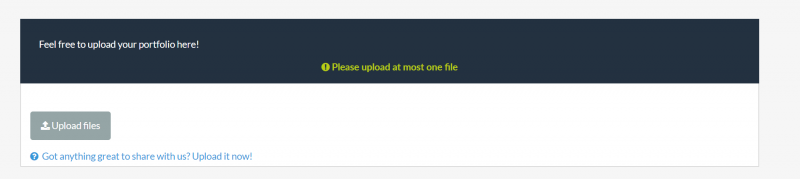
File Upload
- To create an option for participants to upload a file, click on File Upload option
- Fill in the question and help box and save and close
Publishing a Survey
Make a Survey Available
Step 1
- Click on the "IXD Survey" text in the top left hand corner to return to the home screen
- Click on the "List Surveys" button
Step 2
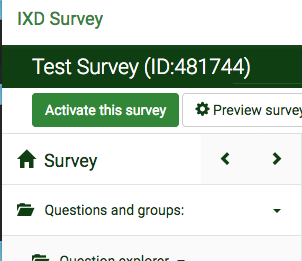
- Click on the title/name of the survey you wish to activate
Step 3
- Click on the "Activate Survey" button in the upper left corner
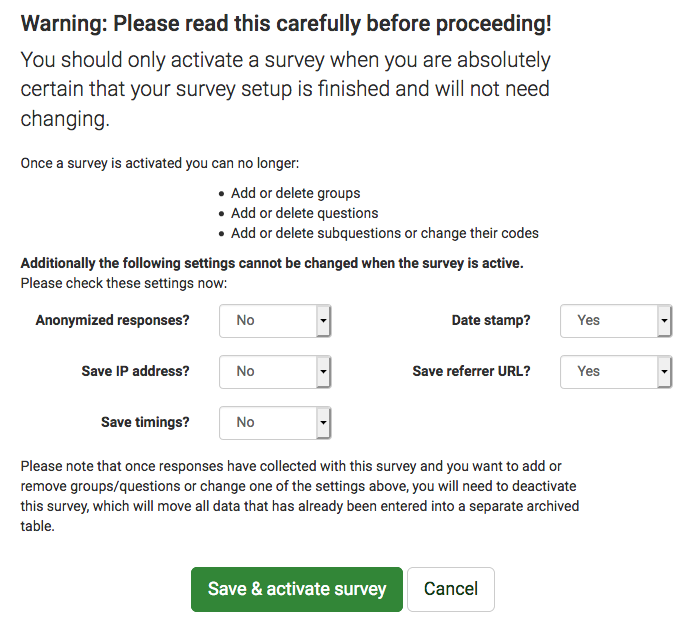
Step 4
- Note the warning once you activate a survey, you will not be able to edit questions to correct a mistake after publishing without losing the data collected
- Choose to record "Date stamp" to record when each survey is taken by a participant
- also select yes for "Save referrer URL" to see which website, if any, has re-directed to your survey page
Step 5
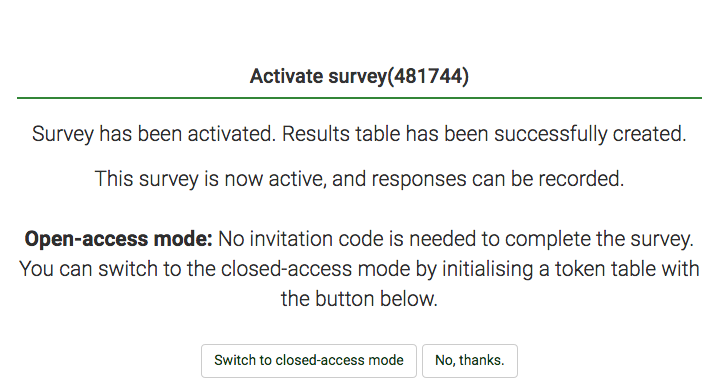
- You will taken to the activate survey screen.
- If you choose "No Thanks" the survey will be accessible by the Survey URL listed under Survey summary
- It will not be listed at http://survey.firebird.sheridanc.on.ca For it to be completely public read the section on survey access control later in this guide
- If you choose "Switch to closed-access mode" you will need to generate tokens that are sent out by email so that only people you explicitly invite will be able to take the survey
Step 6
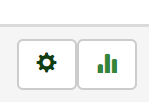
- If you would like to view the survey data, repeat step 1 of this section, and click on the button that look like a bar graph on the right of the survey you'd like to view data for
Step 7
- You will taken to the main survey screen. Select "Stop this survey" to stop the survey being available.
- There will be two options available:
- Expire survey - you want to choose this, when you are satisfied with the data collected, and would no longer like the survey to be activated.
- Deactivate survey - if you wish to add or edit the questions in the survey. Keep in mind that any data obtained will reset.

Step 8
- To export data, you need to click on display/export button on the top menu
- Choose the format you would like to export your data

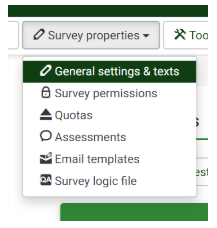
Survey Permissions
Survey Permissions allow you to adjust user permissions and provide access to users you'd like to have access to your survey. Keep in mind, this is only accessible to the survey owner.
Step 1
- On the top menu of your survey, click on survey permissions
Step 2
- Pick the user from the drop down menu you would like to grant access to your survey
- Click on Add User

Step 3
- Read each permission carefully then select the permissions you'd like to grant access to the user. This will allow that specific user access to your survey. Repeat step 2 to add another user or group.

Video on using LimeSurvey
Learn how to:
- Create a survey
- Create questions
- Preview survey
- Activate survey
- Email survey