The Mac Techs @ Sheridan
RemoteMac: Guide for Windows-based Users
General Information
Are you a FAAD student using a Windows-based computer (aka "PC")?
If so, this guide will get you connected to a remote Mac at Sheridan!
Step 1: Installing Required Software
- Download and install Cisco AnyConnect VPN
- Download and install NoMachine
- Download and install RemoteMac client
Step 2: Connecting to the Sheridan VPN
RemoteMac requires the use of the Cisco AnyConnect application to connect to the Sheridan VPN. Please note that no other VPN option will work here.
- Launch this application.
Located in your Applications folder as "Cisco AnyConnect" with this icon:

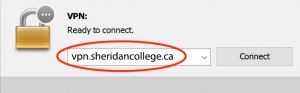
- When it is launched for the first name, it will have a text box to specify a server address.
Please enter this: vpn.sheridancollege.ca
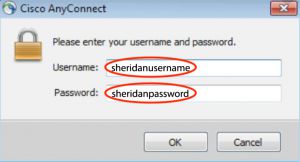
- Use your Sheridan credentials when asked (username and password)
note: this is the same as what you would use for AccessSheridan
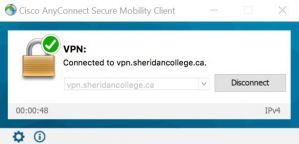
- Once connected, you should see a window similar to below.
At this point, please proceed to the next section below
Step 3: Using "RemoteMac"
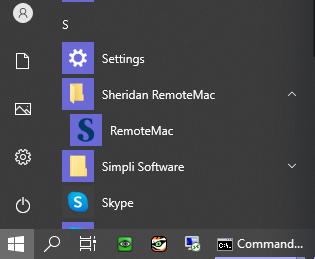
- Launch "RemoteMac" from the Windows menu in your taskbar
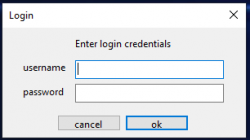
- After running the RemoteMac program, you will be presented with a login prompt.
Use your Sheridan credentials.
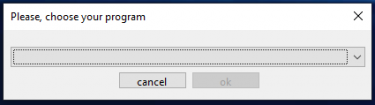
- If you are a student, please skip to the next step.
If you are a faculty member, select your program from the drop down list.
- Select a room to choose a computer from
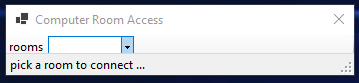
- A computer will automatically be chosen from that room for you.
The NoMachine client will now launch. Click OK.
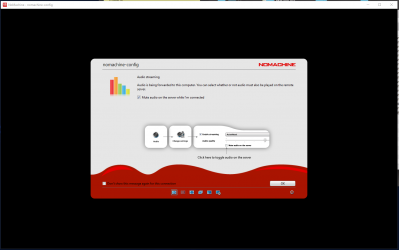
- The next dialog warns of differing resolutions. Your screen resolution will likely not match the one of the remote Mac workstation. For now, click OK.
- You should now see the login screen of the Mac computer.
Use your Sheridan credentials to login to the computer.
- If your view of the remote Mac is problematic in any way:
Please refer to the next section below ("Troubleshooting Visual Issues"). - When you are done your work, please close the NoMachine window.
This allows the app to close properly so that the remote Mac is available for others.
Troubleshooting Visual Issues
To resolve issues of the image settings for the remote Mac that you are using...
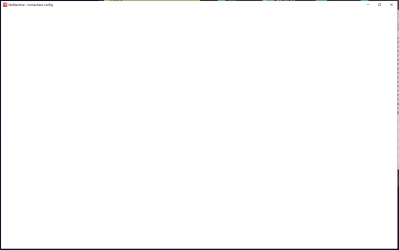
- You may experience an all-white window as seen below.
If so, please disable and re-enable the setting for "Client side Hardware Decoding"
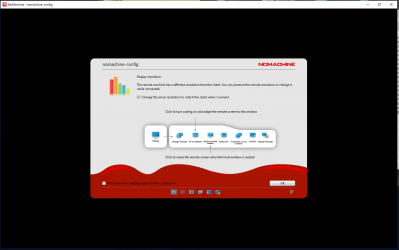
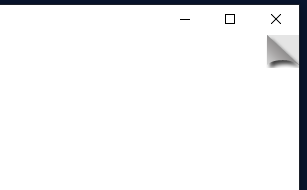
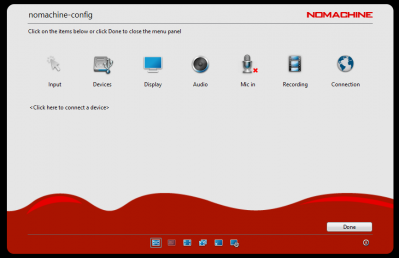
- To change the required display settings in NoMachine, you must carefully place your mouse in the upper right corner of the window, below the X until a page turn animation appears.
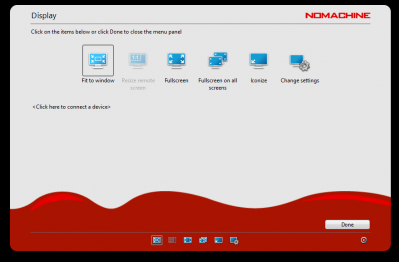
- Once you click on that page-turn button (top right), the NoMachine configuration dialog will appear. At this point, click on the "Display" button (as seen below).
- Click on the "Change settings" button on the right
- Click the checkbox for "Disable client side hardwaredecoding" to check-mark it.
Then click the same checkbox again to uncheck-mark it
(note: this is a known bug with the NoMachine software) - Ensure the quality setting is at 100%.
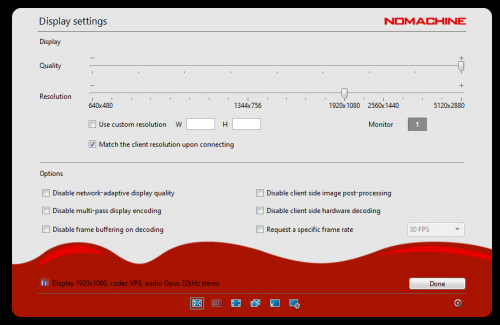
- Click Done until the login screen is revealed, you may now continue with your work.
Support
We are happy to help in any part of the process as outlined above.
If you have any issue with any of the requirements or instructions:
Please contact us directly by emailing mactech@sheridancollege.ca.