Viewing and Sharing files in the Media-Vault...
For those of you wanting to submit your work in a digital file, you will need to use an app similar to the Samsung Mobile Print app. Sending files to the FileExplorer app will allow it to be uploaded to the “Media-Vault” network drive. The Media-Vault is a server that is available only on Campus, while connected to the Sheridan Secure Network. The Media-Vault also can be used by your instructors to hand out files to you digitally.
There is a paid version of the app, which only adds the ability to connect to more than one server at a time. The needs of this program only require you to connect to one server.
Configuring The Server Settings
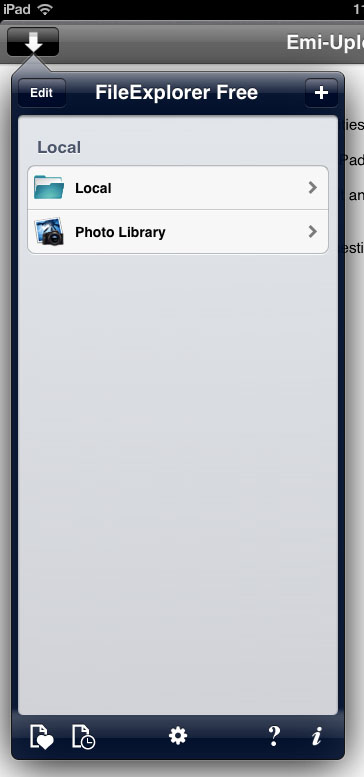
To upload files to Media-Vault, you will first need to configure the app to connect to it. Open the FileExplorer app and tap the arrow button in the top left.
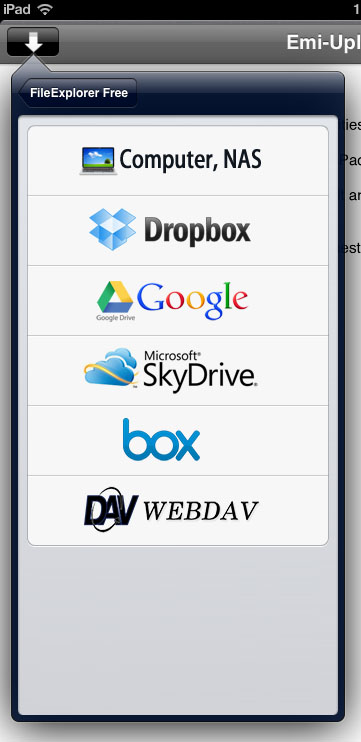
Tap the “+” button on the top right to see a list of connection types. Tap “Computer, NAS”.
When prompted for the Computer Details enter this information
Display Name: (leave blank)
Computer Name/IP: media-vault
DNS Domain: (leave blank)
Port: 445
Login As...
User Name: SHERNET\(your username)
Password: (your password)
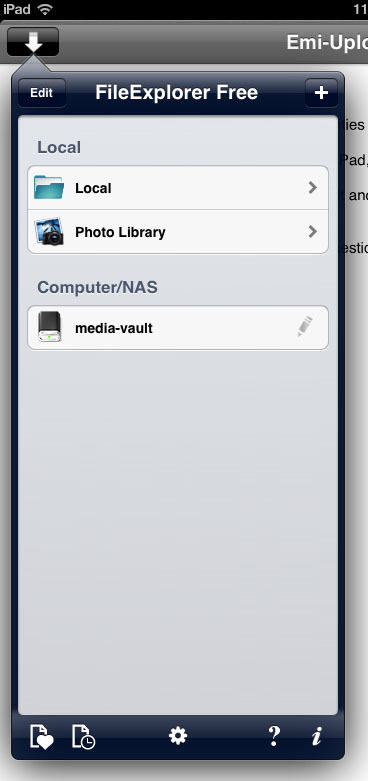
If successful you should see the server show up as a mount like this:
Viewing Hand-Out Files
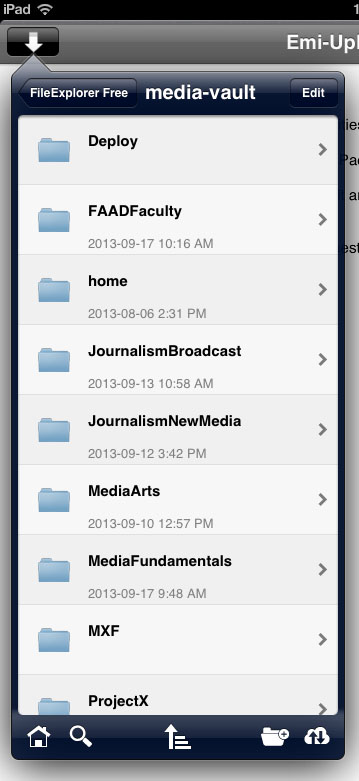
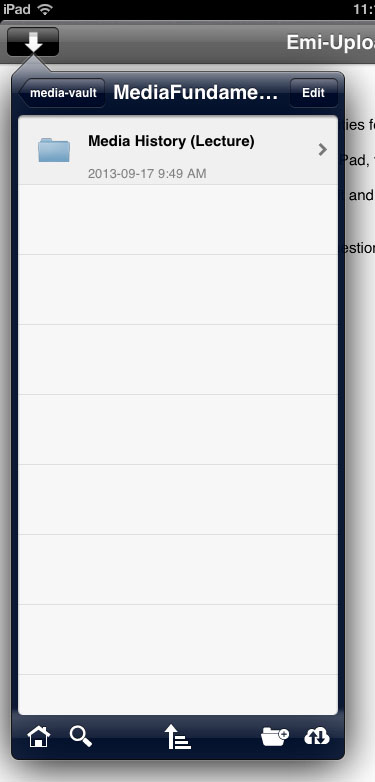
Tap the media-vault connection from the list of computers. Swipe down until you see the “MediaFundamental” folder and tap it.
Once in the folder, find the course you are attending.
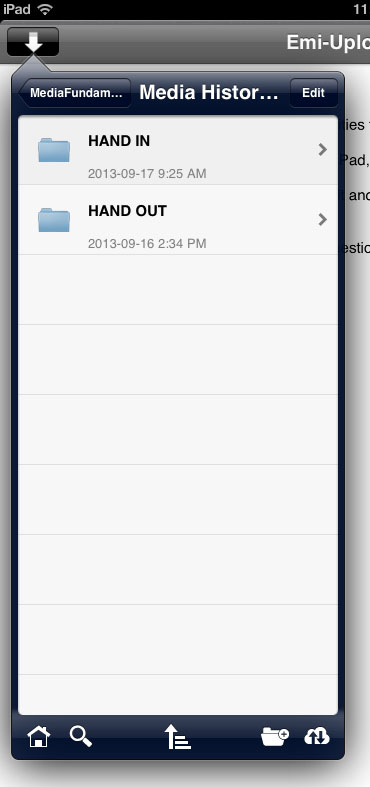
From here you will see two folders. The “Hand-Out” folder is Read-Only, which allows you to view the files, and save them to your iPad if you want, but not delete or change the originals. You are also unable to add files to this folder.
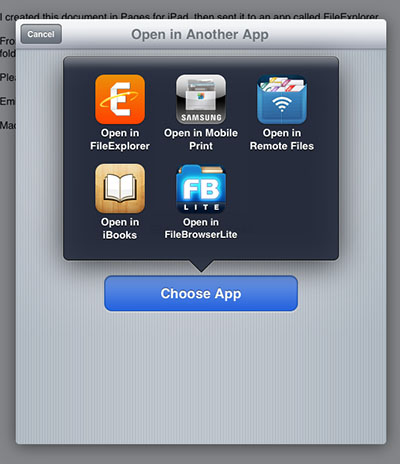
Find the file you wish to view and tap on it. You can view many different file formats while in this app. If you wish to open the file in another app (for instance, a word document can be opened and edited in Pages), simply tap the action button on the top right of the screen, and tap “Open in...”. You can then pick the appropriate app to open the file in.

Handing In a File
This example uses Pages to hand in a document, but many apps allow you to hand in files in the same manner. If the app does not allow the file to be opened in another app, you can take a screen shot of your work by pushing the sleep/wake and home buttons at the same time, and upload the screen shot.
First, find the document you want to upload within pages. Tap the wrench on the top right and tap Share and Print... Select open in another app, and choose the appropriate format (typically PDF). When asked to choose app, select File Explorer.
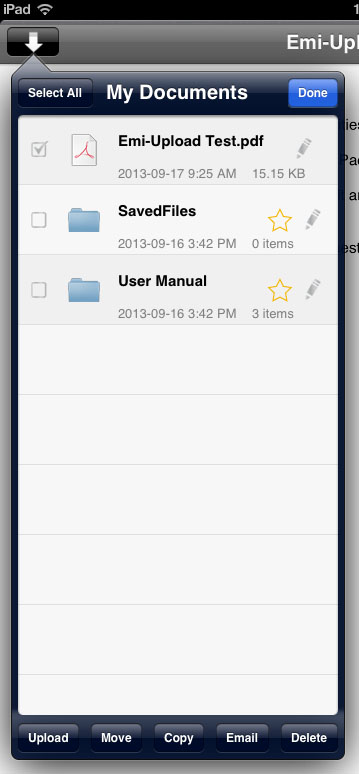
Your file will open up in File Explorer. On the top right, tap the down arrow to show the file browser. You’ll need to tap on the top left till you see a “Local” folder. Inside here you’ll find your files.
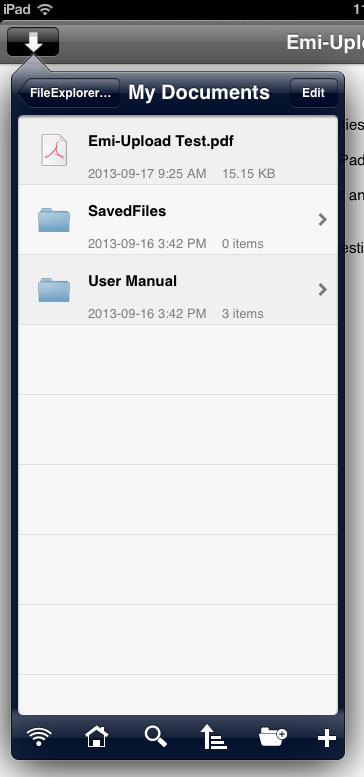
Next tap on the the edit button on the top right of that list, and check the file(s) you want to upload. Then tap the Upload button on the bottom left.
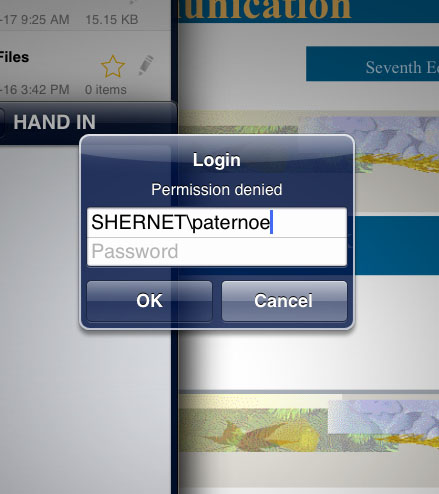
When asked where to upload the file to, tap the media-vault, then navigate to the appropriate class you are wanting to hand into. Tapping the hand-in folder for that class will bring up a login pop-up. You cannot read the files in this folder, so simply hit Cancel.
Tap the save button.
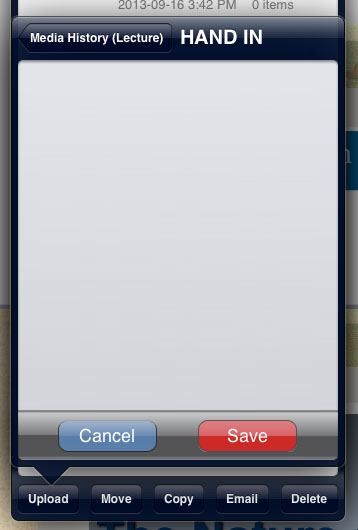
If the upload is successful, you should see it in your recent actions list, which comes up after an upload.