HoloLens Development Guide for IXD Students
Contents:
- Installing the Tools
- Introduction to HoloLens Gestures (Microsoft.com)
- Connecting to Wi-Fi
- Finding your HoloLens’ IP Address
- Accessing the HoloLens Device Portal
- Using ‘Microsoft HoloLens’ Mirror Mode
- Introduction to HoloLens Development (Holograms 101)
Note: HoloLens development requires Windows 10, fully up-to-date.
Installing the Tools
Visual Studio Community 2017
Step 1
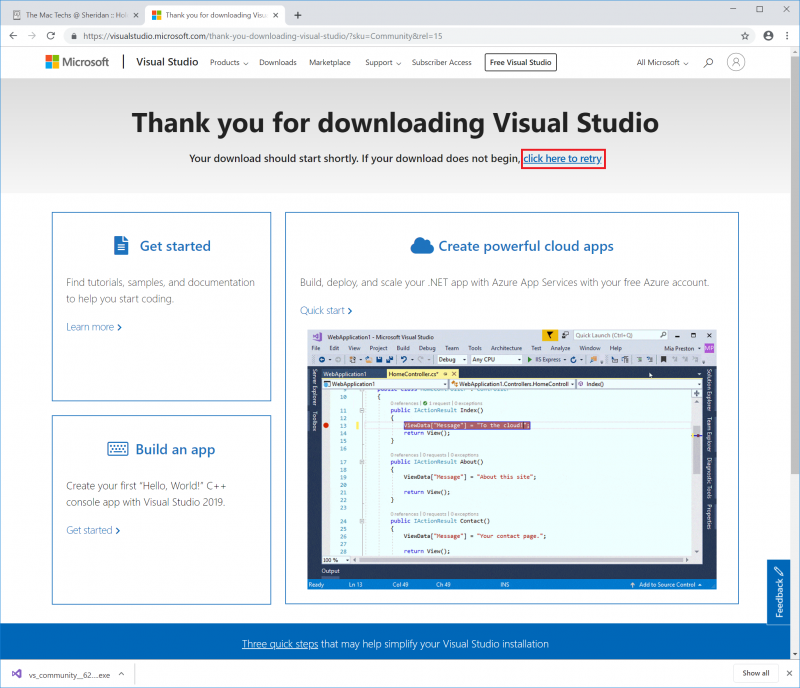
- Follow this link to download the Visual Studio 2017 installer: https://visualstudio.microsoft.com/thank-you-downloading-visual-studio/?sku=Community&rel=15
- Your download should start automatically. If not, select the link in the image below.
Step 2
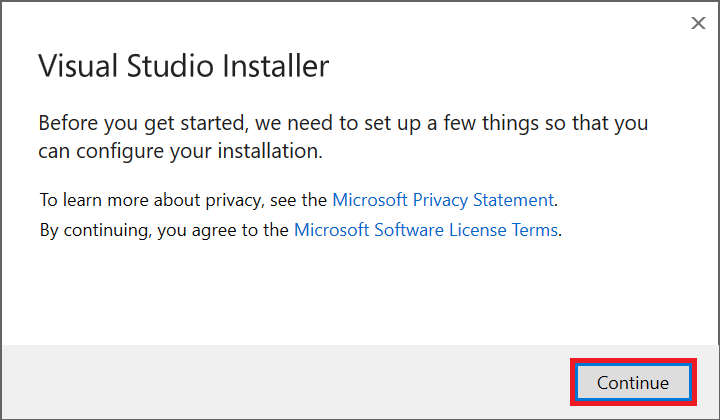
- Launch the installer from your Downloads folder.
- Select Continue to agree to the Privacy Policy.
Step 3
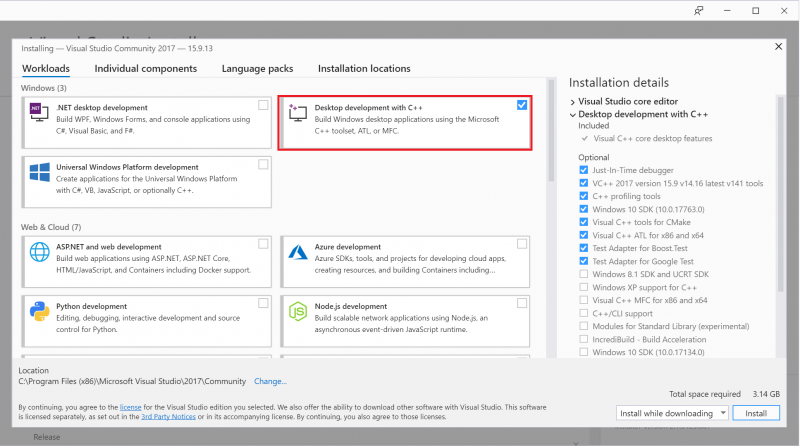
- Select the Desktop development with C++ workload
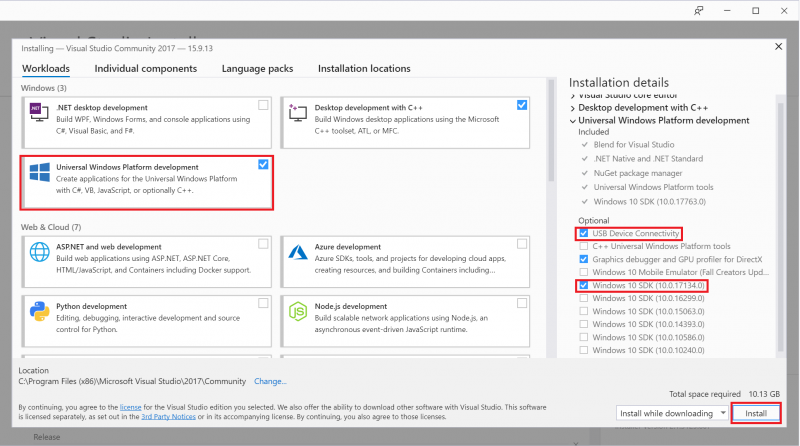
- Then select the Universal Windows Platform development workload
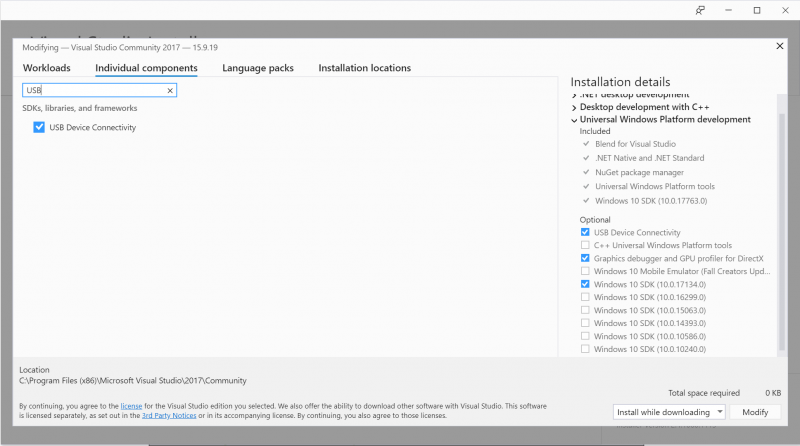
- Then in the side menu check the USB Device Connectivity and the Windows 10 SDK (10.0.17134.0)
- Select the Install button in the bottom right corner of the window
Step 4
- Allow the installation to complete, then launch Visual Studio if it does not launch itself
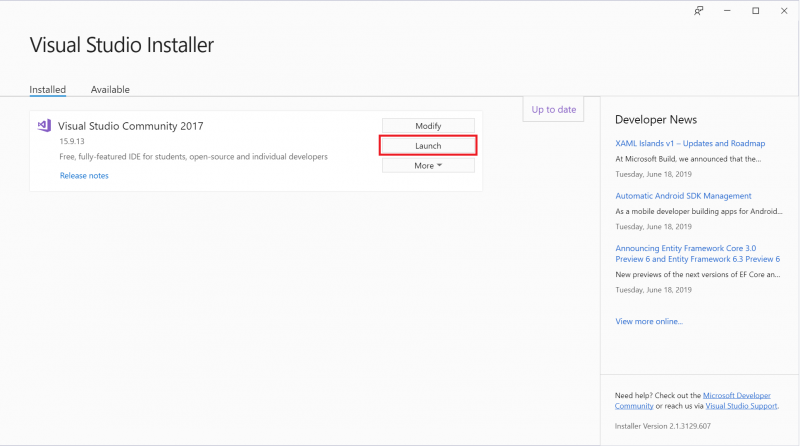
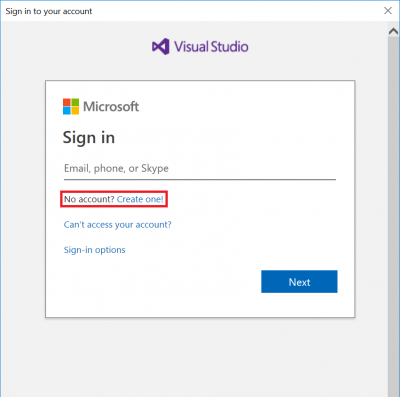
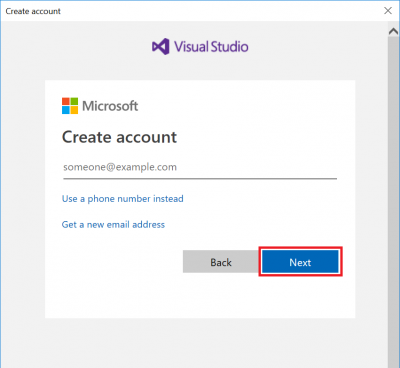
- If you have Microsoft account, you can use it to sign in when prompted, otherwise, you can select the link in the image below to create a new account.
Installing the Tools
Unity
Step 1
- Follow this link to download Unity Personal Edition: https://store.unity.com/download/thank-you?thank-you=personal&os=win&nid=1413
Step 2
- Launch UnityHubSetup.exe from your Downloads folder.
- Select I Agree.
- Select Install.

- Select Finish.
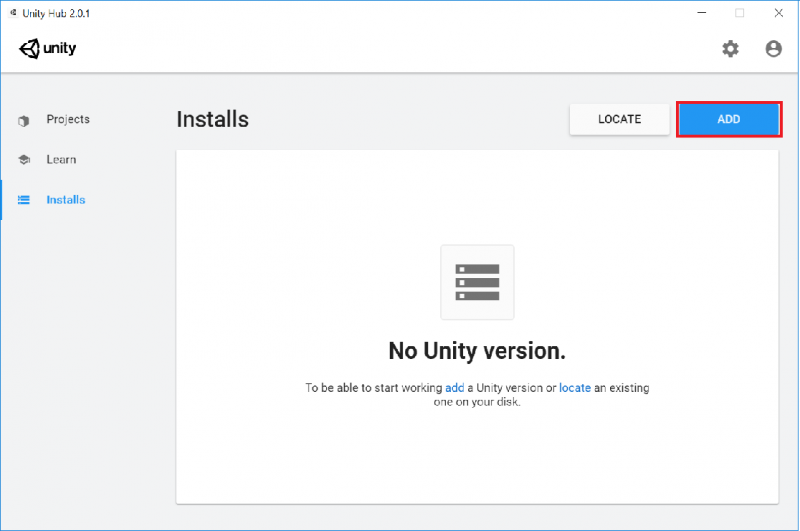
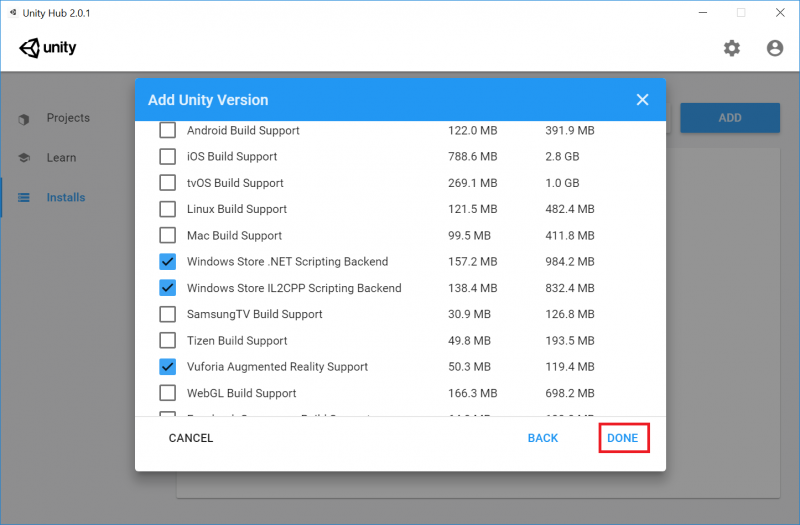
- After installation is complete go to the Installs tab.
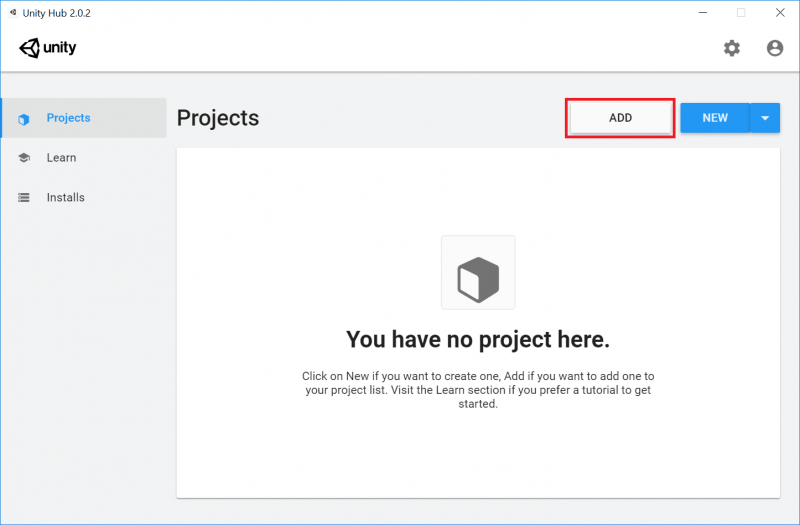
- Select the blue ADD button.
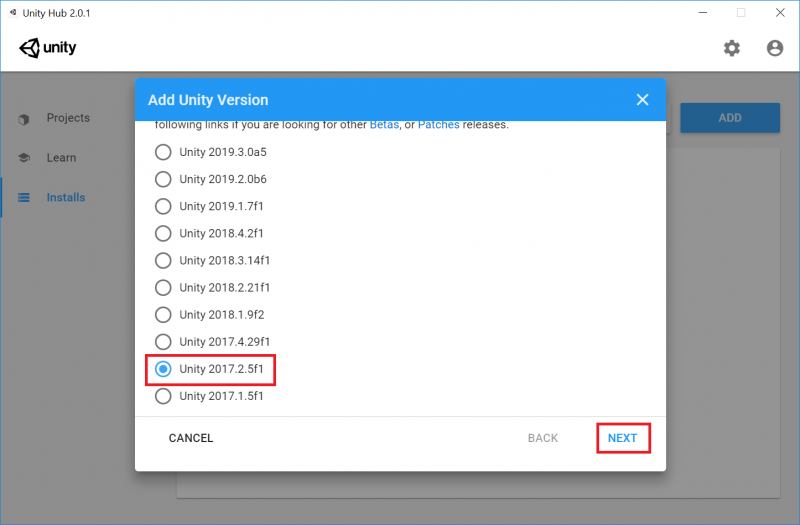
- For this tutorial to work you will need Unity 2017.2.5f1
- Make sure the check boxes are the same
- Select Done.
- Wait for the install to complete
Step 3
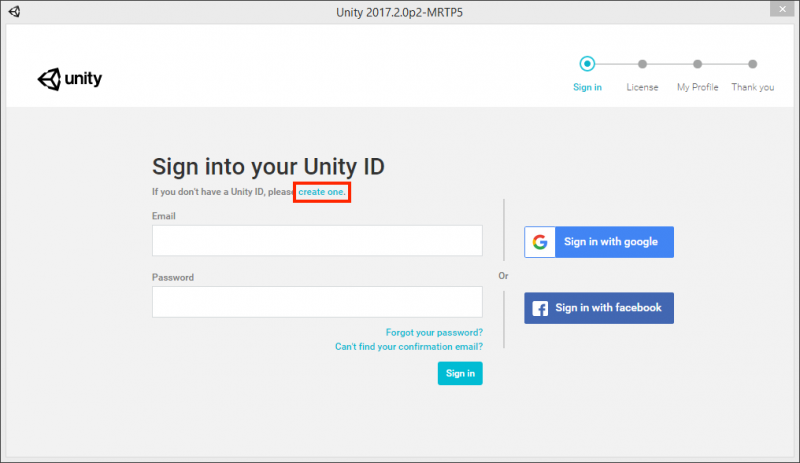
- If you have a Google or Facebook account you’d like to log in with, select the corresponding option to the right of the log in and skip down to Step 4.
- If you would rather not use a Google or Facebook account, select Create One.
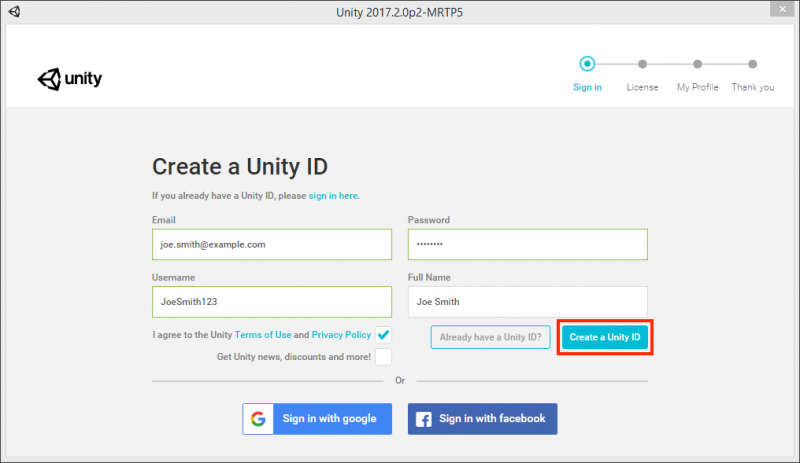
- Enter your personal details.
- Select Create a Unity ID.
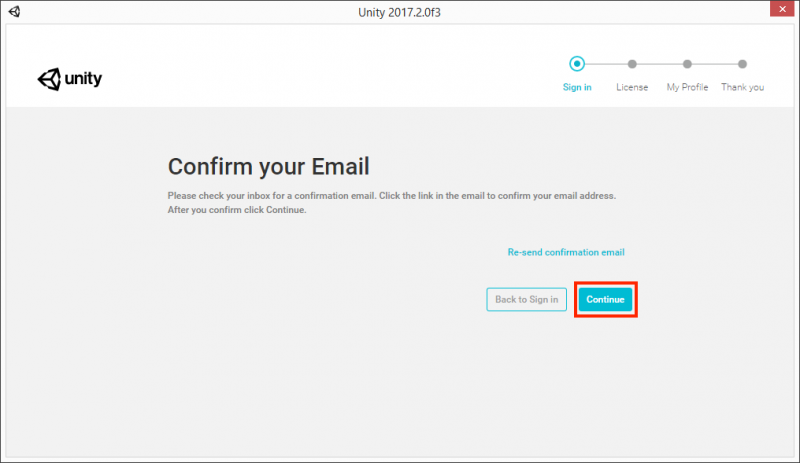
- Access the inbox of the email you used to register, and select the confirmation link in the email you just received from Unity.
- If you don’t receive the email, wait a couple minutes, then check your junk mail. If you still don’t receive the email, select Re-send confirmation email
- Once you’ve selected the confirmation link, select Continue.
Step 4
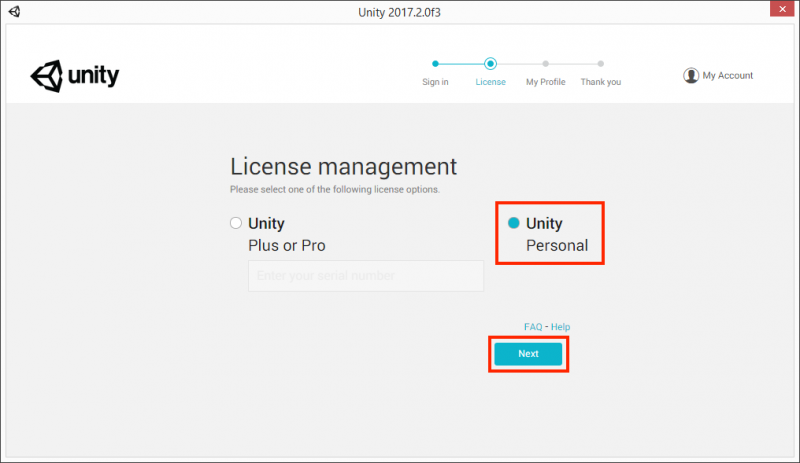
- Select Unity Personal.
- Select Next.
Step 5
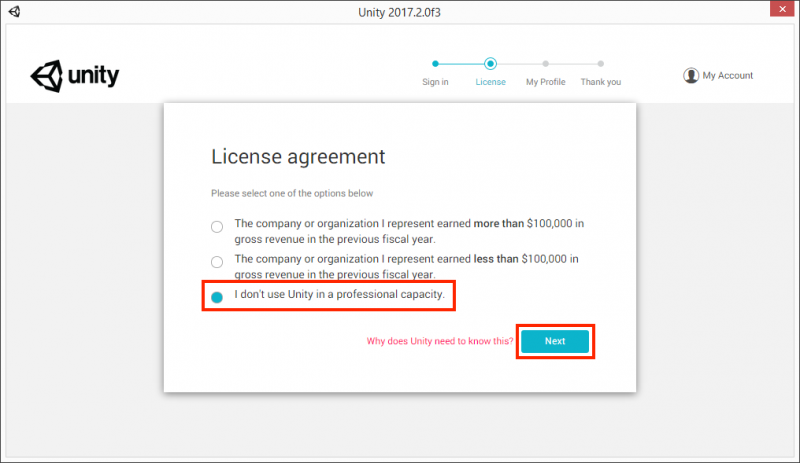
- Select I don't use Unity in a professional capacity
- Select Next
Step 6
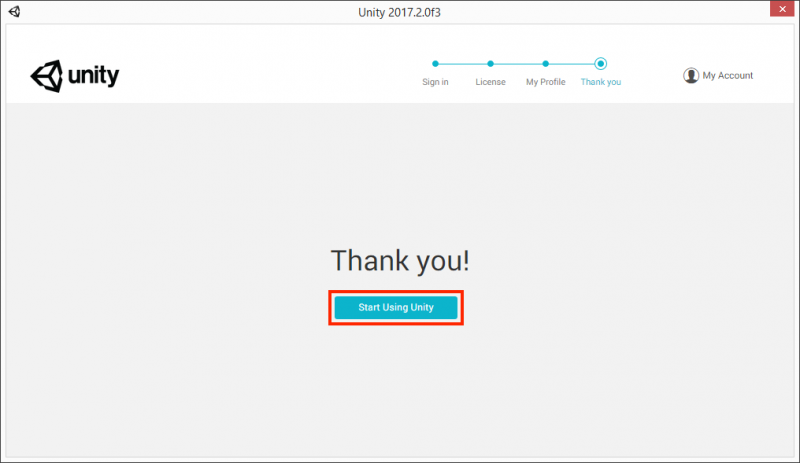
- Select Start Using Unity.
Connecting to Wi-Fi
Step 1
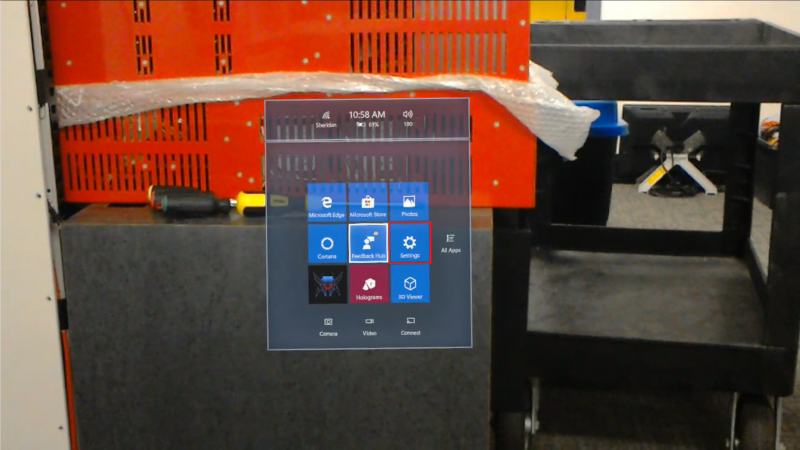
- Use the Bloom Gesture to open the HoloLens Menu.
- Use the Air-Tap Gesture to select Settings.

Step 2
- Select Network & Security
Step 3
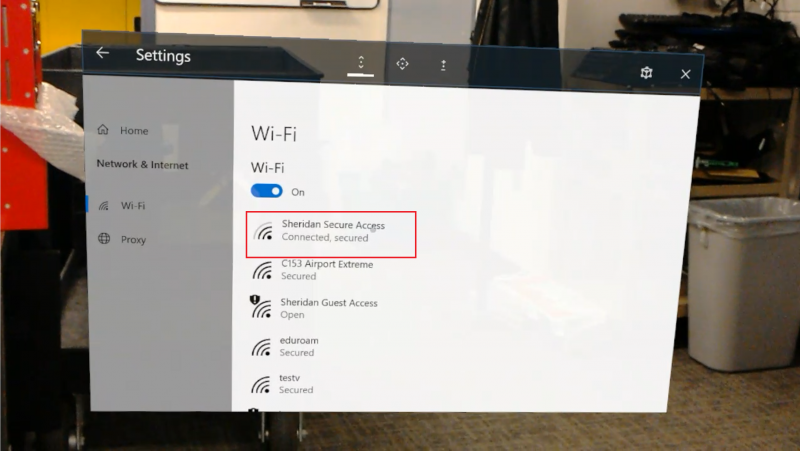
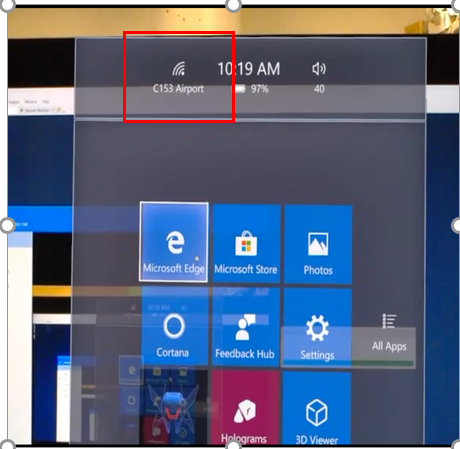
- Select the network you wish to connect to.
Finding your HoloLens’ IP Address
Step 1
- Use the Bloom Gesture to open the HoloLens Menu.
- Use the Air-Tap Gesture to select Settings.

Step 2
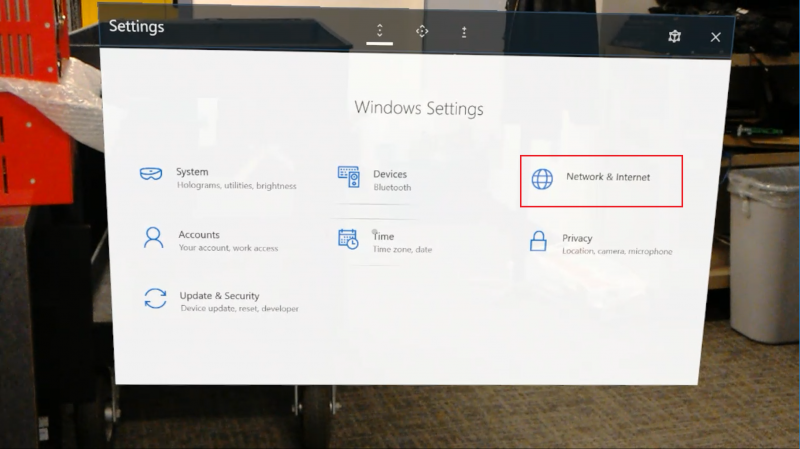
- Select Network & Internet.

Step 3
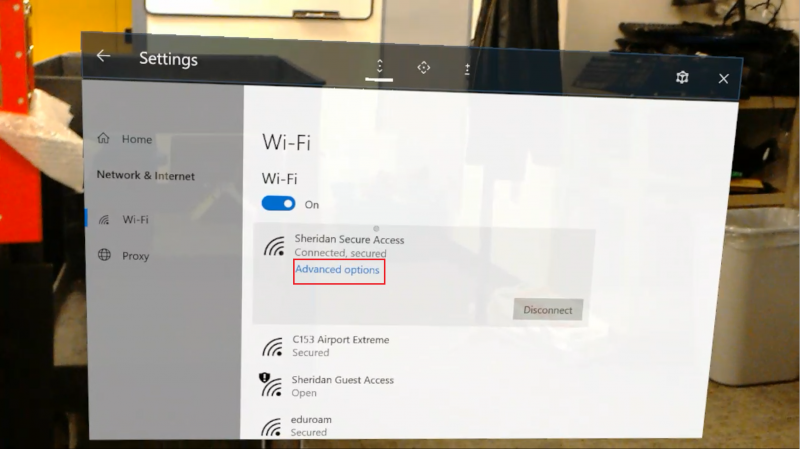
- Select the Network you are connected to.
- Select Advanced Options.
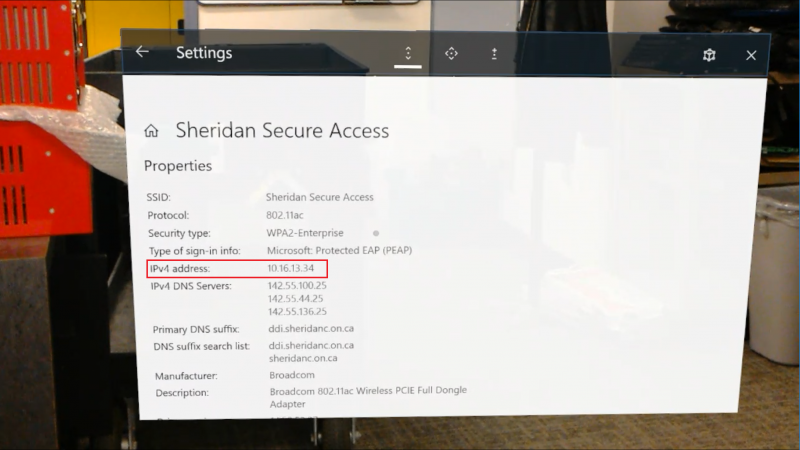
Step 4
- Make note of the IPv4 Address.
Accessing the HoloLens Device Portal
Note: This section requires your HoloLens' IP address which can be found using the section above.
Step 1
- Power on your HoloLens and put on the device.
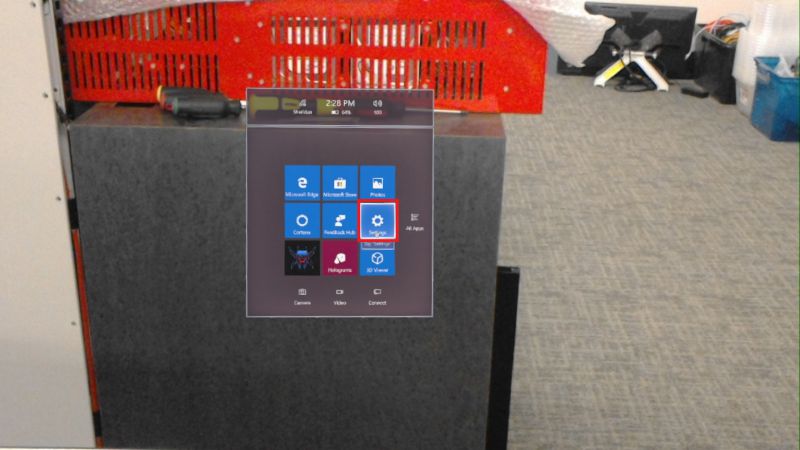
- Perform the Bloom Gesture to launch the main menu.
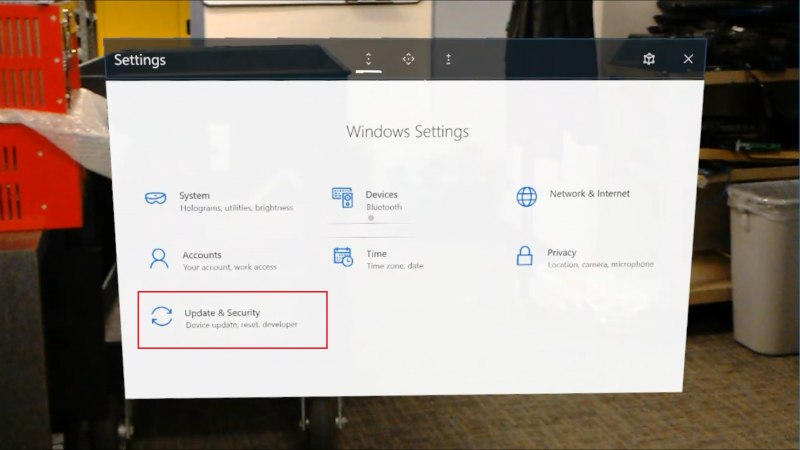
- Gaze at the Settings tile and perform the Air-Tap Gesture. Perform a second air-tap to place the app in your environment. The Settings app will launch after you place it.
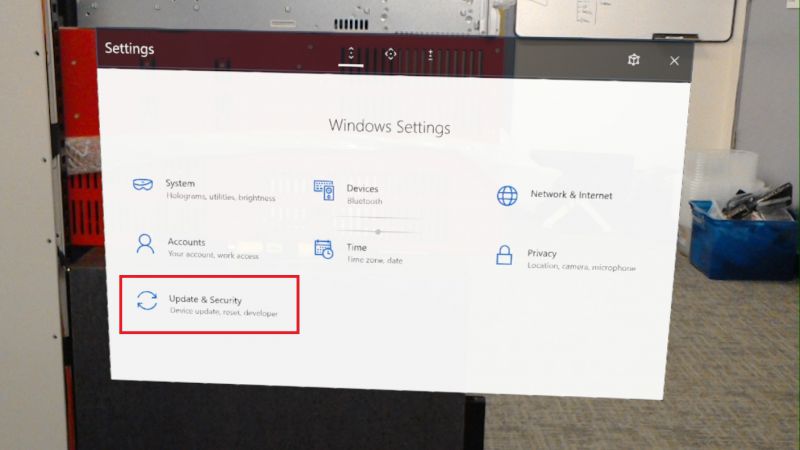
Step 2
- Select the Update & Security menu item.
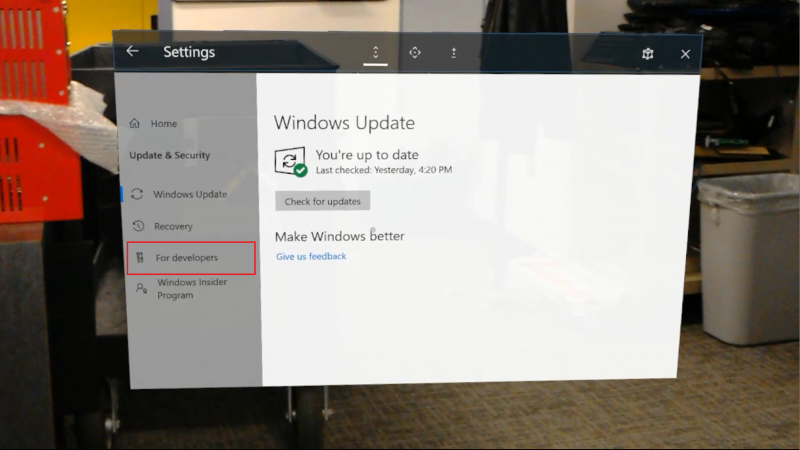
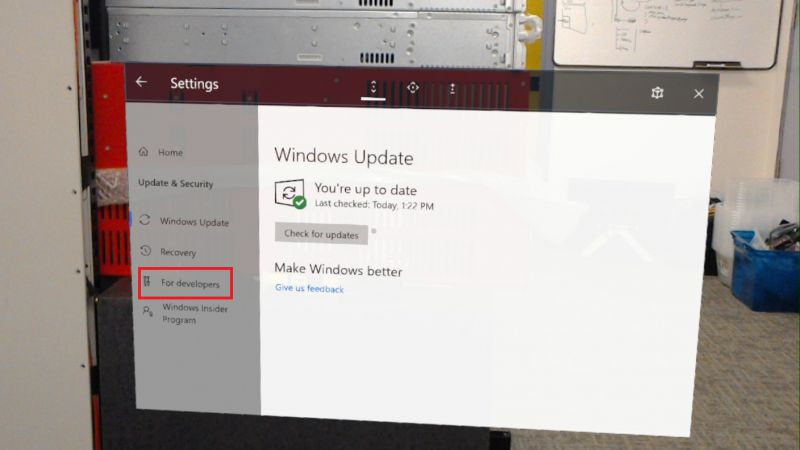
Step 3
- Select the For developers menu item.
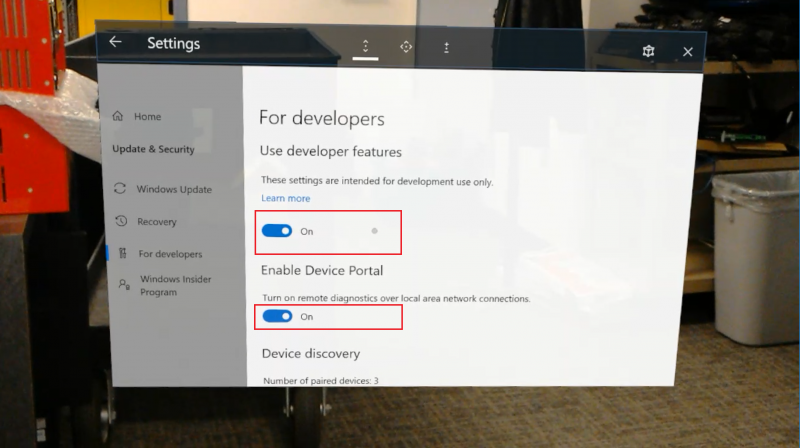
Step 4
- Enable Developer Mode.
- Enable Device Portal
Step 5
Connecting over Wi-FI
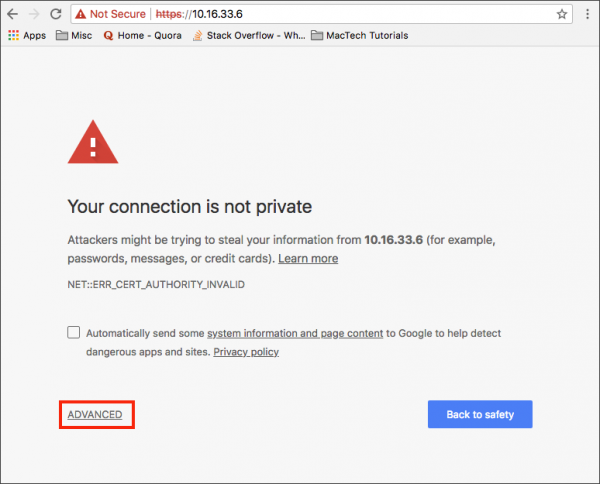
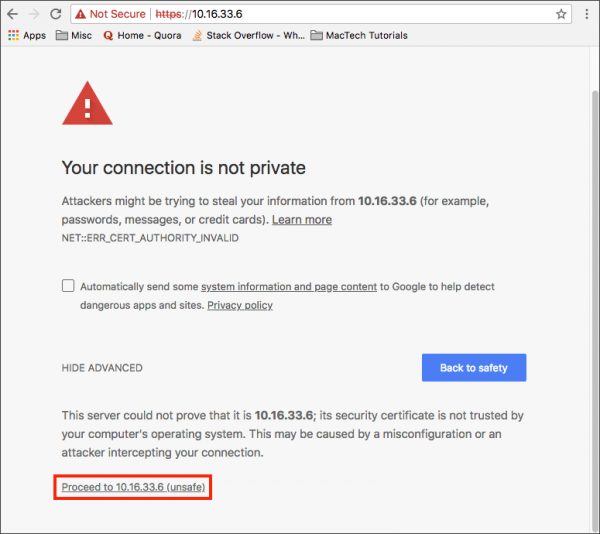
- From a web browser (preferably Chrome) on your PC, go to https://<YOUR_HOLOLENS_IP_ADDRESS> (Use the IP Address you noted in the previous section, Finding Your HoloLens’ IP Address (Right-Click > Open in New Tab)
- The browser will display the following message: "There’s a problem with this website’s security certificate". This happens because the certificate which is issued to the Device Portal is a test certificate.
- If using Chrome, select Advanced, then select Proceed.
- You will be prompted for a User Name and Password. Use the Device Portal Credentials provided to you with your HoloLens.
Connecting over USB
- Connect your HoloLens to your PC with a micro-USB cable
- Ensure that USB Device Connectivity is installed. Follow these steps to install the component as without the component you will not be able to connect the Hololens to Visual Studios.
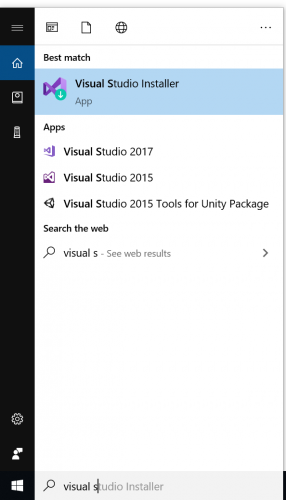
- Open the Visual Studio Installer by finding it in your start menu.
- Select Installed Components tab and search up USB Device Connectivity. If you already have it, it will be checked. If not, install it
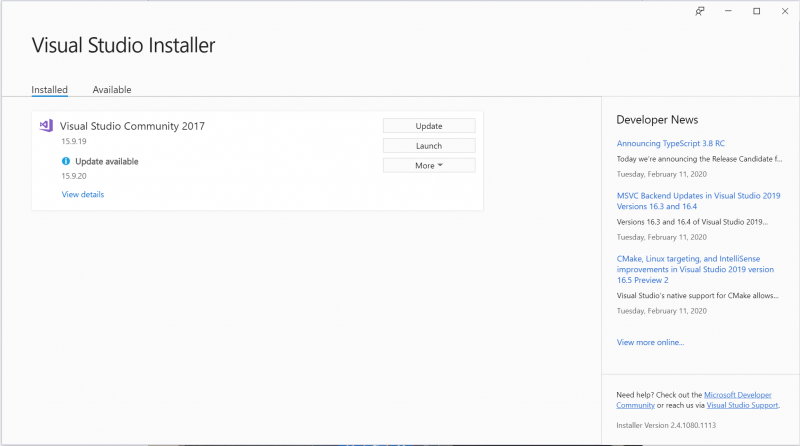
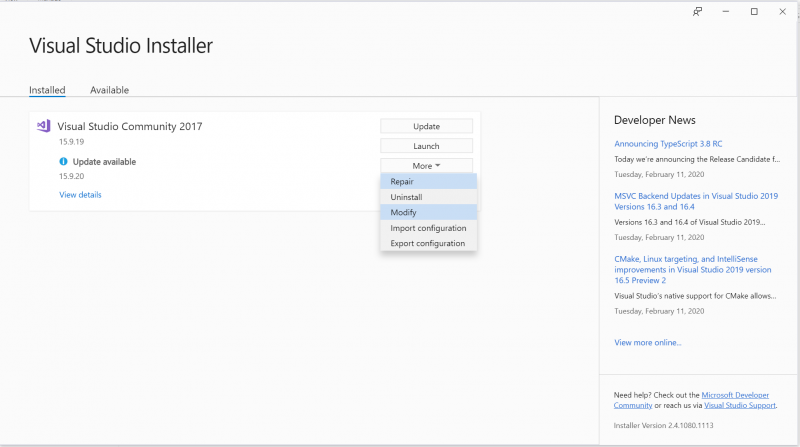
- Once the Visual Studio Installer is opened, click on Modify. If you do not see the modify button, then click on More which will provide more options.
- You can go ahead and choose install while downloading.
Using ‘Microsoft HoloLens’ Mirror Mode
Note: This section requires your HoloLens' IP address which can be found using the section above.
Step 1
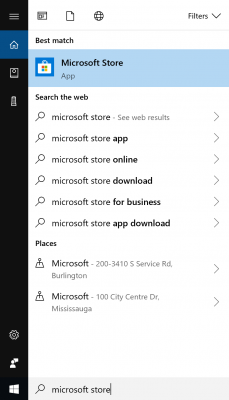
- Open your Start Menu, and type “Windows Store” into the search bar. Select Store.
Step 2
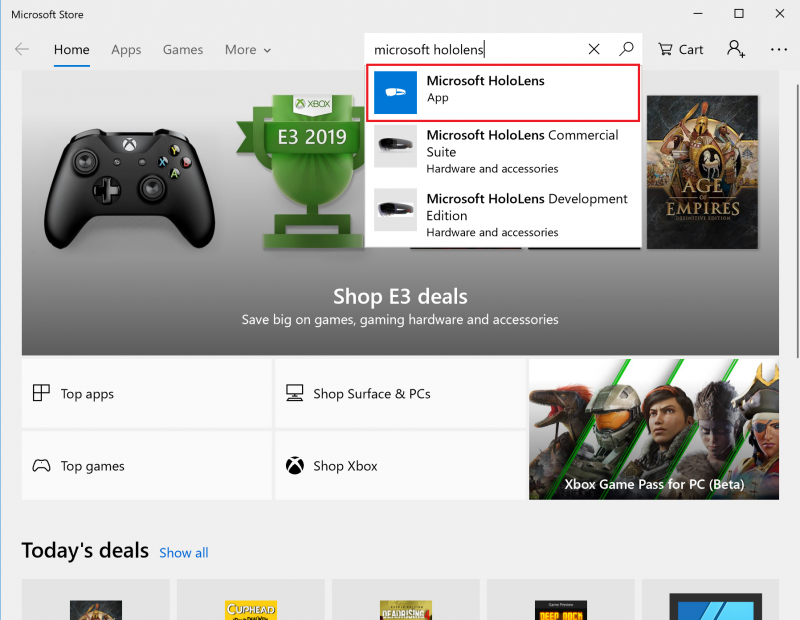
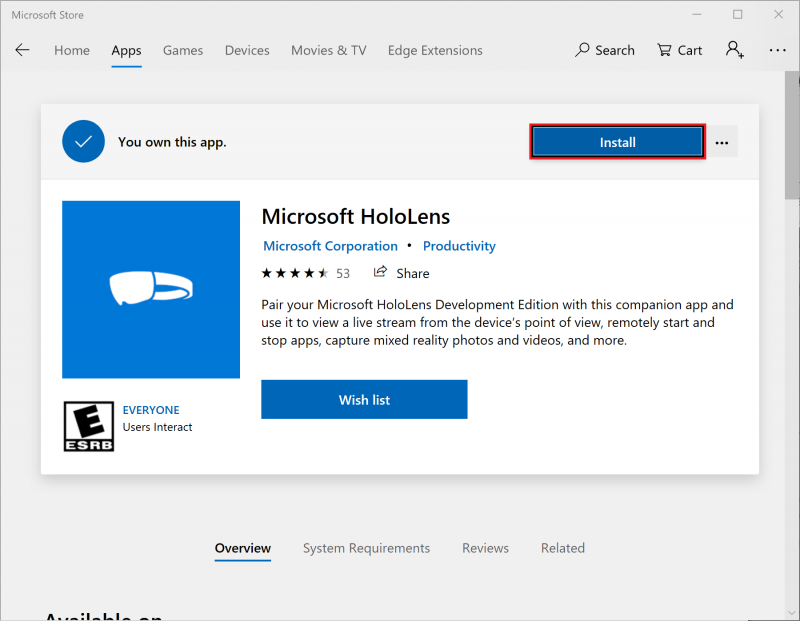
- Type “Microsoft HoloLens” in the Store search bar. There should only be one result. Select Microsoft HoloLens.
Step 3
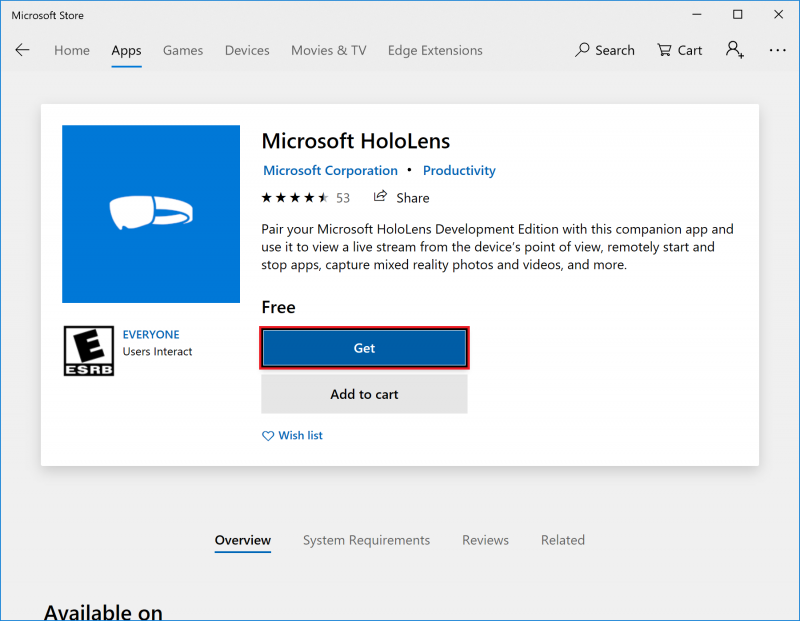
- Select Get.
Step 4
- Sign in to a Microsoft Account now or you will be prompted to do so later
- Select Install
Step 5
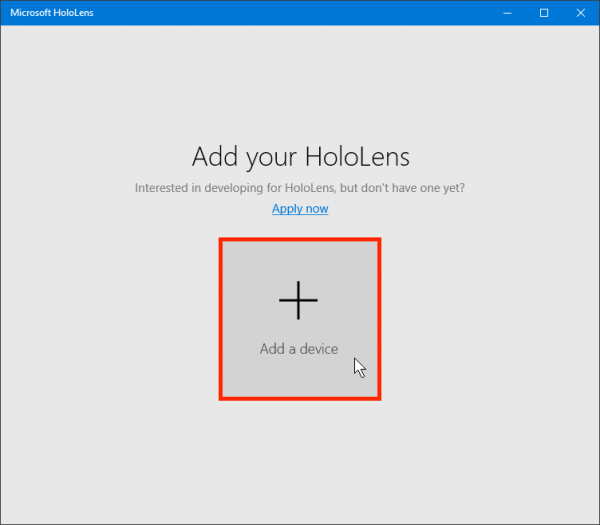
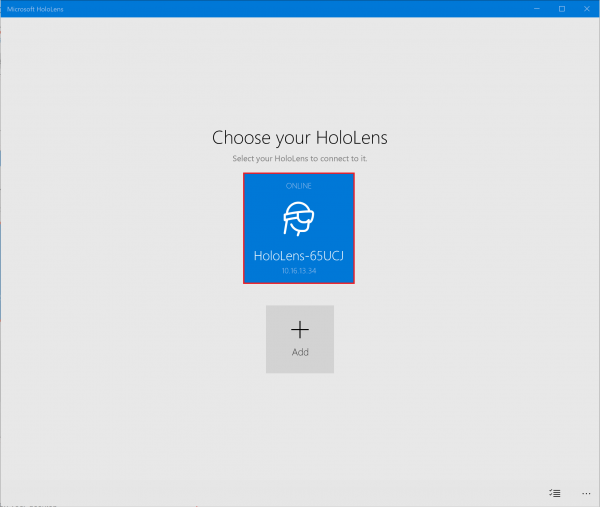
- After Installation launch the Hololens app from the Search Bar or Start Menu
- Select Add a device.
Step 6
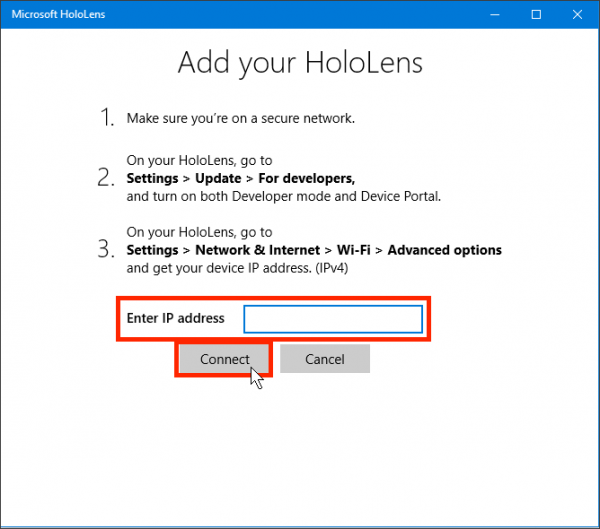
- Enter the IP address of your HoloLens from the chapter above
- Select Connect
Step 7
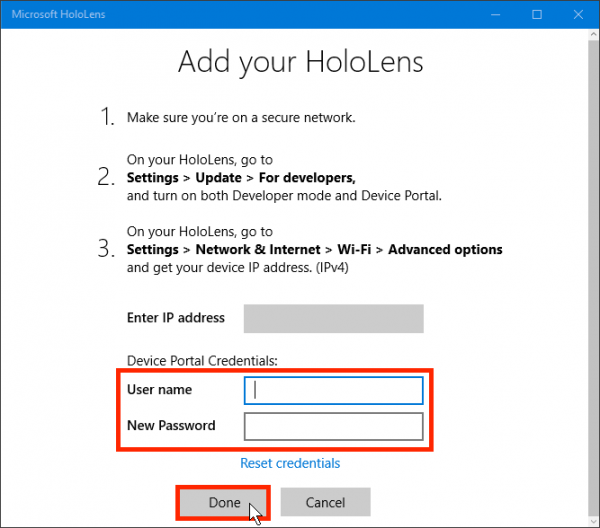
- Enter "ixdhololens" as the User Name.
- Enter the HoloLens Device Portal Password provided to you with your HoloLens.
- Select Done.
Step 8
- Select the blue square icon with the name of your HoloLens.
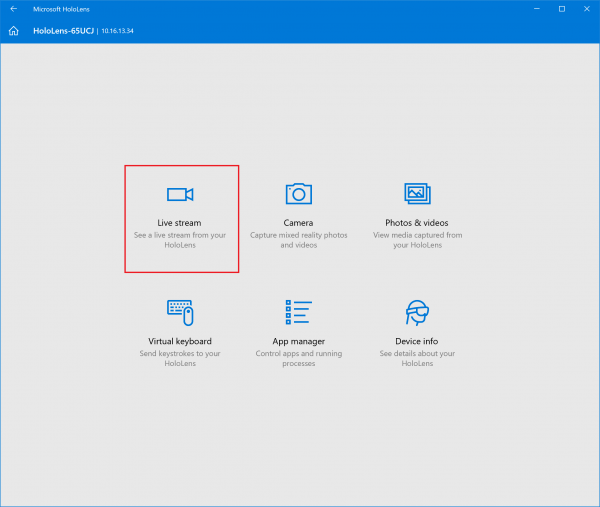
Step 9
- Select Live Stream
- You should now see the view from your HoloLens mirrored on your desktop
Introduction to HoloLens (Holograms 101)
Chapter 1 - "Holo" world
Note: This section requires Developer Mode to be enabled on your HoloLens. Instructions to enable Developer mode can be found in the previous section 'Accessing the HoloLens Device Portal'.
Step 1
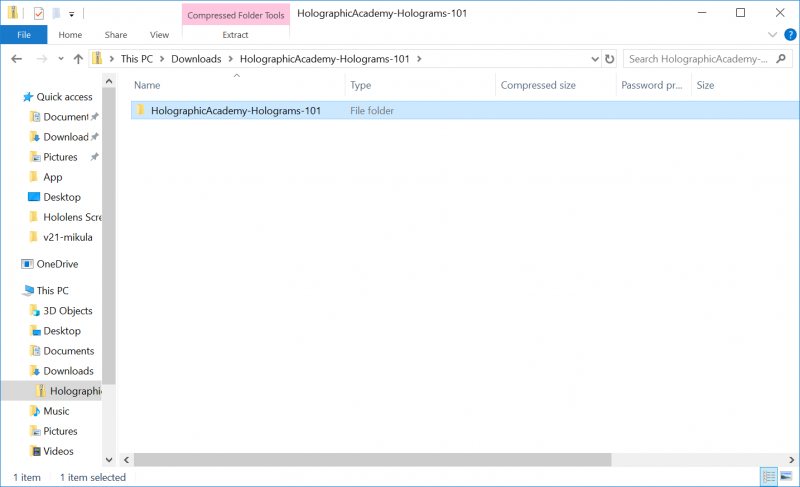
- Navigate to this URL to download the Holograms 101 project files: https://github.com/Microsoft/HolographicAcademy/archive/Holograms-101.zip
- Navigate to your “Downloads” folder and open the archive you just downloaded - “HolographicAcademy-Holograms-101.zip”.
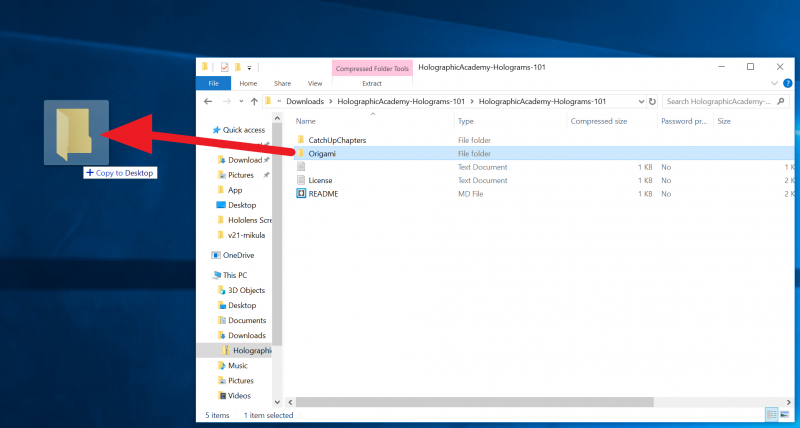
- Open the folder Origami.
- Drag the Origami folder to the desktop to create a copy of the folder on your Desktop.
Step 2
- If it’s not already running, launch the application Unity.
- Under the Projects tab select ADD.
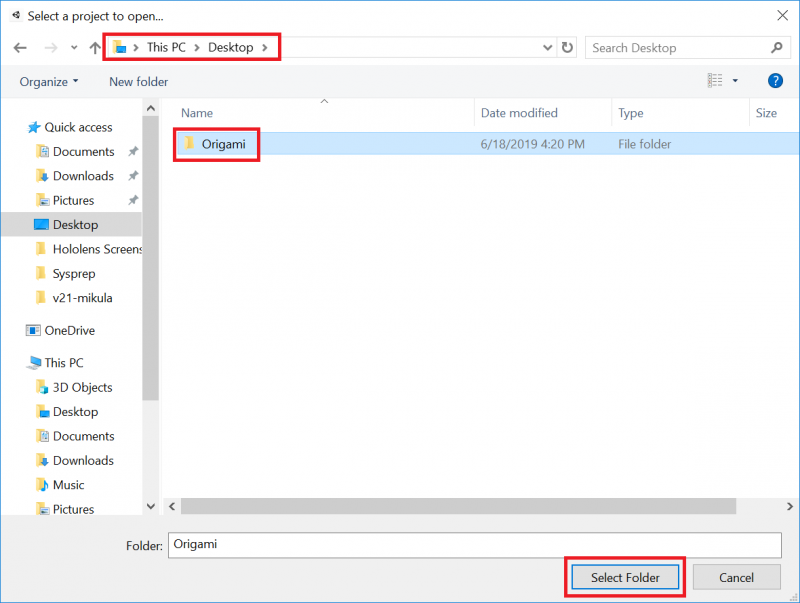
- Navigate to your Desktop folder, and select the “Origami” folder.
- Select the Select Folder button.
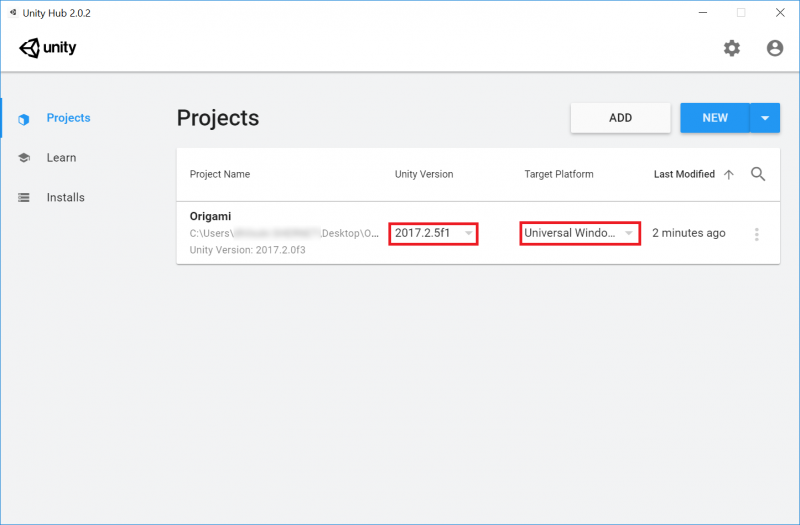
- Select Unity Version to be 2017.2.5f1
- Select Target Platform to be Universal Windows Platform
- Then click the project name Origami
Step 3
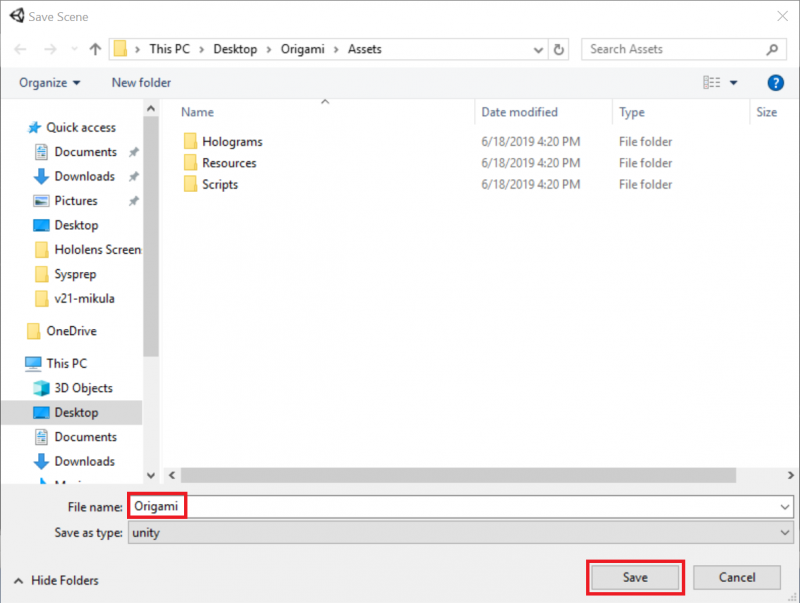
- Since the Origami project does not contain a scene, save the empty default scene to a new file using: File / Save Scene As.
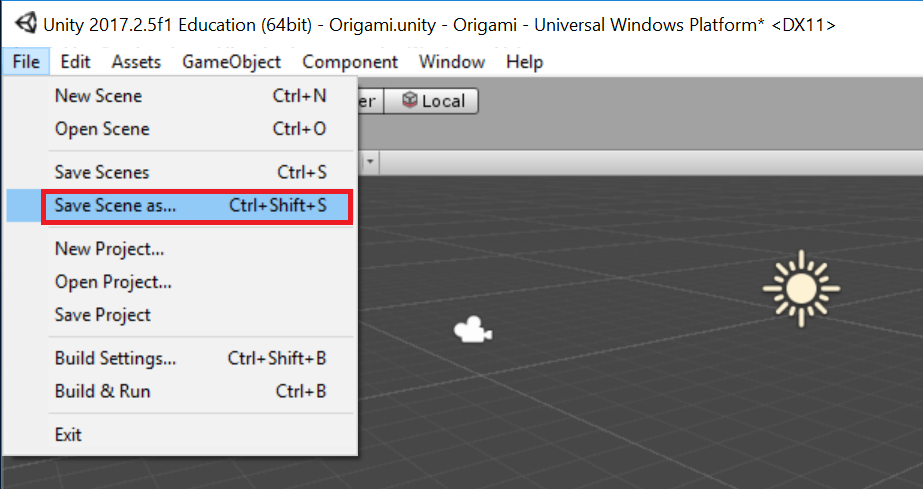
- Name the new scene Origami and select the Save button.
Step 4
- In the Hierarchy Panel, select Main Camera.
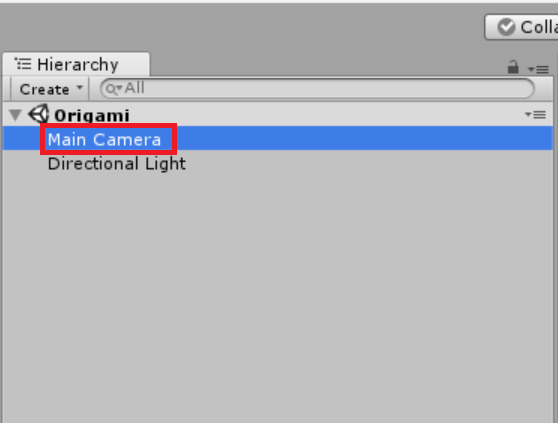
- In the Inspector set its transform position to 0,0,0.
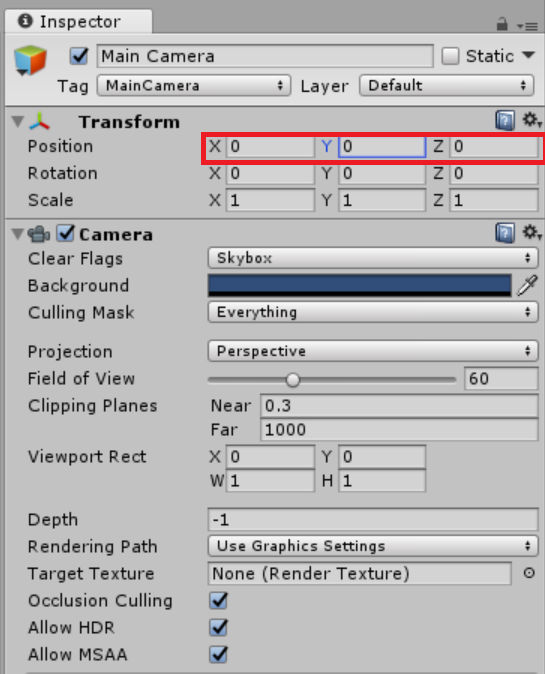
- Find the Clear Flags property, and change the dropdown from Skybox to Solid color.
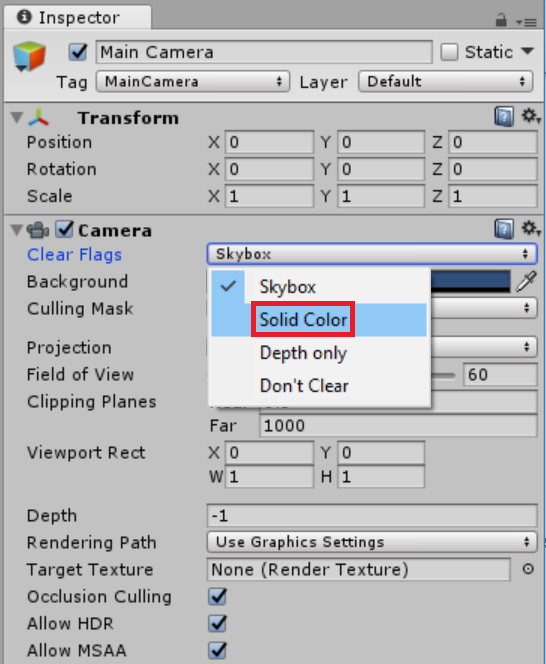
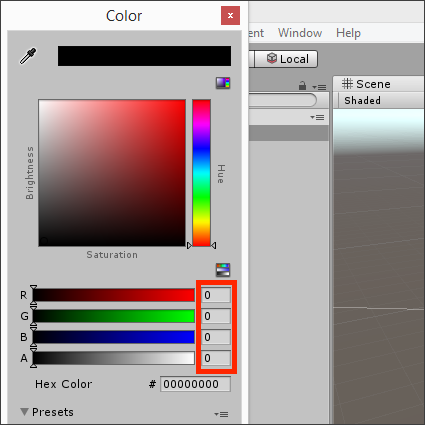
- Click on the Background field to open a color picker.
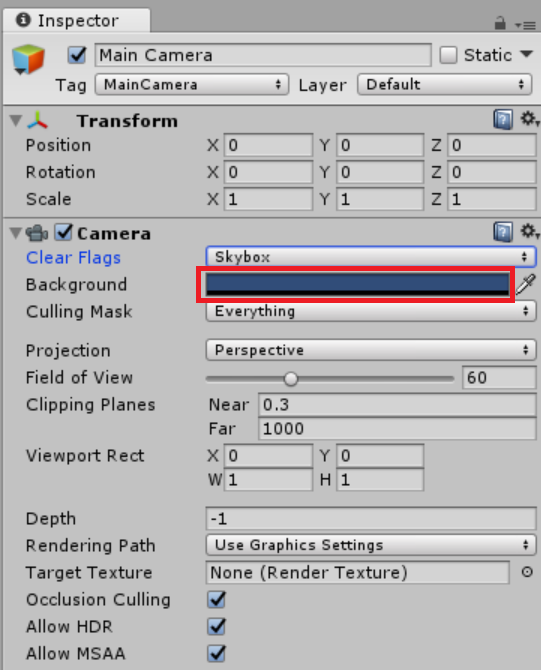
- Set R, G, B, and A to 0.
Step 5
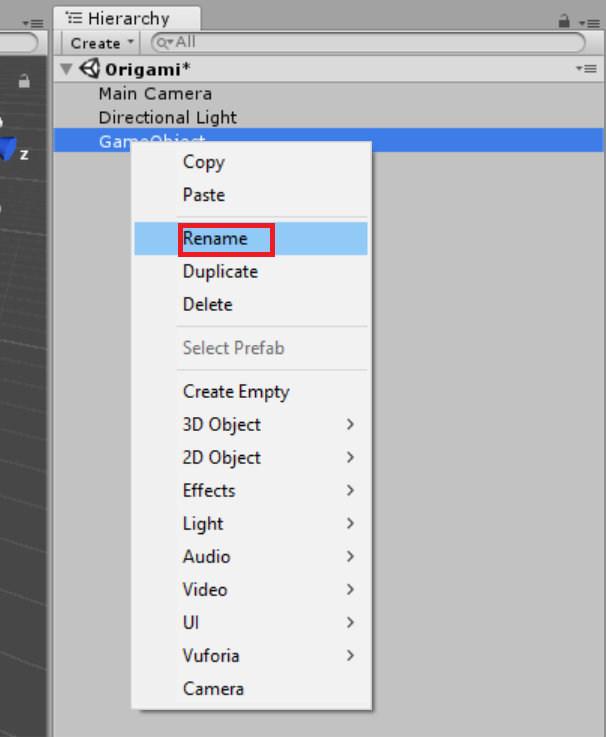
- In the Hierarchy Panel, click on Create and Create Empty.
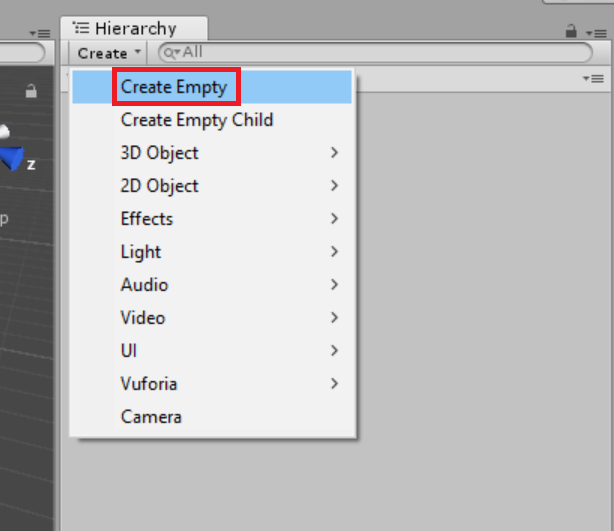
- Right-click the new GameObject and select Rename. Rename the GameObject to OrigamiCollection.
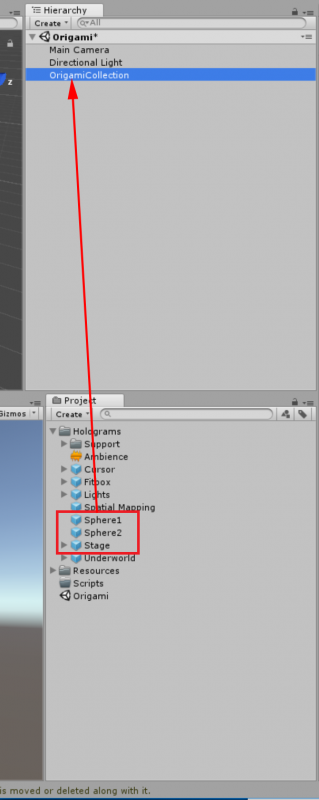
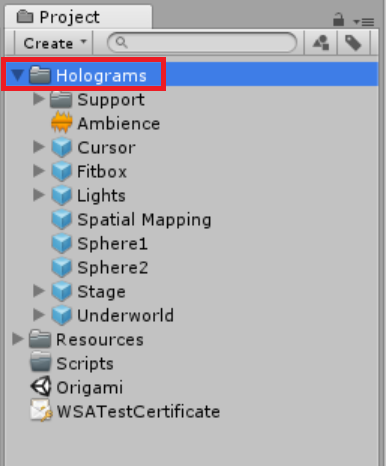
- Select the Holograms folder in the Project Panel.
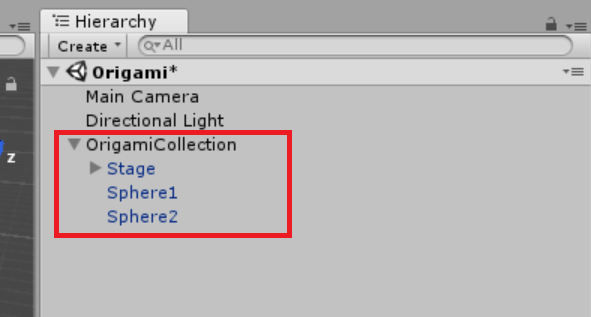
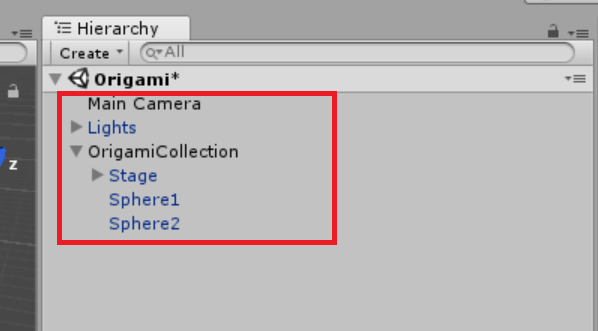
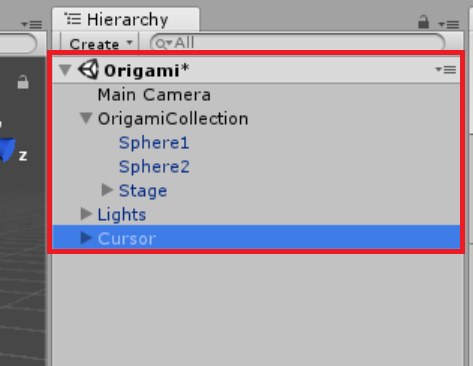
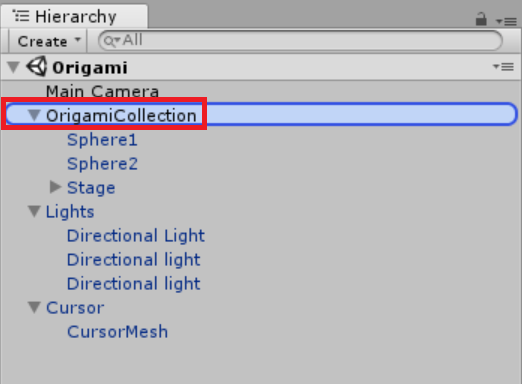
- Drag Stage, Sphere1 and Sphere2 into the Hierarchy to be children of OrigamiCollection.
- Your Hierarchy Panel should now look like the image below
Step 6
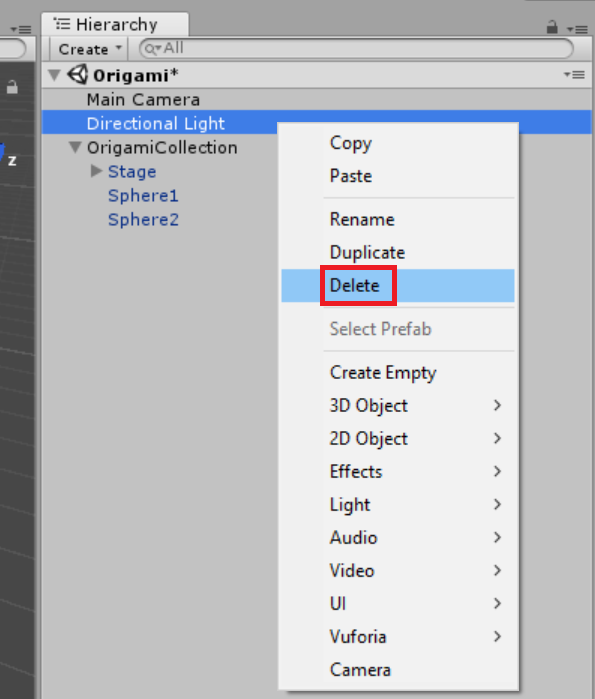
- Right-click the Directional Light object in the Hierarchy Panel and select Delete.
- From the Holograms folder, drag Lights into the root of the Hierarchy Panel.
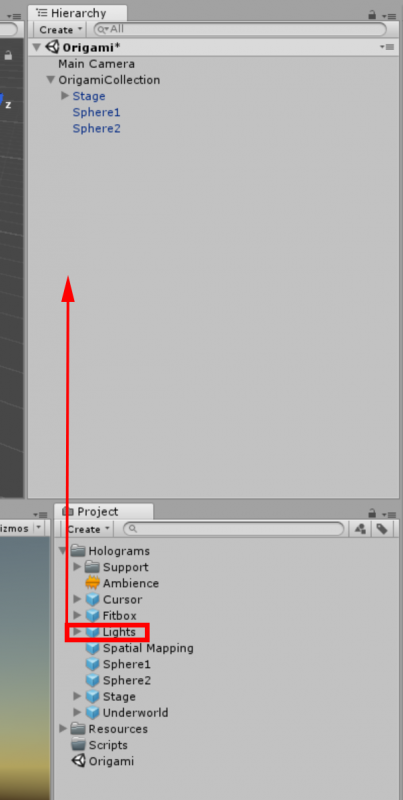
- Your Hierarchy Panel should now look like the image below
Step 7
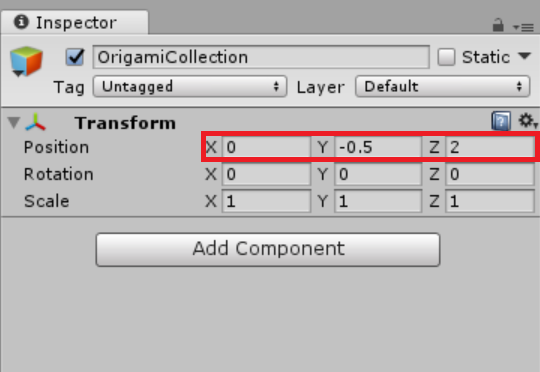
- In the Hierarchy, select the OrigamiCollection.
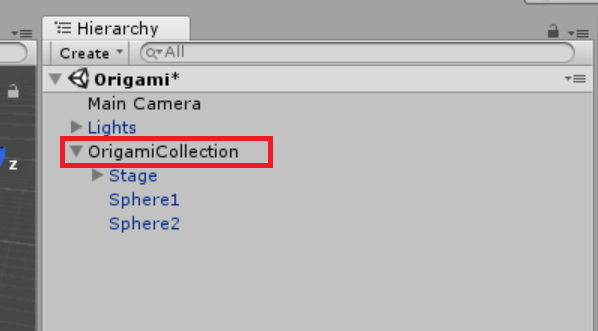
- In the Inspector, set the transform position to 0, -0.5, 2.0.
Step 8
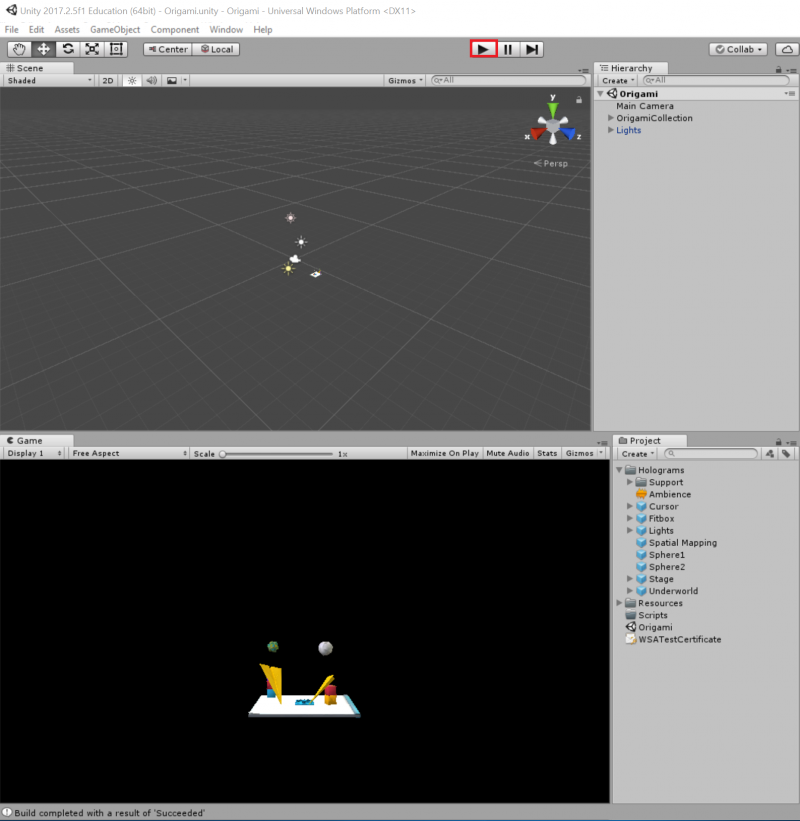
- Press the Play button in Unity to preview your holograms.
- You should see the Origami objects in the preview window.
- Press Play a second time to stop preview mode.
Step 9
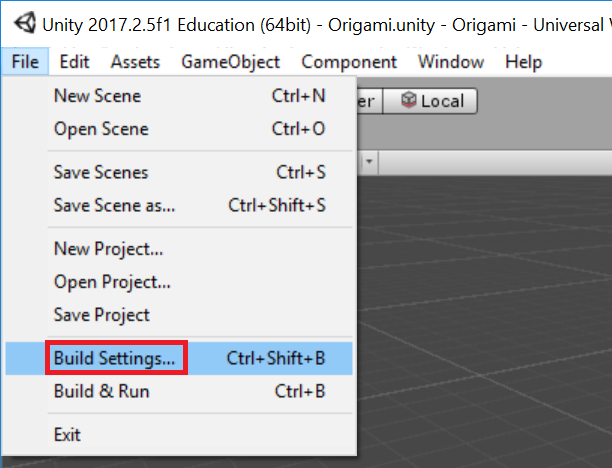
- In Unity select File > Build Settings.
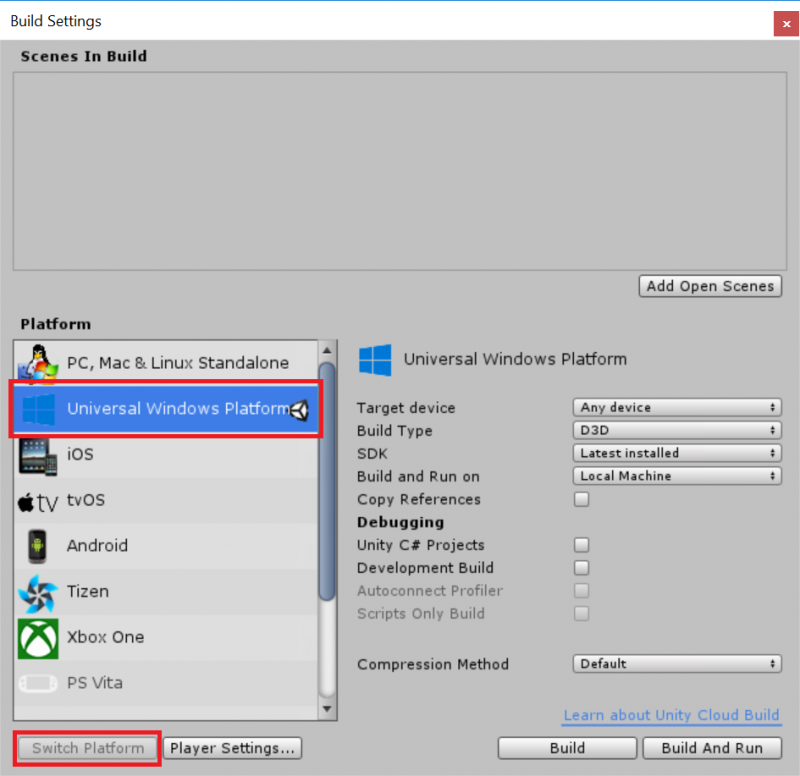
- Select Universal Windows Platform in the Platform list and click Switch Platform.
- Select the Add Open Scenes button and make sure the Origami checkbox is marked
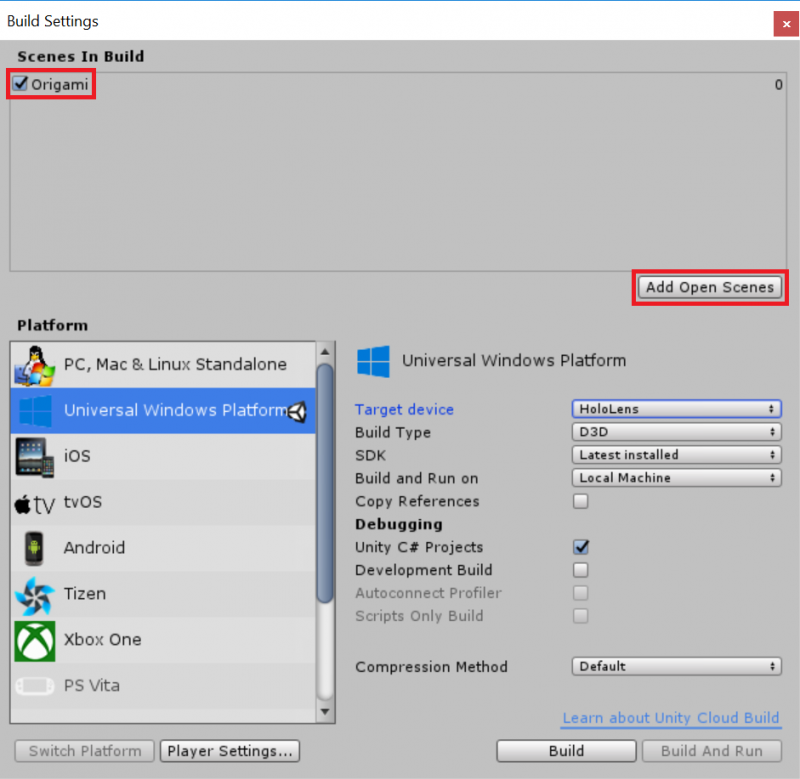
- Change Target Device to Hololens
- Change Build Type to D3D
- Check Unity C# Projects check box
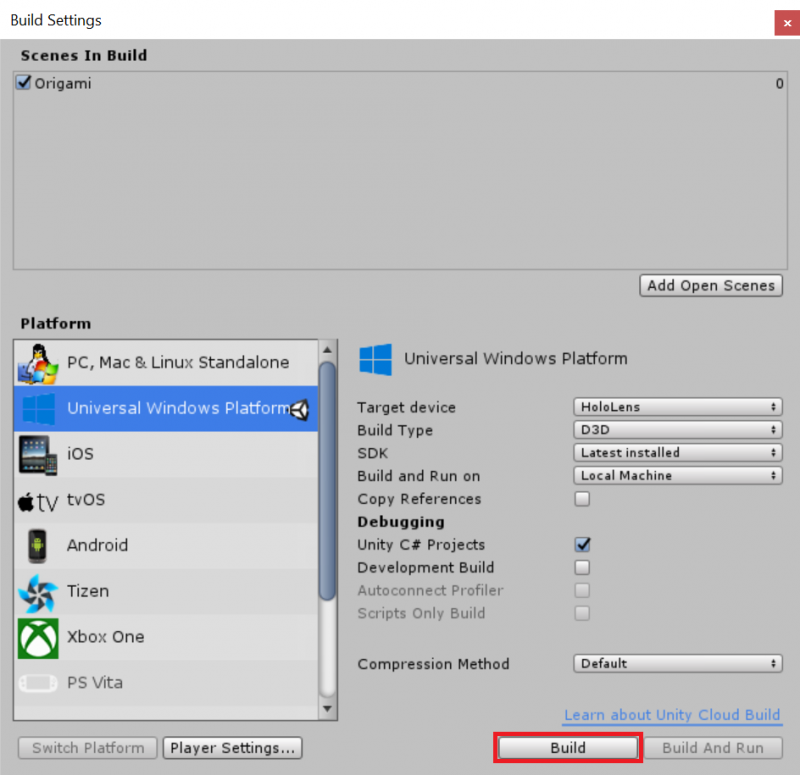
- Match settings to the ones shown in the picture below
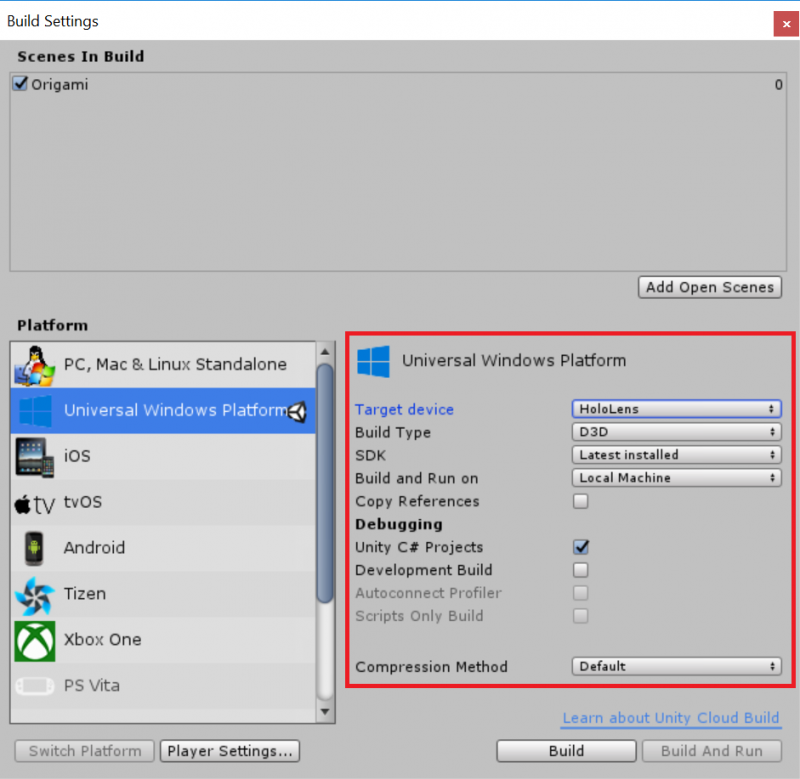
- Select Build to build the project for Visual Studios
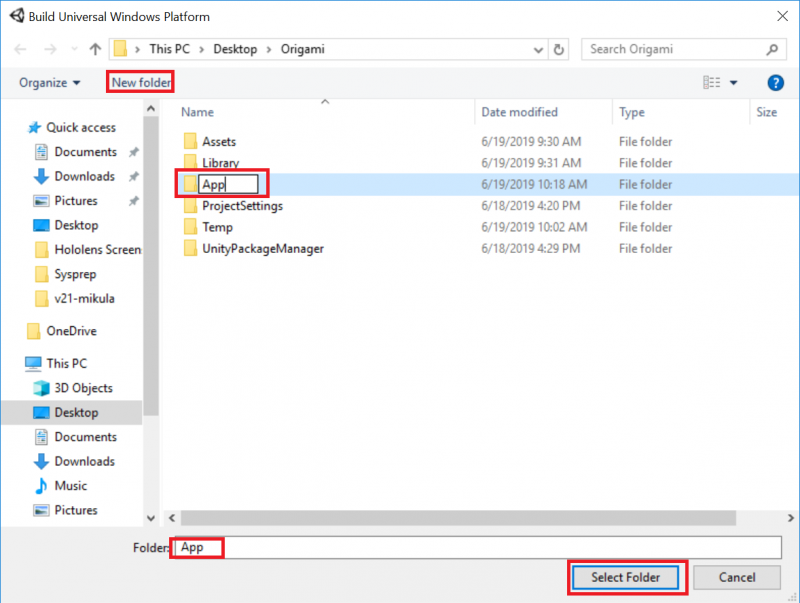
- In the file explorer window that appears, create a New Folder named "App".
- Make sure in the Folder: type box it says App
- Click Select Folder to continue
Step 10
- When Unity is done, a File Explorer window will appear.
- Double-click the App folder.
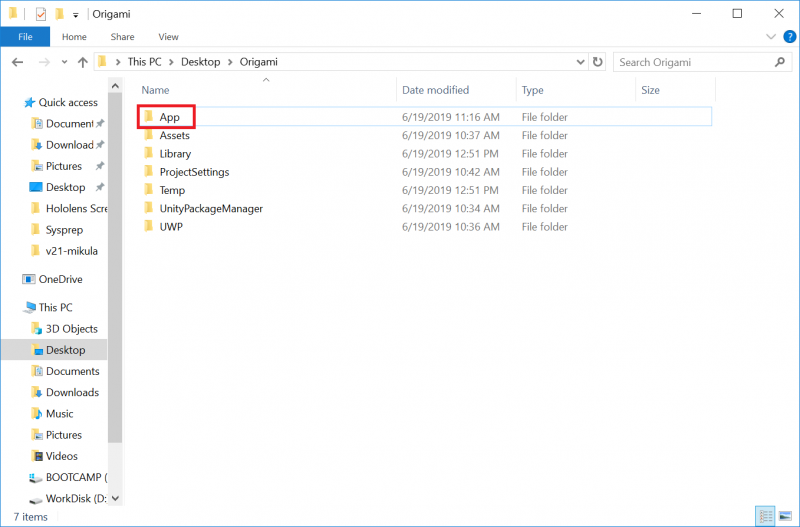
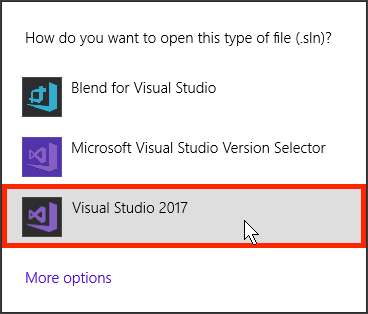
- Double-click Origami.sln.
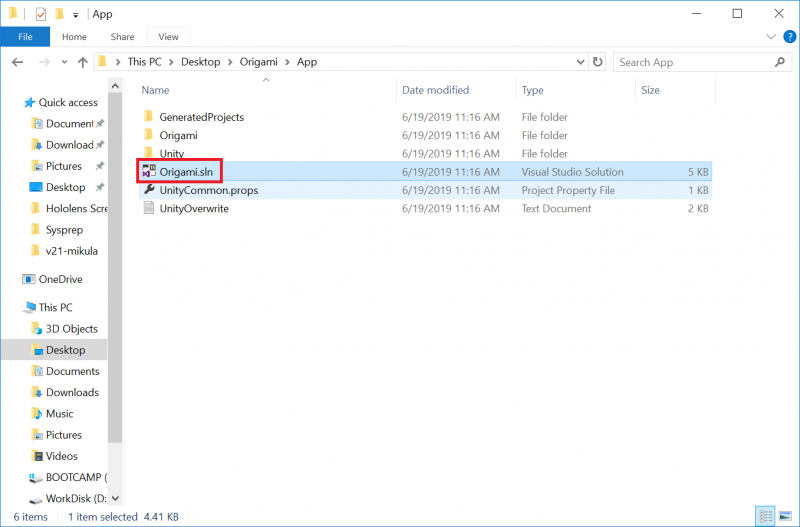
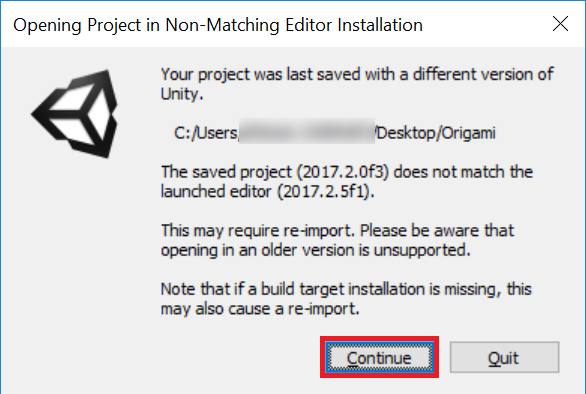
- If prompted, open Origami.sln with Visual Studio 2017
Step 11
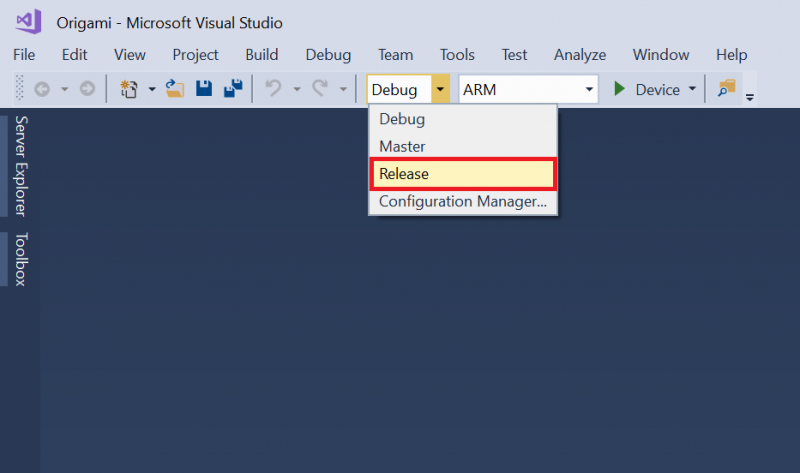
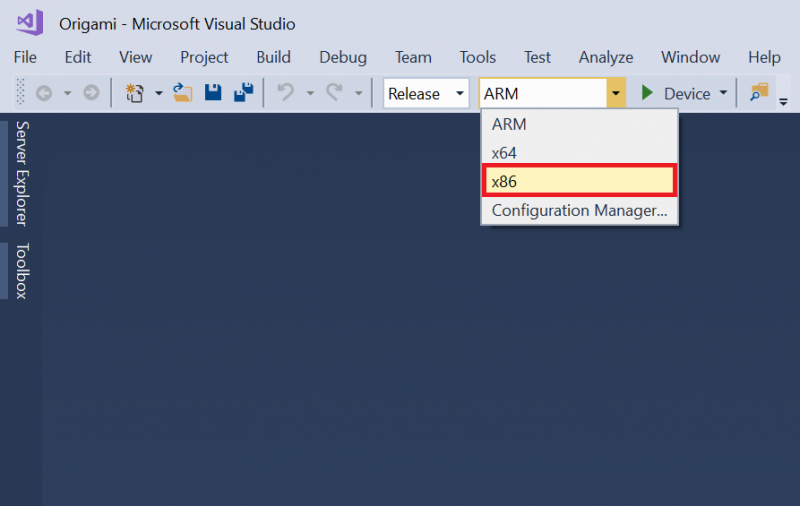
- Using the top toolbar in Visual Studio, change the target from Debug to Release and from ARM to X86.
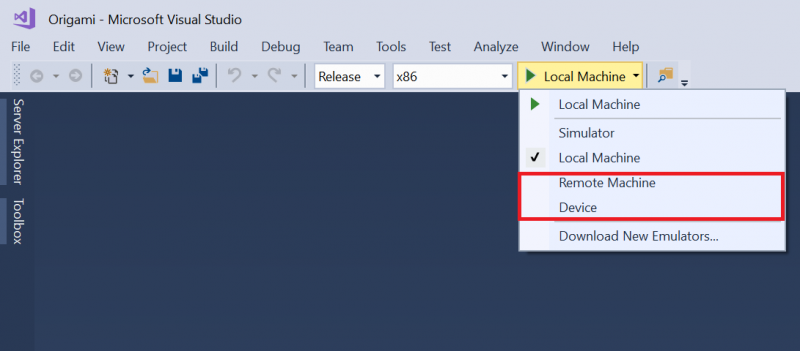
- Click on the arrow next to Local Machine button:
- Select Remote Machine to deploy over Wi-Fi.
- Select Device to deploy over USB.
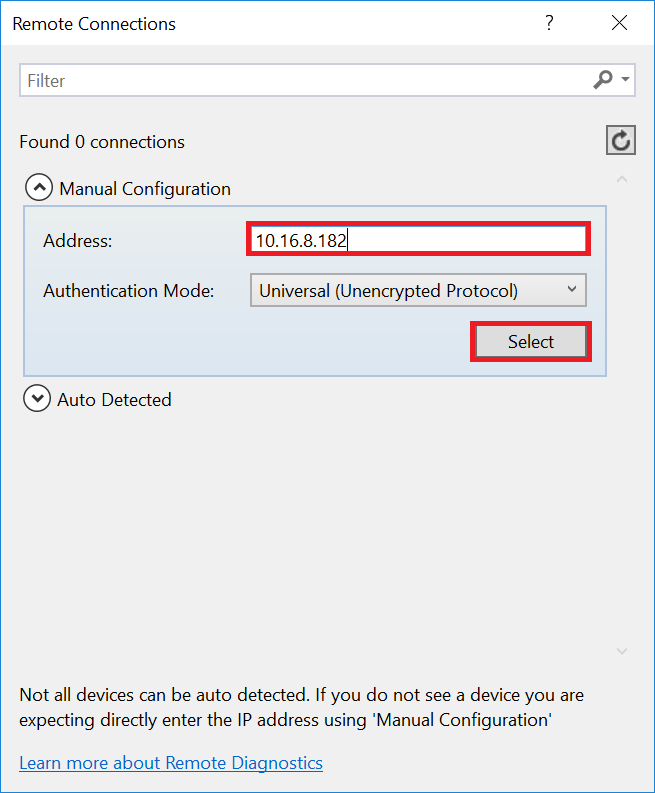
- If deploying to Remote Machine (over Wi-Fi), you will see a dialogue like the one below.
- Set the Address to the name or IP address of your HoloLens. Use the IP address you recorded in the section 'Finding Your HoloLens’ IP'.
- Leave the Authentication Mode set to Universal.
- Click Select
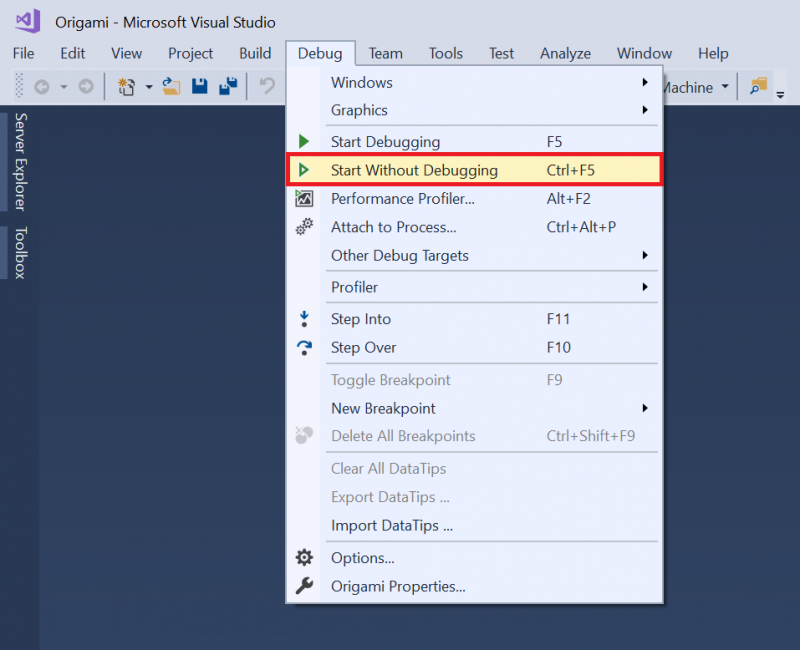
Step 12
- Under the Debug drop down select Start Without Debugging or press Ctrl+F5
Note: If this is the first time deploying to your device, you will need to pair it with Visual Studio.
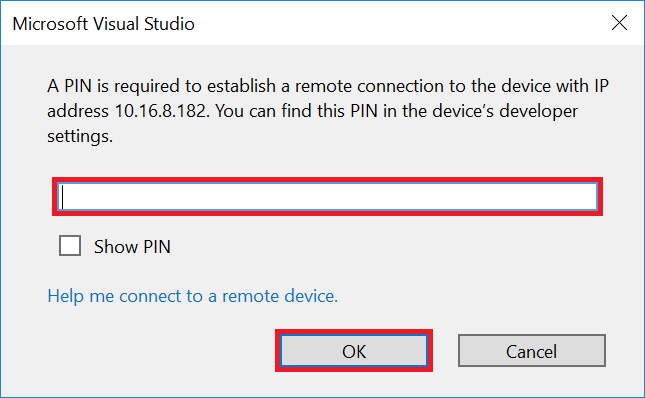
- The first time you deploy an app from Visual Studio to your HoloLens, you will be prompted for a PIN.
- On the HoloLens, generate a PIN by using the Bloom Gesture to open the Main HoloLens Menu and launch the Settings app.
- Select to Update & Security
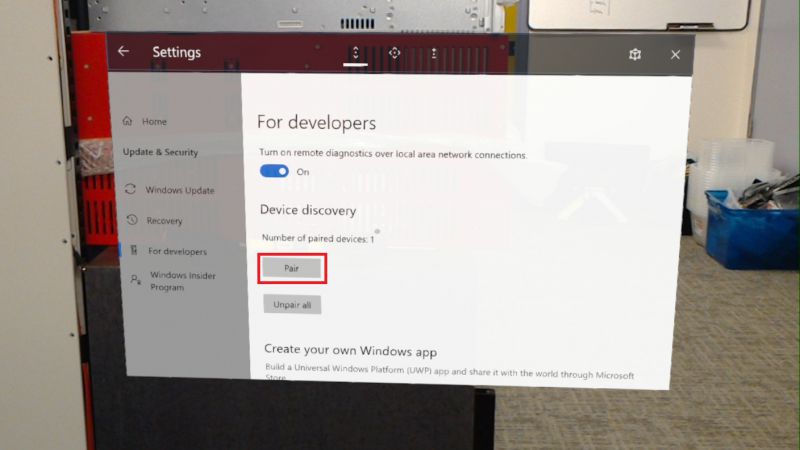
- Select For Developers
- Scroll down then select Pair.
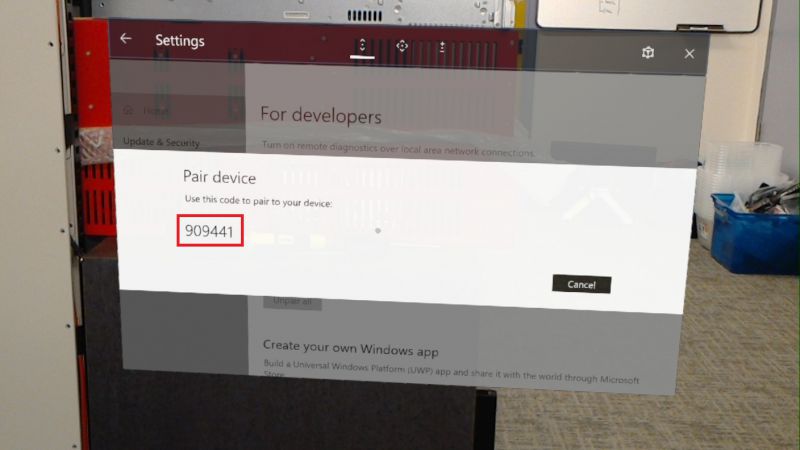
- A PIN will be displayed on your HoloLens; type this PIN in Visual Studio.
- After pairing is complete, tap Done on your HoloLens to dismiss the dialog. This PC is now paired with the HoloLens and you will be able to deploy apps automatically. Repeat these steps for every subsequent PC that is used to deploy apps to your HoloLens.
- The Origami project will now build, deploy to your HoloLens, and then run.
Step 13
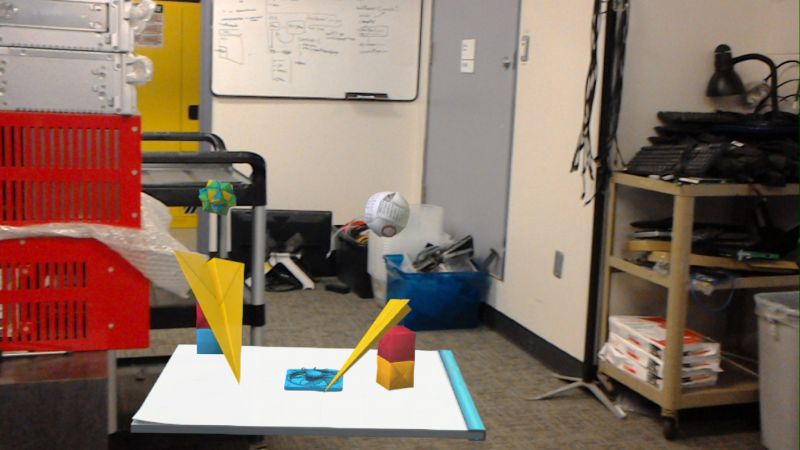
- Put on your HoloLens and look around to see your new holograms.
Troubleshooting
You want to ensure the following criteria below are met, if you are having trouble connecting the Hololens
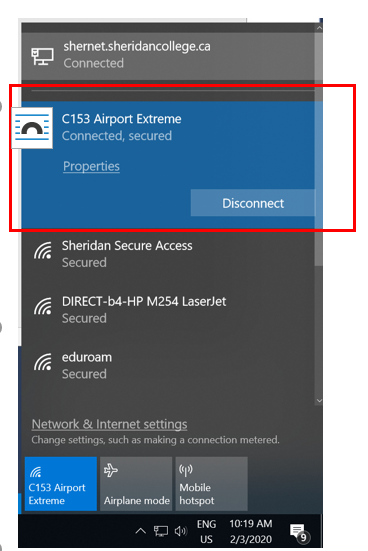
- Ensure both devices (PC and Hololens) are connected to the same network
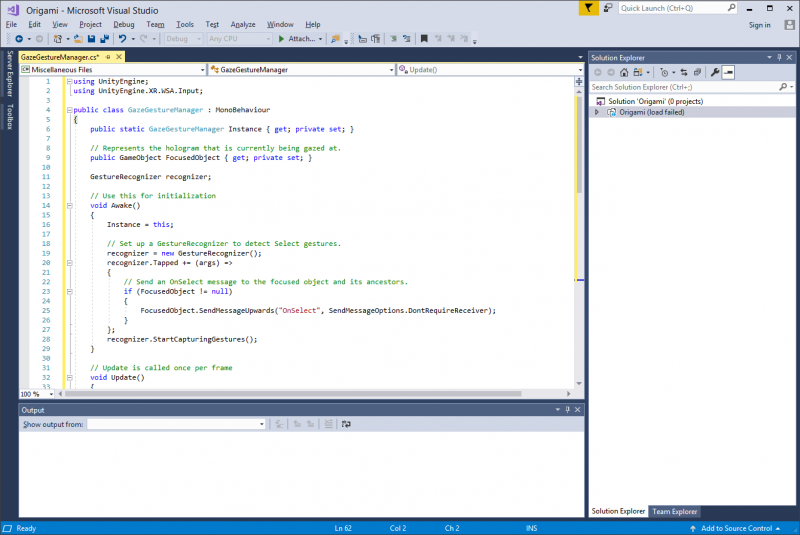
- Ensure that the class name in the C-Script file is the same as the name of the script
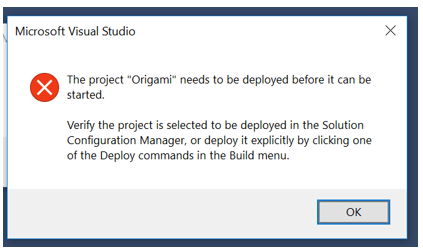
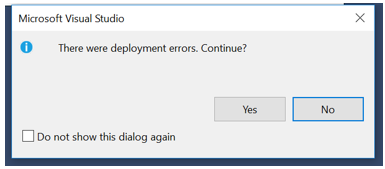
- Ensure the HoloLens is powered before running the solution/project as it tends to go to sleep after some idle time. Otherwise, an error (as shown below) will appear when attempting to run the solution/project

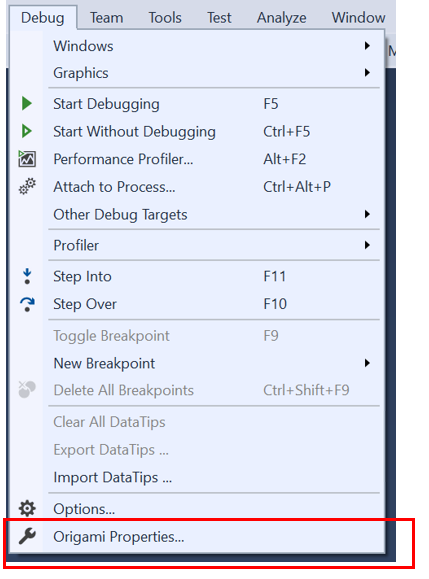
- To switch connection to a different HoloLens you want to go to Debug > “Project Name” properties
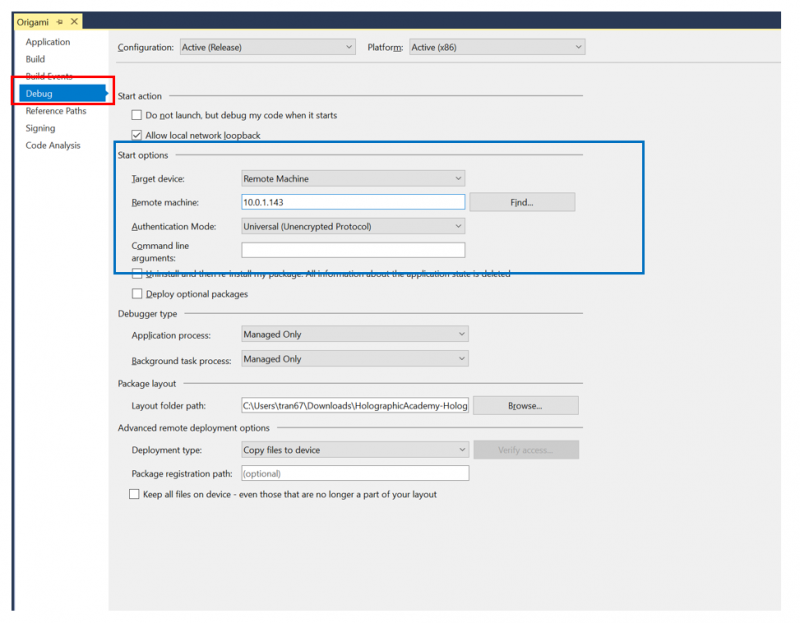
- You want to change the information in the blue box in the screenshot below. Make sure to refer to the section "Finding your Hololens IP address", to replace the IP address with yours, not what you see in the screenshot below!
- You'd want to re-pair your device again as you did in Step 12
- After this process, you want to redeploy the solution/project by going to Debug > Start Without Debugging
Introduction to HoloLens (Holograms 101)
Chapter 2 – Gaze
Step 1
- Go back to your Unity project, and close the Build Settings window if it's still open.
- Select the Holograms folder in the Project panel.
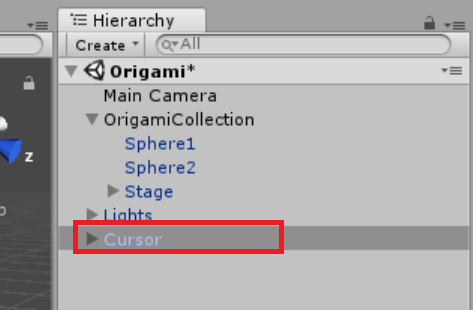
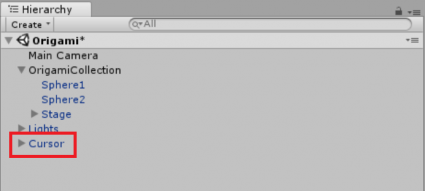
- Drag the Cursor object into the Hierarchy panel at the root level.
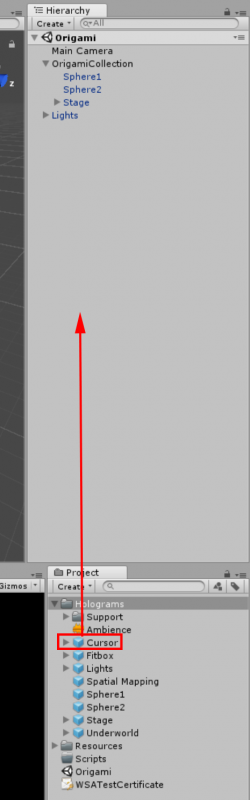
- The Hierarchy panel should now look like the image below
Step 2
- Double-click on the Cursor object to take a closer look at it.
- Right-click on the Scripts folder in the Project panel.
- Click the Create sub-menu.
- Select C# Script.
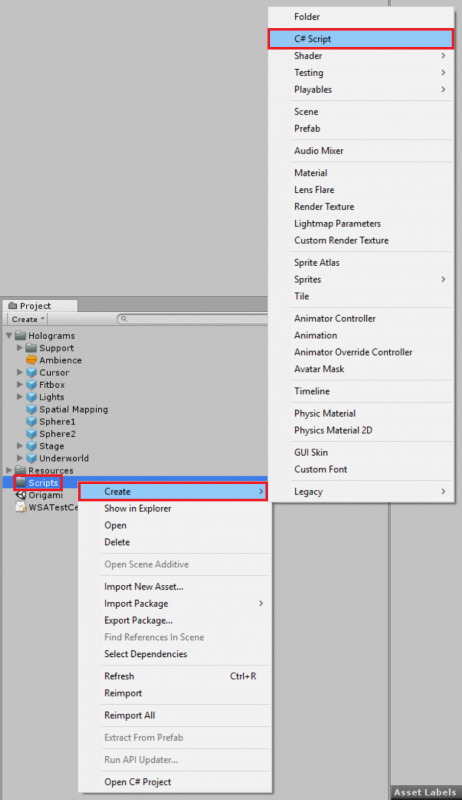
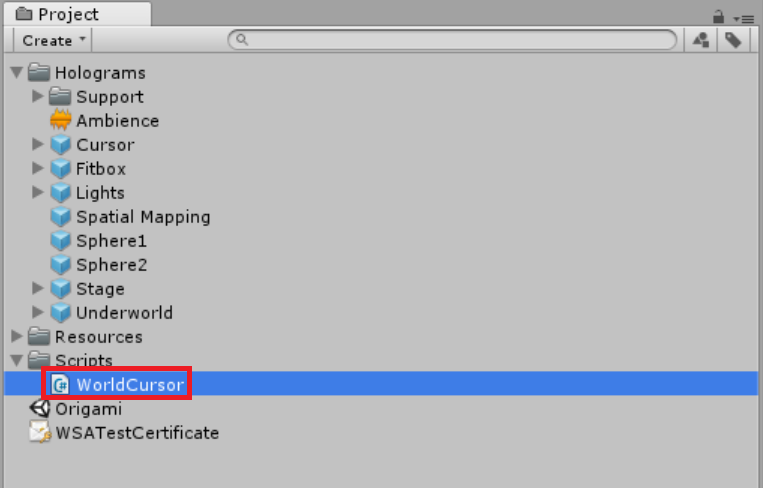
- A script icon will appear titled NewBehaviorScript like in the image below
- Rename the script WorldCursor. Note: The name is case-sensitive. You do not need to add the .cs extension.
Step 3
- Double-click the WorldCursor script to open it in Visual Studio.
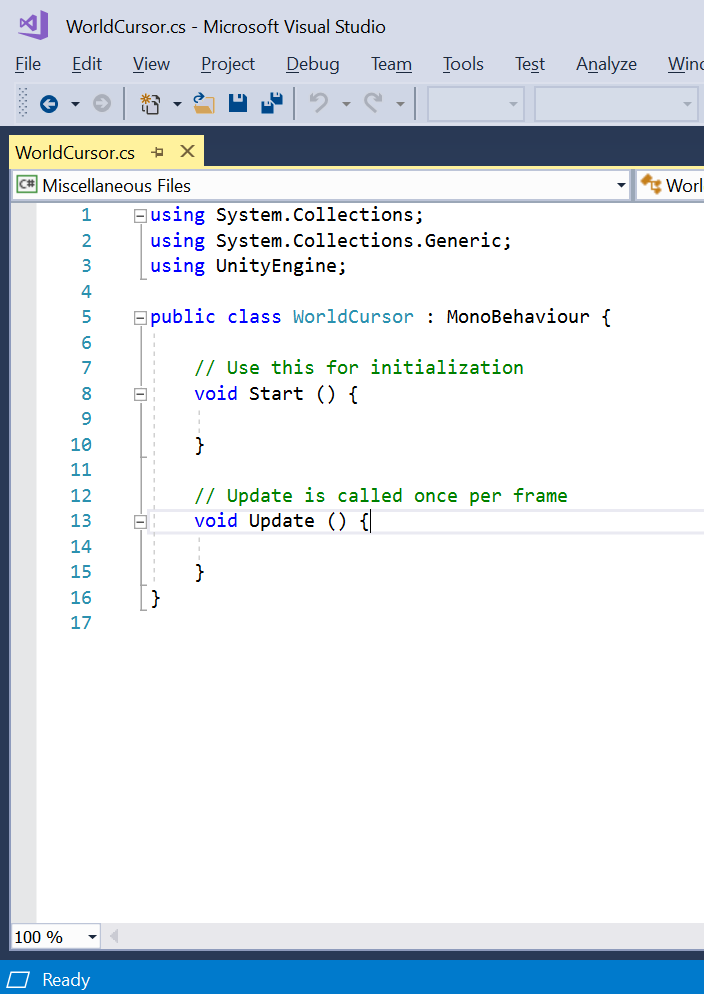
- Select the current code, and delete it
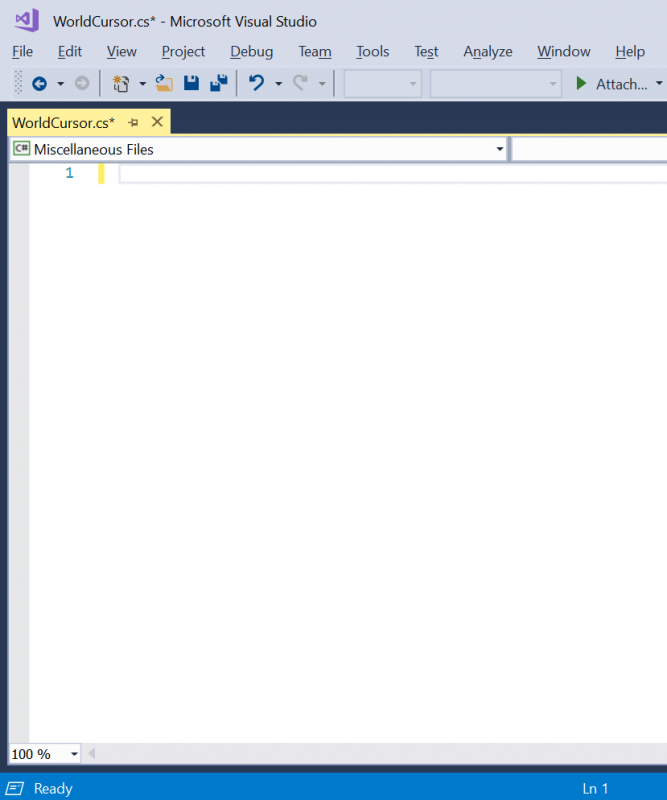
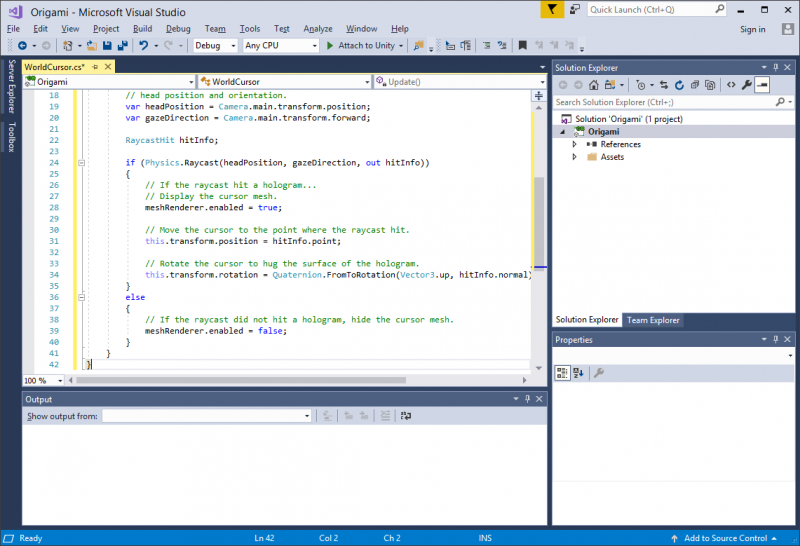
- Copy the code below, and paste it into the Visual Studio window
using UnityEngine;

public class WorldCursor : MonoBehaviour
{
    private MeshRenderer meshRenderer;

    // Use this for initialization
    void Start()
    {
        // Grab the mesh renderer that's on the same object as this script.
        meshRenderer = this.gameObject.GetComponentInChildren<MeshRenderer>();
    }

    // Update is called once per frame
    void Update()
    {
        // Do a raycast into the world based on the user's
        // head position and orientation.
        var headPosition = Camera.main.transform.position;
        var gazeDirection = Camera.main.transform.forward;

        RaycastHit hitInfo;

        if (Physics.Raycast(headPosition, gazeDirection, out hitInfo))
        {
            // If the raycast hit a hologram...
            // Display the cursor mesh.
            meshRenderer.enabled = true;

            // Move the cursor to the point where the raycast hit.
            this.transform.position = hitInfo.point;

            // Rotate the cursor to hug the surface of the hologram.
            this.transform.rotation = Quaternion.FromToRotation(Vector3.up, hitInfo.normal);
        }
        else
        {
            // If the raycast did not hit a hologram, hide the cursor mesh.
            meshRenderer.enabled = false;
        }
    }
}
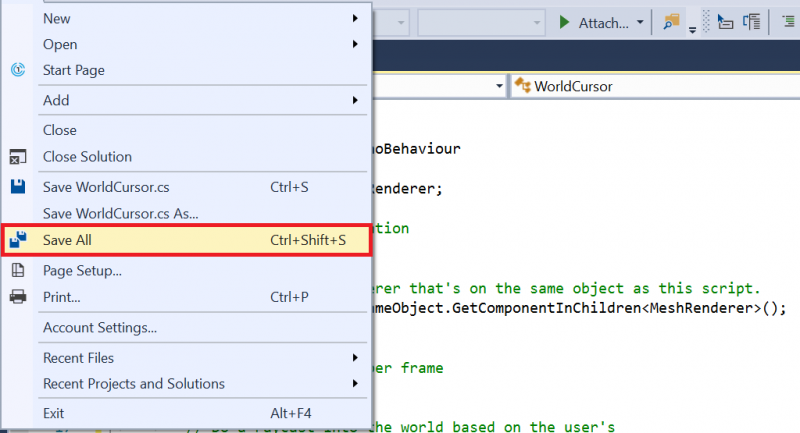
- Select File > Save All.
Step 4
- Return to Unity.
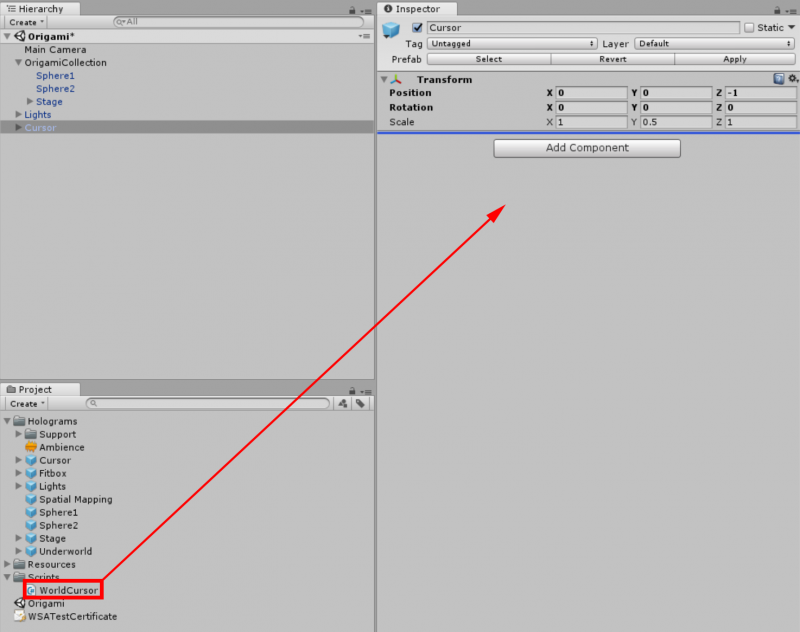
- Select the Cursor object in the Hierarchy panel.
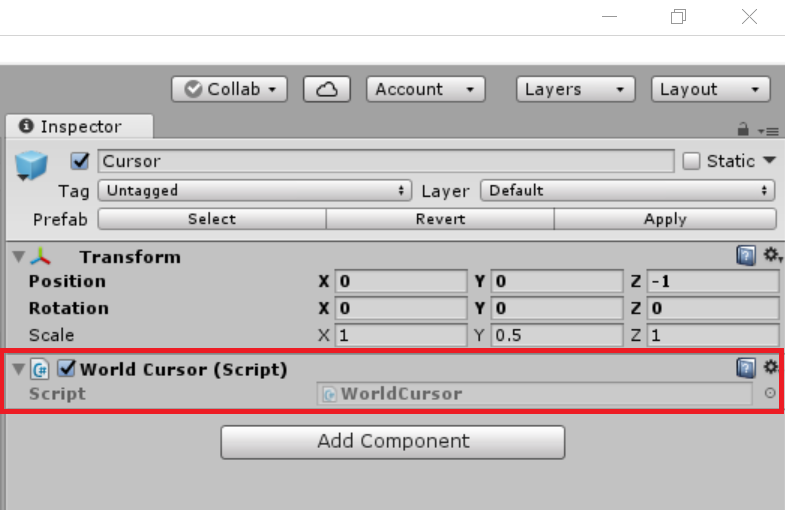
- Drag and drop the WorldCursor script into the Inspector panel.
- Your Inspector panel should now look like the image below
Step 5
- Rebuild the app from File > Build Settings.

Step 6
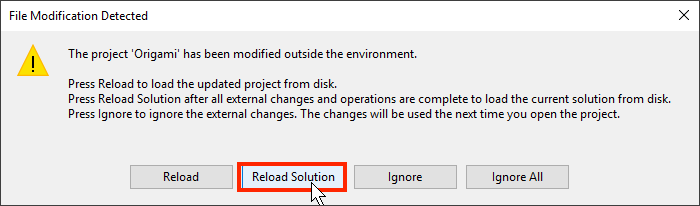
- Return to the Visual Studio solution previously used to deploy to your HoloLens.
- Select Reload Solution when prompted.
- Select Debug > Start Without Debugging

Step 7
- Now look around the scene and notice how the cursor interacts with the shape of objects.
Introduction to HoloLens (Holograms 101)
Chapter 3 – Gestures
Step 1
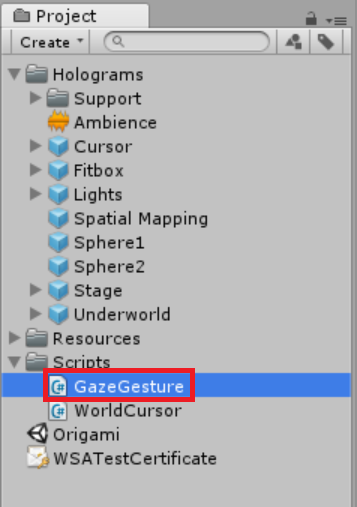
- In the Scripts folder, create a new C# Script.

- Rename the new script “GazeGestureManager”.
Step 2
- Double-click the GazeGestureManager script to open it in Visual Studio and replace the existing code the following code:
using UnityEngine;
using UnityEngine.XR.WSA.Input;

public class GazeGestureManager : MonoBehaviour
{
    public static GazeGestureManager Instance { get; private set; }

    // Represents the hologram that is currently being gazed at.
    public GameObject FocusedObject { get; private set; }

    GestureRecognizer recognizer;

    // Use this for initialization
    void Awake()
    {
        Instance = this;

        // Set up a GestureRecognizer to detect Select gestures.
        recognizer = new GestureRecognizer();
        recognizer.Tapped += (args) =>
        {
            // Send an OnSelect message to the focused object and its ancestors.
            if (FocusedObject != null)
            {
                FocusedObject.SendMessageUpwards("OnSelect", SendMessageOptions.DontRequireReceiver);
            }
        };
        recognizer.StartCapturingGestures();
    }

    // Update is called once per frame
    void Update()
    {
        // Figure out which hologram is focused this frame.
        GameObject oldFocusObject = FocusedObject;

        // Do a raycast into the world based on the user's
        // head position and orientation.
        var headPosition = Camera.main.transform.position;
        var gazeDirection = Camera.main.transform.forward;

        RaycastHit hitInfo;
        if (Physics.Raycast(headPosition, gazeDirection, out hitInfo))
        {
            // If the raycast hit a hologram, use that as the focused object.
            FocusedObject = hitInfo.collider.gameObject;
        }
        else
        {
            // If the raycast did not hit a hologram, clear the focused object.
            FocusedObject = null;
        }

        // If the focused object changed this frame,
        // start detecting fresh gestures again.
        if (FocusedObject != oldFocusObject)
        {
            recognizer.CancelGestures();
            recognizer.StartCapturingGestures();
        }
    }
}
- Select File > Save All.

Step 3
- Return to Unity
- Drag the GazeGestureManager script onto the OrigamiCollection object in the Hierarchy.
Step 4
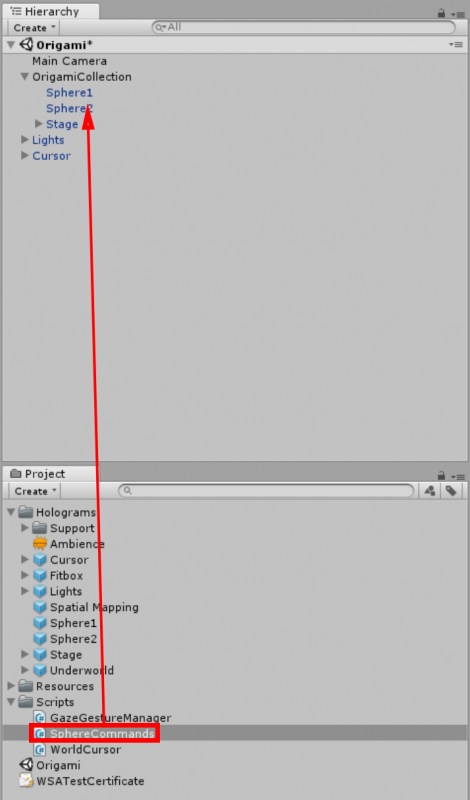
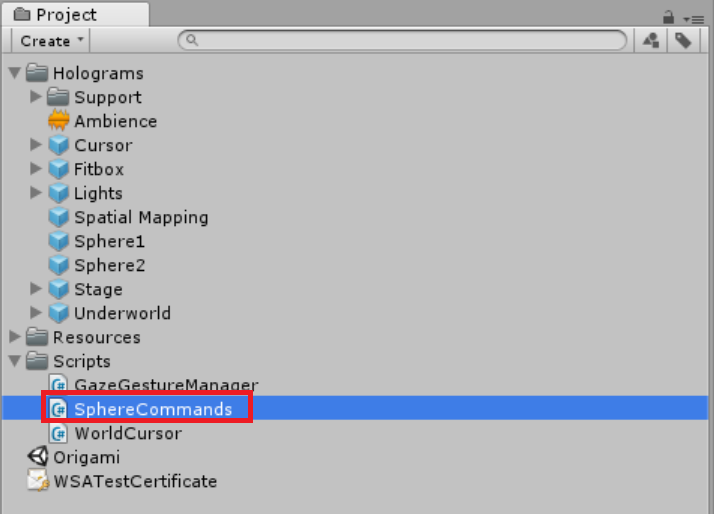
- Create another script in the Scripts folder, this time named SphereCommands.
Step 5
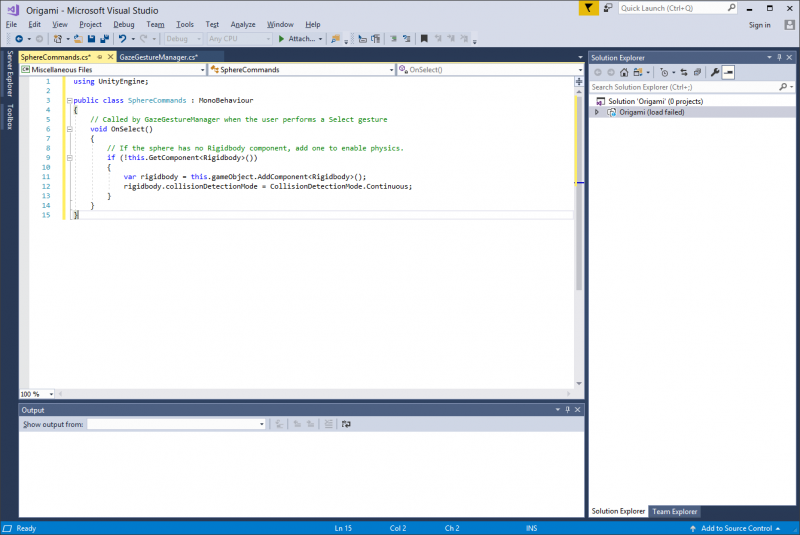
- Double-click the SphereCommands script to open it in Visual Studio, and replace the default code with this:
using UnityEngine;

public class SphereCommands : MonoBehaviour
{
    // Called by GazeGestureManager when the user performs a Select gesture
    void OnSelect()
    {
        // If the sphere has no Rigidbody component, add one to enable physics.
        if (!this.GetComponent<Rigidbody>())
        {
            var rigidbody = this.gameObject.AddComponent<Rigidbody>();
            rigidbody.collisionDetectionMode = CollisionDetectionMode.Continuous;
        }
    }
}
- Select File > Save All.
Step 6
- Return to Unity
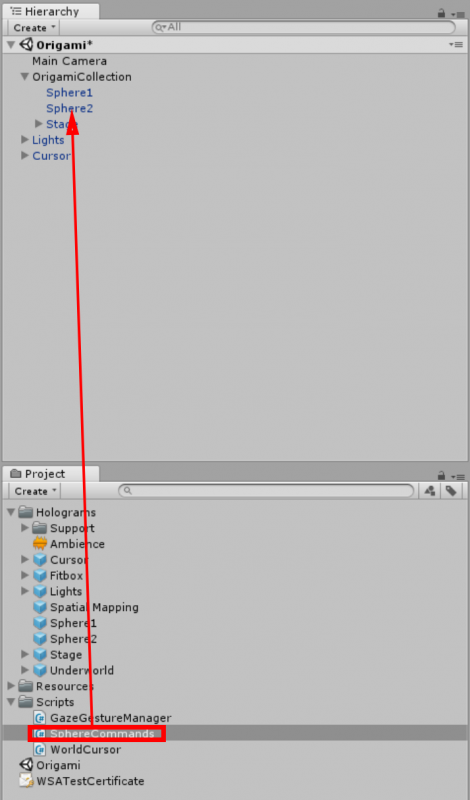
- Drag the SphereCommands script onto the Sphere1 object in the Hierarchy panel.
- Drag the SphereCommands script onto the Sphere2 object in the Hierarchy panel.
Step 7
- Return to Unity
- Rebuild the app from File > Build Settings.
Step 8
- Return to the Visual Studio solution previously used to deploy to your HoloLens.
- Select 'Reload All' when prompted.

- Select Debug > Start Without Debugging
Step 9
- Look at one of the spheres.
- Perform the select gesture and watch the sphere drop onto the surface below.
Introduction to HoloLens (Holograms 101)
Chapter 4 – Voice
Step 1
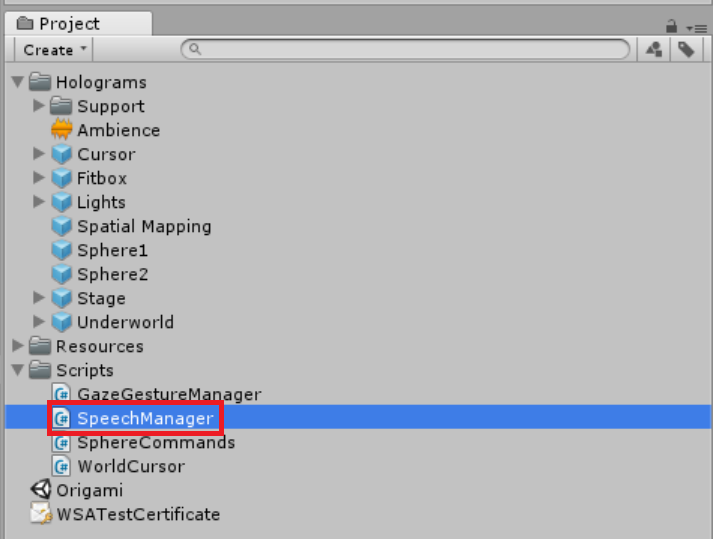
- In the Scripts folder, create a script named SpeechManager.
Step 2
- Double-click the SpeechManager script to open it in Visual Studio.
- Copy and paste this code into SpeechManager.cs:
using System.Collections.Generic;
using System.Linq;
using UnityEngine;
using UnityEngine.Windows.Speech;

public class SpeechManager : MonoBehaviour
{
    KeywordRecognizer keywordRecognizer = null;
    Dictionary<string, System.Action> keywords = new Dictionary<string, System.Action>();

    // Use this for initialization
    void Start()
    {
        keywords.Add("Reset world", () =>
        {
            // Call the OnReset method on every descendant object.
            this.BroadcastMessage("OnReset");
        });

        keywords.Add("Drop Sphere", () =>
        {
            var focusObject = GazeGestureManager.Instance.FocusedObject;
            if (focusObject != null)
            {
                // Call the OnDrop method on just the focused object.
                focusObject.SendMessage("OnDrop", SendMessageOptions.DontRequireReceiver);
            }
        });

        // Tell the KeywordRecognizer about our keywords.
        keywordRecognizer = new KeywordRecognizer(keywords.Keys.ToArray());

        // Register a callback for the KeywordRecognizer and start recognizing!
        keywordRecognizer.OnPhraseRecognized += KeywordRecognizer_OnPhraseRecognized;
        keywordRecognizer.Start();
    }

    private void KeywordRecognizer_OnPhraseRecognized(PhraseRecognizedEventArgs args)
    {
        System.Action keywordAction;
        if (keywords.TryGetValue(args.text, out keywordAction))
        {
            keywordAction.Invoke();
        }
    }
}
- Select File > Save All
Step 3
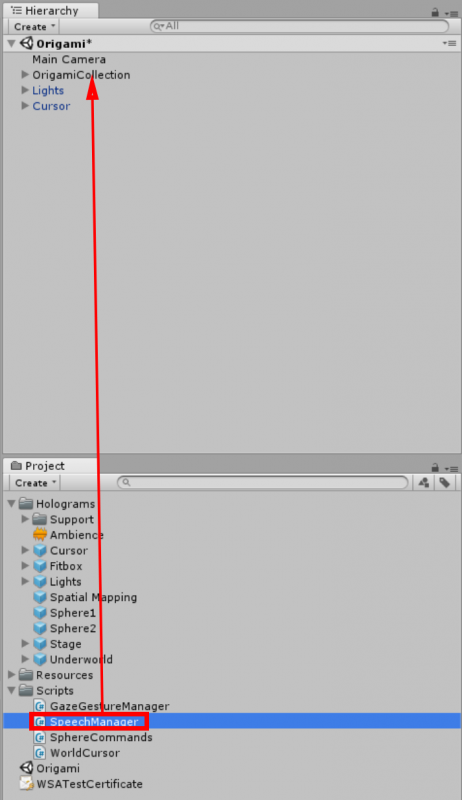
- Drag the SpeechManager script onto the OrigamiCollection object in the Hierarchy
Step 4
- Double-click the SphereCommands script to open it in Visual Studio.
- Update the script to read as follows:
using UnityEngine;

public class SphereCommands : MonoBehaviour
{
    Vector3 originalPosition;

    // Use this for initialization
    void Start()
    {
        // Grab the original local position of the sphere when the app starts.
        originalPosition = this.transform.localPosition;
    }

    // Called by GazeGestureManager when the user performs a Select gesture
    void OnSelect()
    {
        // If the sphere has no Rigidbody component, add one to enable physics.
        if (!this.GetComponent<Rigidbody>())
        {
            var rigidbody = this.gameObject.AddComponent<Rigidbody>();
            rigidbody.collisionDetectionMode = CollisionDetectionMode.Continuous;
        }
    }

    // Called by SpeechManager when the user says the "Reset world" command
    void OnReset()
    {
        // If the sphere has a Rigidbody component, remove it to disable physics.
        var rigidbody = this.GetComponent<Rigidbody>();
        if (rigidbody != null)
        {
            rigidbody.isKinematic = true;
            Destroy(rigidbody);
        }

        // Put the sphere back into its original local position.
        this.transform.localPosition = originalPosition;
    }

    // Called by SpeechManager when the user says the "Drop sphere" command
    void OnDrop()
    {
        // Just do the same logic as a Select gesture.
        OnSelect();
    }
}
- Select File > Save All.
Step 5
- Return to Unity.
- Rebuild the app from File > Build Settings.
Step 6
- Return to the Visual Studio solution previously used to deploy to your HoloLens.
- Select 'Reload All' when prompted.
- Export, build and deploy the app to your HoloLens (carefully repeating the steps from previous chapters!).
Step 7
- Look at one of the spheres, and say "Drop Sphere".
- Say "Reset World" to bring them back to their initial positions.
Introduction to HoloLens (Holograms 101)
Chapter 5 – Spatial Sound
Step 1
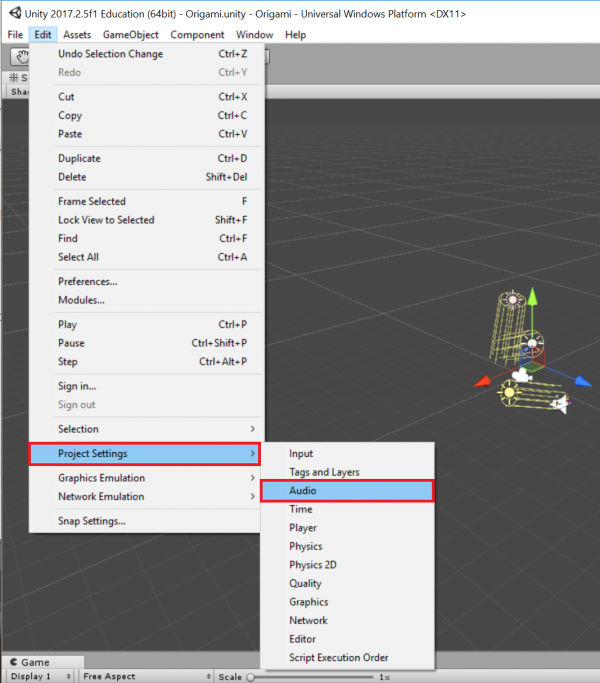
- In Unity select from the top menu Edit > Project Settings > Audio
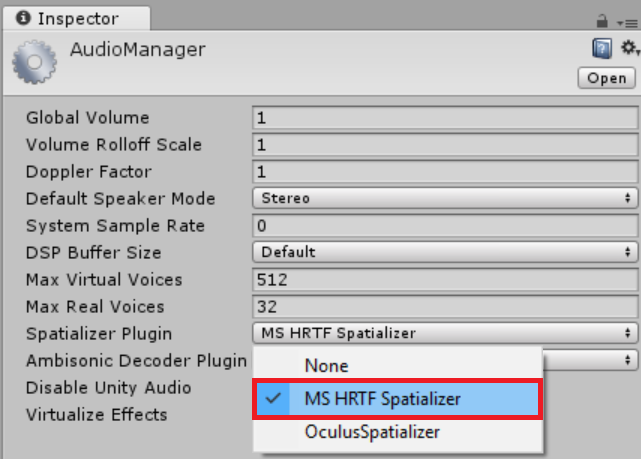
- In the Inspector Panel on the right side, find the Spatializer Plugin setting and select MS HRTF Spatializer.
Step 2
- From the Holograms folder in the Project panel, drag the Ambience object onto the OrigamiCollection object in the Hierarchy Panel.
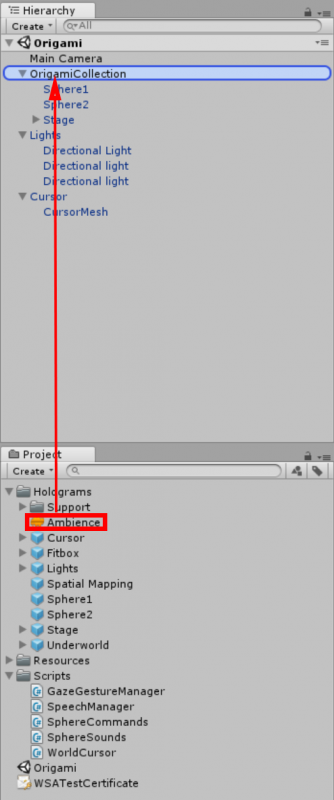
Step 3
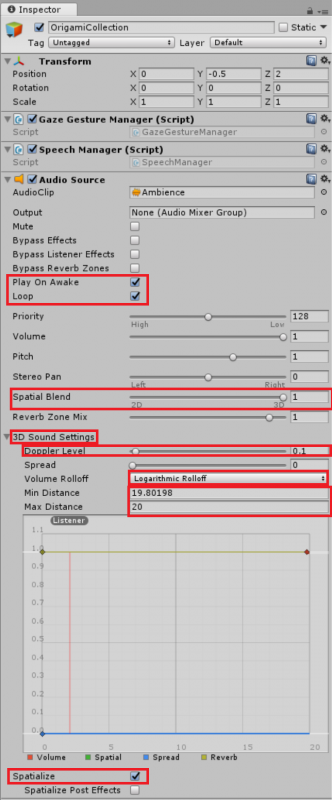
- Select OrigamiCollection and find the Audio Source component in the Inspector panel.
- Change these properties:
- Check the Play On Awake.
- Change Spatial Blend to 3D by dragging the slider all the way to the right. The value should change from 0 to 1 when you move the slider.
- Check the Loop property.
- Expand 3D Sound Settings, and enter 0.1 for Doppler Level.
- Set Volume Rolloff to Logarithmic Rolloff.
- Set Max Distance to 20.
- Check the Spatialize property.
Step 4
- In the Scripts folder, create a script named SphereSounds.
Step 5
- Double-click the SphereSounds script to open it in Visual Studio.
- Replace the default code in SphereSounds with the following code:
using UnityEngine;

public class SphereSounds : MonoBehaviour
{
    AudioSource impactAudioSource = null;
    AudioSource rollingAudioSource = null;

    bool rolling = false;

    void Start()
    {
        // Add an AudioSource component and set up some defaults
        impactAudioSource = gameObject.AddComponent<AudioSource>();
        impactAudioSource.playOnAwake = false;
        impactAudioSource.spatialize = true;
        impactAudioSource.spatialBlend = 1.0f;
        impactAudioSource.dopplerLevel = 0.0f;
        impactAudioSource.rolloffMode = AudioRolloffMode.Logarithmic;
        impactAudioSource.maxDistance = 20f;

        rollingAudioSource = gameObject.AddComponent<AudioSource>();
        rollingAudioSource.playOnAwake = false;
        rollingAudioSource.spatialize = true;
        rollingAudioSource.spatialBlend = 1.0f;
        rollingAudioSource.dopplerLevel = 0.0f;
        rollingAudioSource.rolloffMode = AudioRolloffMode.Logarithmic;
        rollingAudioSource.maxDistance = 20f;
        rollingAudioSource.loop = true;

        // Load the Sphere sounds from the Resources folder
        impactAudioSource.clip = Resources.Load<AudioClip>("Impact");
        rollingAudioSource.clip = Resources.Load<AudioClip>("Rolling");
    }

    // Occurs when this object starts colliding with another object
    void OnCollisionEnter(Collision collision)
    {
        // Play an impact sound if the sphere impacts strongly enough.
        if (collision.relativeVelocity.magnitude >= 0.1f)
        {
            impactAudioSource.Play();
        }
    }

    // Occurs each frame that this object continues to collide with another object
    void OnCollisionStay(Collision collision)
    {
        Rigidbody rigid = gameObject.GetComponent<Rigidbody>();

        // Play a rolling sound if the sphere is rolling fast enough.
        if (!rolling && rigid.velocity.magnitude >= 0.01f)
        {
            rolling = true;
            rollingAudioSource.Play();
        }
        // Stop the rolling sound if rolling slows down.
        else if (rolling && rigid.velocity.magnitude < 0.01f)
        {
            rolling = false;
            rollingAudioSource.Stop();
        }
    }

    // Occurs when this object stops colliding with another object
    void OnCollisionExit(Collision collision)
    {
        // Stop the rolling sound if the object falls off and stops colliding.
        if (rolling)
        {
            rolling = false;
            impactAudioSource.Stop();
            rollingAudioSource.Stop();
        }
    }
}
- Select File > Save All.
Step 6
- Return to Unity
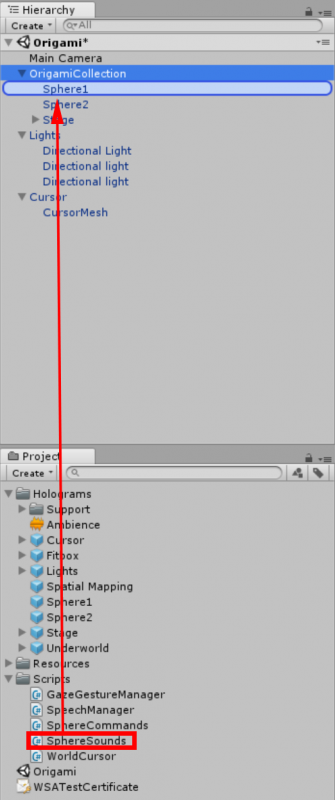
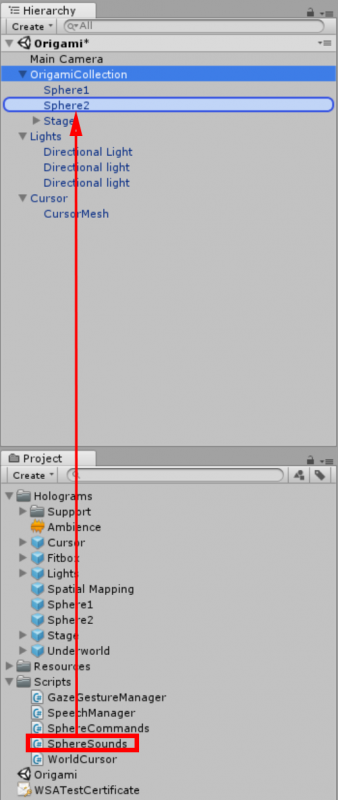
- Drag and drop SphereSounds to the Sphere1 object in the Hierarchy
- Drag and drop SphereSounds to the Sphere2 object in the Hierarchy.
Step 7
- Rebuild the app from File > Build Settings.
Step 8
- Return to the Visual Studio solution previously used to deploy to your HoloLens.
- Select 'Reload All' when prompted.
- Export, build and deploy the app to your HoloLens (carefully repeating the steps from previous chapters!).
Step 9
- Put on the HoloLens.
- Move closer and further from the Stage and turn side-to-side to hear the sounds change.
Introduction to HoloLens (Holograms 101)
Chapter 6 – Spatial Mapping
Step 1
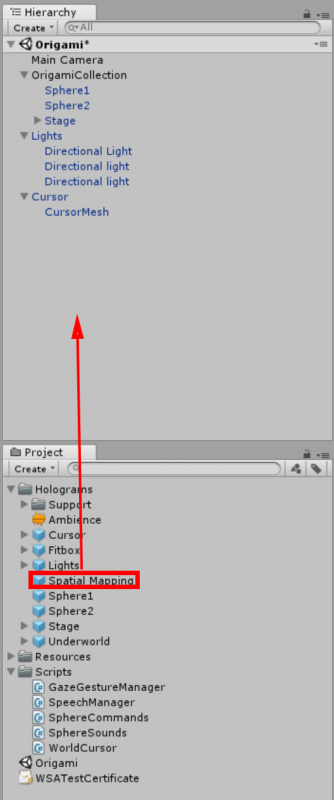
- Click on the Holograms folder in the Project panel.
- Drag the Spatial Mapping asset into the root of the Hierarchy.
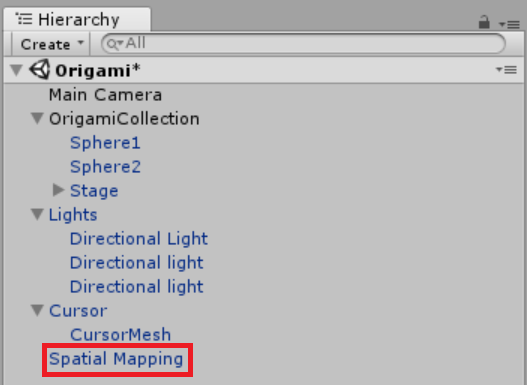
Step 2
- Click on the Spatial Mapping object in the Hierarchy.
- In the Inspector panel, change the following properties:
- Check the Draw Visual Meshes box.
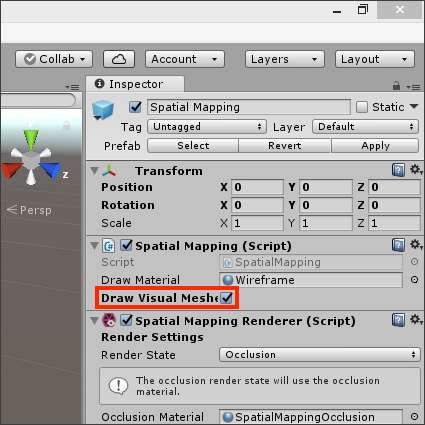
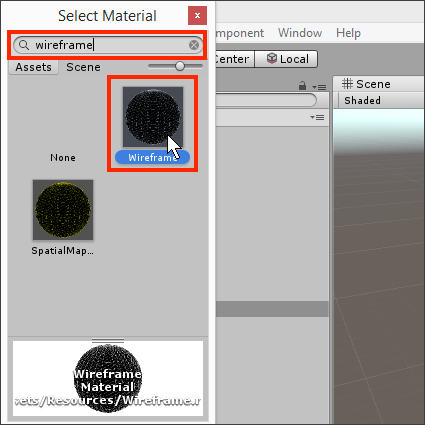
- Locate Draw Material and click the circle on the right.
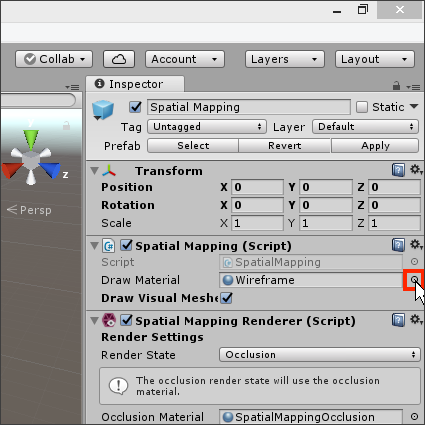
- Type "wireframe" into the search field at the top. Click on the result and then close the window. When you do this, the value for Draw Material should get set to Wireframe.
Step 3
- Export, build and deploy the app to your HoloLens (carefully repeating the steps from previous chapters!).
- When the app runs, a wireframe mesh will overlay your real world.
- Watch how a rolling sphere will fall off the stage, and onto the floor!
Step 4
- Return to Unity
- In the Scripts folder, create a script named TapToPlaceParent.
Step 5
- Double-click the TapToPlaceParent script to open it in Visual Studio
- and replace the existing code the following code:
using UnityEngine;

public class TapToPlaceParent : MonoBehaviour
{
    bool placing = false;

    // Called by GazeGestureManager when the user performs a Select gesture
    void OnSelect()
    {
        // On each Select gesture, toggle whether the user is in placing mode.
        placing = !placing;

        // If the user is in placing mode, display the spatial mapping mesh.
        if (placing)
        {
            SpatialMapping.Instance.DrawVisualMeshes = true;
        }
        // If the user is not in placing mode, hide the spatial mapping mesh.
        else
        {
            SpatialMapping.Instance.DrawVisualMeshes = false;
        }
    }

    // Update is called once per frame
    void Update()
    {
        // If the user is in placing mode,
        // update the placement to match the user's gaze.

        if (placing)
        {
            // Do a raycast into the world that will only hit the Spatial Mapping mesh.
            var headPosition = Camera.main.transform.position;
            var gazeDirection = Camera.main.transform.forward;

            RaycastHit hitInfo;
            if (Physics.Raycast(headPosition, gazeDirection, out hitInfo,
                30.0f, SpatialMapping.PhysicsRaycastMask))
            {
                // Move this object's parent object to
                // where the raycast hit the Spatial Mapping mesh.
                this.transform.parent.position = hitInfo.point;

                // Rotate this object's parent object to face the user.
                Quaternion toQuat = Camera.main.transform.localRotation;
                toQuat.x = 0;
                toQuat.z = 0;
                this.transform.parent.rotation = toQuat;
            }
        }
    }
}
- Select File > Save All.
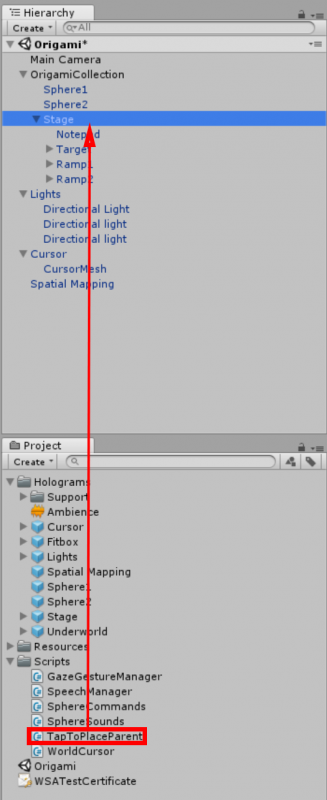
Step 6
- Return to Unity.
- In the Hierarchy, expand the OrigamiCollection and select the Stage object.
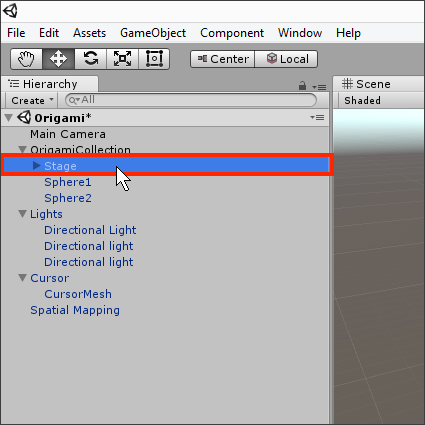
- Drag the TapToPlaceParent script onto the Stage object.
Step 7
- Export, build and deploy the app (carefully repeating the steps from previous chapters!).
- Now you should now be able to place the game in a specific location by gazing at it, using the Select gesture and then moving to a new location, and using the Select gesture again.
Introduction to HoloLens (Holograms 101)
Chapter 7 – Holographic fun
Step 1
- Select the Holograms folder in the Project Panel
- Drag Underworld into the Hierarchy to be a child of OrigamiCollection.

Step 2
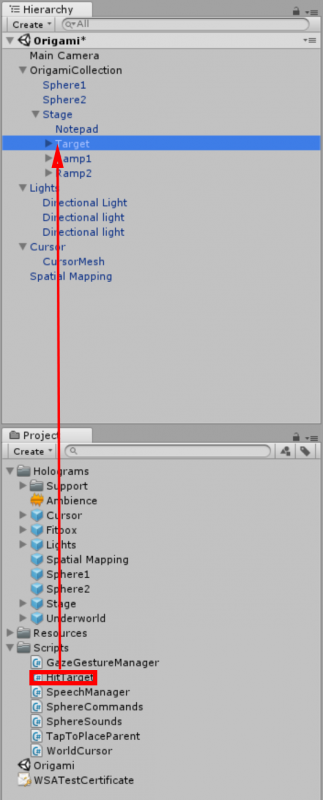
- In the Scripts folder, create a script named HitTarget.
- Double-click the HitTarget script to open it in Visual Studio.
- Replace the existing code with this:
using UnityEngine;

public class HitTarget : MonoBehaviour
{
    // These public fields become settable properties in the Unity editor.
    public GameObject underworld;
    public GameObject objectToHide;

    // Occurs when this object starts colliding with another object
    void OnCollisionEnter(Collision collision)
    {
        // Hide the stage and show the underworld.
        objectToHide.SetActive(false);
        underworld.SetActive(true);

        // Disable Spatial Mapping to let the spheres enter the underworld.
        SpatialMapping.Instance.MappingEnabled = false;
    }
}
- Select File > Save All.
Step 3
- Return to Unity
- In the Hierarchy, expand the OrigamiCollection.
- Expand the Stage object and select the Target object.
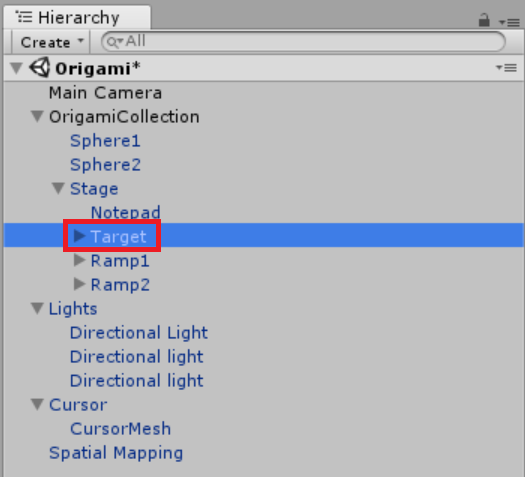
- Drag the HitTarget script onto the Target object.
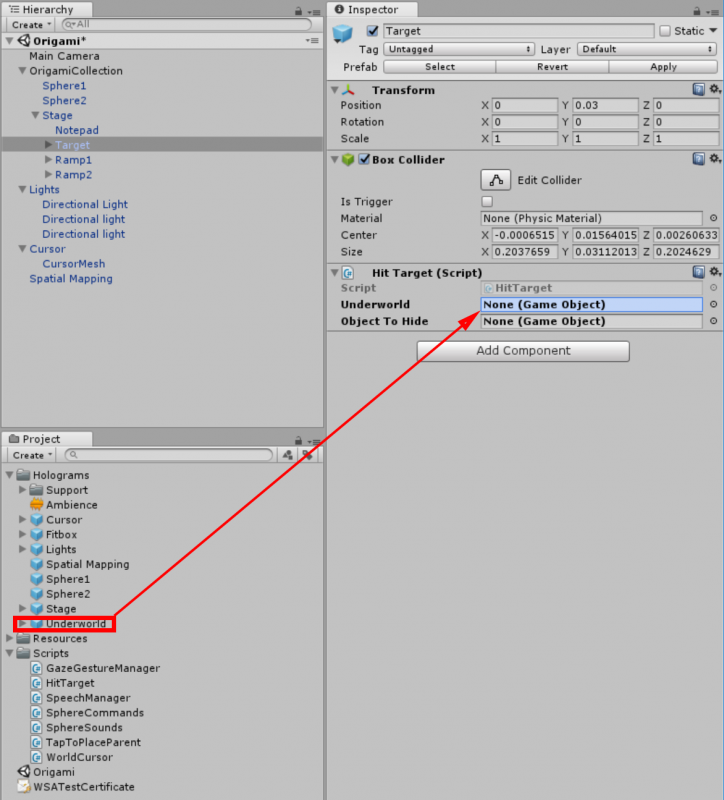
- Two public properties are now visible on the Hit Target component and need to reference objects in our scene:
- Drag Underworld from the Hierarchy panel to the Underworld property on the Hit Target component.
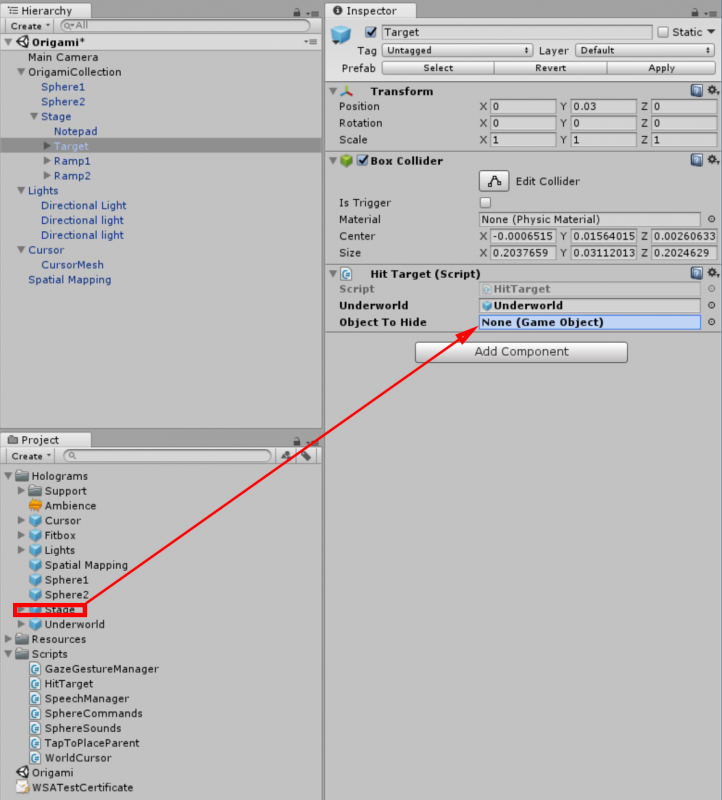
- Drag Stage from the Hierarchy panel to the Object to Hide property on the Hit Target component.
Step 5
- Export, build and deploy the app. (carefully repeating the steps from previous chapters!).
- Place the Origami Collection on the floor, and then use the Select gesture to make a sphere drop.
- When the sphere hits the target (blue fan), an explosion will occur. The collection will be hidden and a hole to the underworld will appear.