Introduction to Project Management using GitLab
Contents:
1. What Is Git & GitLab
2. Installing Git for MacOS
3. Installing Git for Windows
4. Launching the Windows Command Line
5. Initializing Your First Git Project
6. Uploading Your Project to Sheridan’s GitLab
7. Uploading Changes to Your GitLab Project
8. Downloading Changes from Your GitLab Project
9. Downloading a Project from GitLab
Note for Windows Users
This guide was written with Mac users in mind, but the steps are essentially the same for Windows. For a Windows Installation Guide click here, and to learn about opening the Windows Terminal (Command Line) click here.
What is Git & GitLab?
At its most basic, GitLab can be used as cloud storage for your project files, making it easy for you and others to access your projects from anywhere. Projects uploaded and downloaded through GitLab are known as “Git repositories”.
A Git repository is a local or remote project folder that has been initialized as a Git repository, allowing changes to your projects to be saved as “commits”. Each commit in your project’s history is recorded, allowing you to revert back to previous versions easily. Gits can also be branched, allowing you to create offshoots of your project for additional development, which can be merged back into your original project after testing.
Below is a guide to the basics of uploading and downloading your Git projects to and from the GitLab cloud. A guide to using some of the more exciting features of Gits & GitLab can be found here: https://git-scm.com/book/en/v2.
Installing Git
Installing Git for MacOS
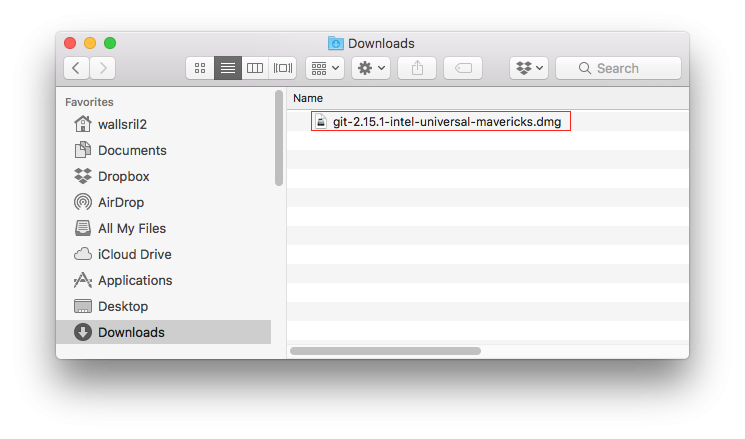
Step 1
• Download the Latest Git for Mac installer
(https://git-scm.com/download/mac)
Step 2
• Double-click the install file in your downloads folder. Your filename may be different than in the image below.
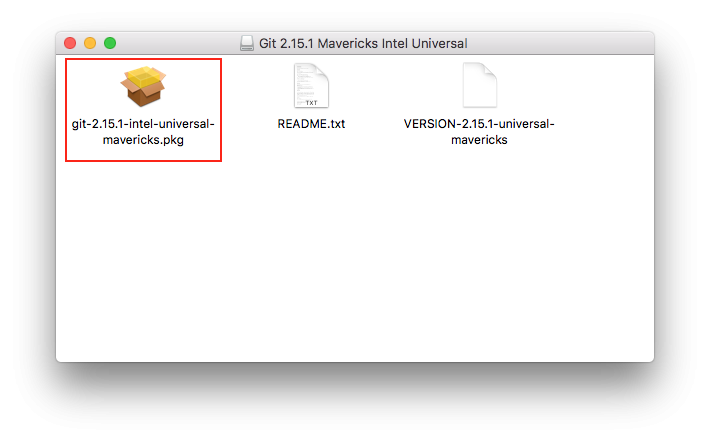
Step 3
• Double-click the package (.pkg) file with the same name as the install file you launched in Step 2.
Step 4
• Depending on your security settings, the installation may be blocked due to being from an “unidentified developer”.
Note: If you do not see a warning like the one below, skip down to Step 5.
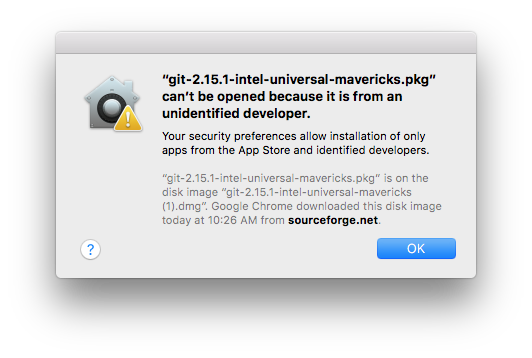
• To fix this, click the Apple icon in the upper left corner of your screen, and select “System Preferences”.
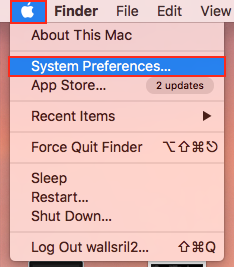
• From “System Preferences” screen, select “Security & Privacy”.
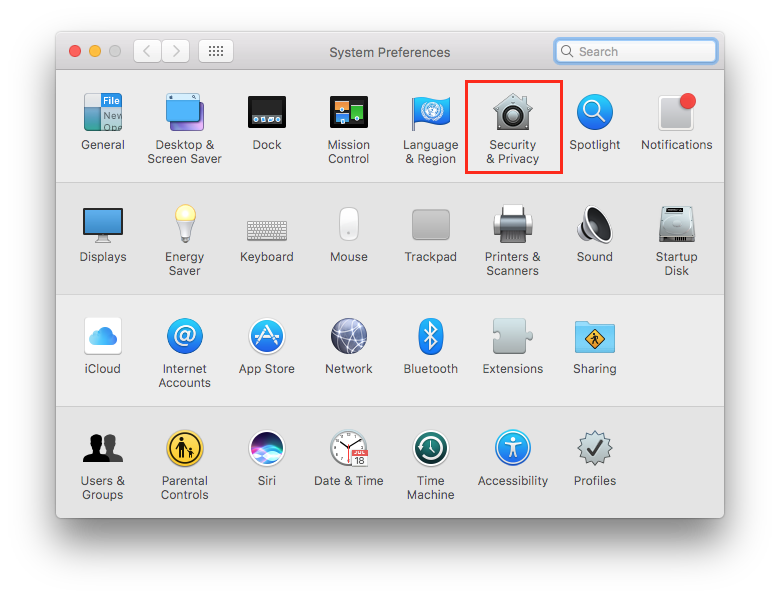
• On the “Security & Privacy” screen, select “Open Anyway”

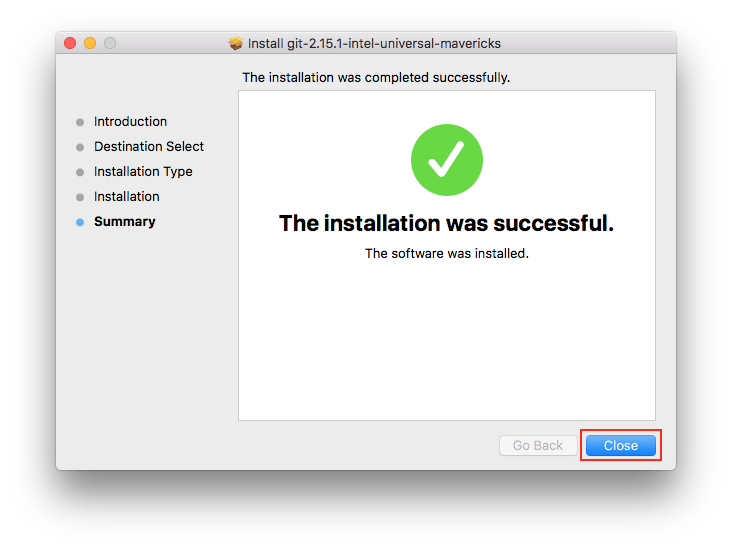
Step 5
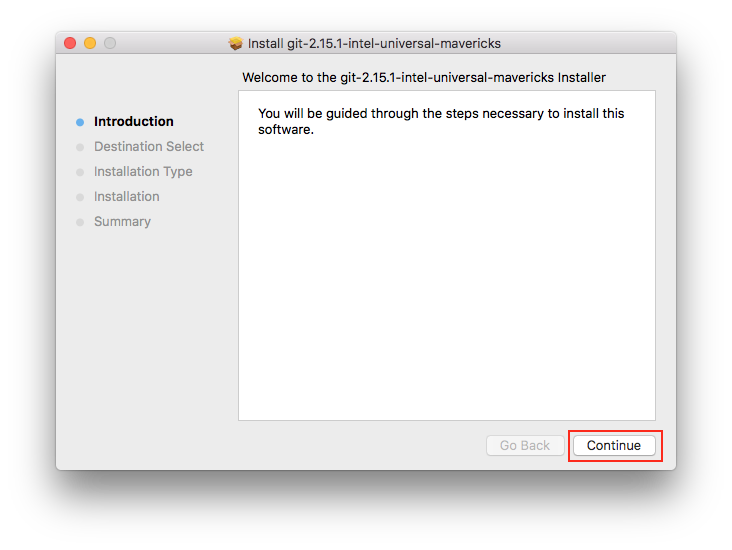
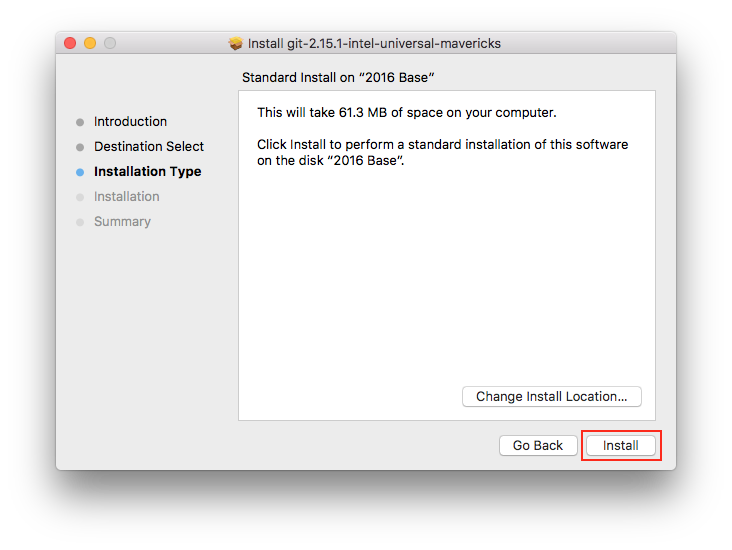
• Proceed through the next few screens, leaving the default settings.
Step 6
• Open Terminal (Applications > Utilities > Terminal)
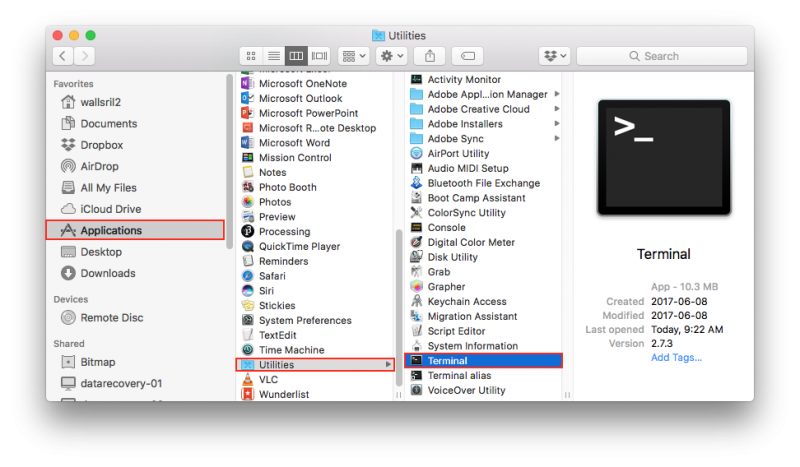
• This will launch a Terminal window like the one below:

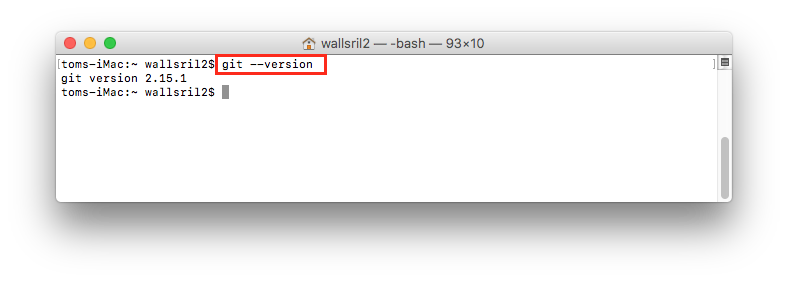
Step 7
• To ensure Git was installed correctly, type “git --version”, then press “return”. If it was installed correctly, you should see a version number like in the image below. Depending how long it’s been since this tutorial was written, your version number may vary.
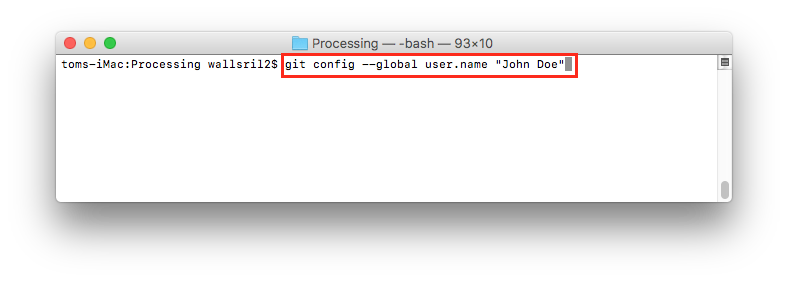
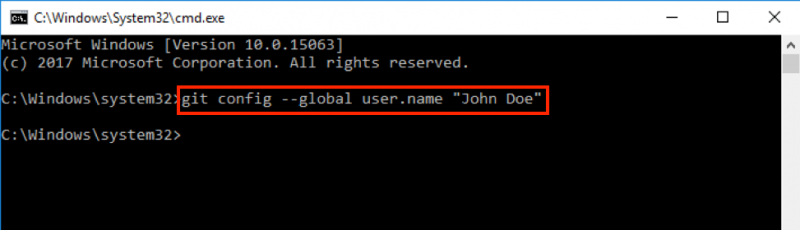
Step 8
• Type the command 'git config --global user.name "John Doe"' to set your Git user name.
Note: The user name does not have to be your Sheridan user name. It can be any name you wish to be used to identify your projects (Typically your full name).
• If successful, you will not see any message.
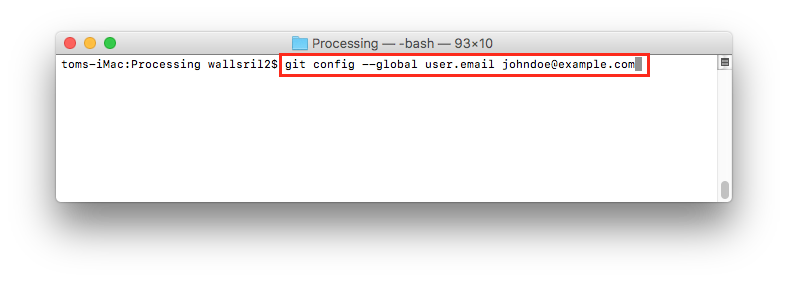
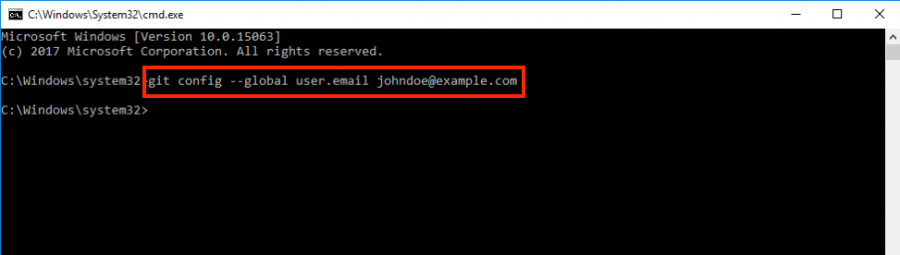
Step 9
Type the command “git config --global user.email johndoe@example.com” to set your email address.
Note: The email does not have to be your Sheridan email address. It will be the email address stamped on all of your projects.
If successful, you will not see any message.
Your Git installation is now complete! If you're using MacOS, click here to get started!
Installing Git
Installing Git for Windows
Step 1
• Download the Windows installer from: http://git-scm.com/download/win
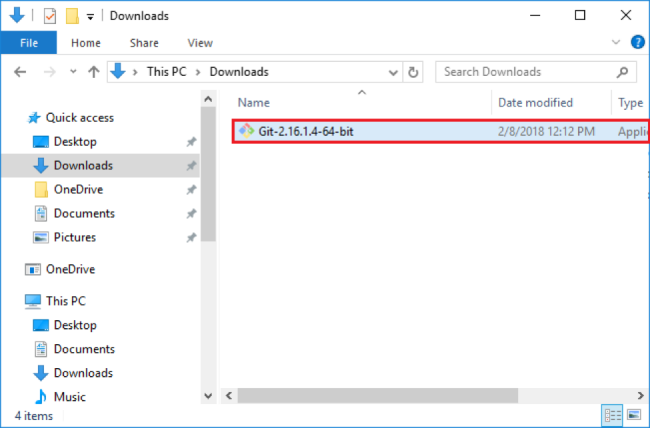
Step 2
• Run the installer from your “Downloads” folder. Your installer’s filename may be different.
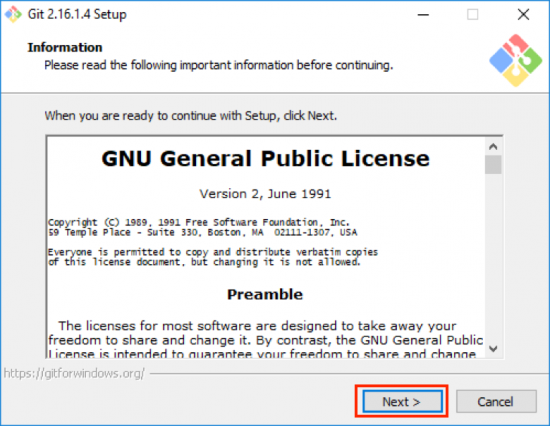
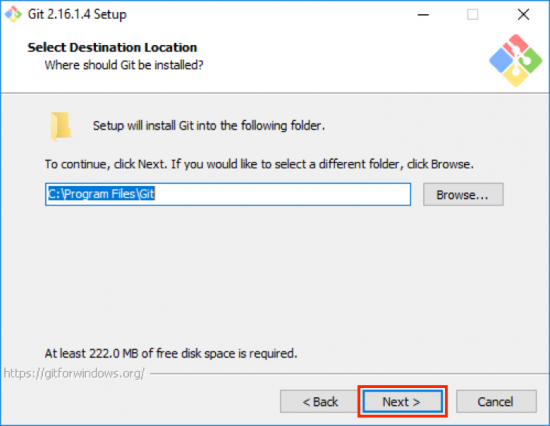
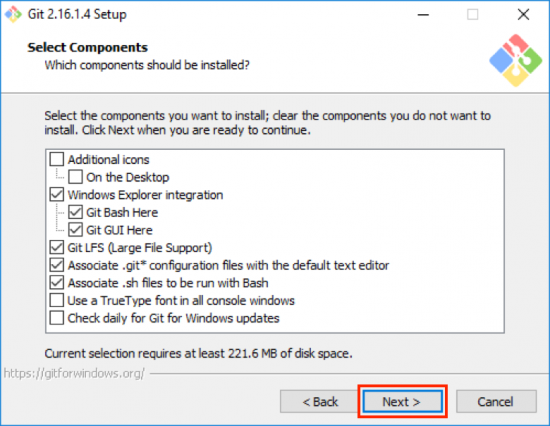
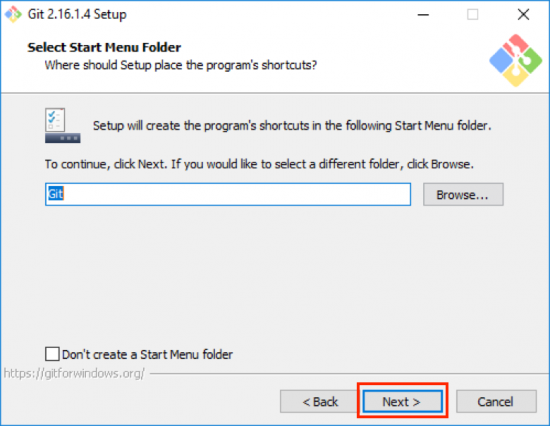
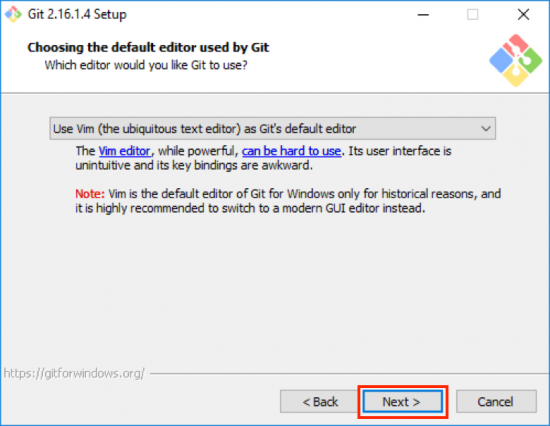
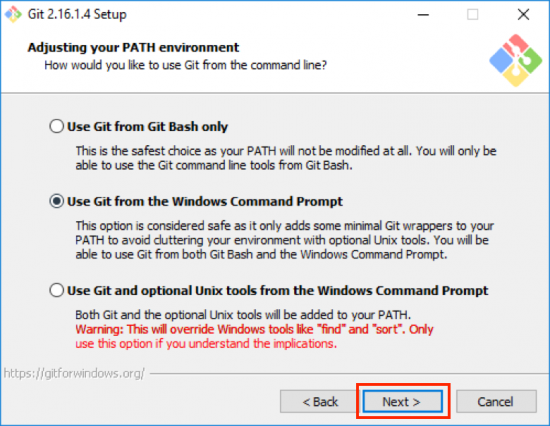
Step 3
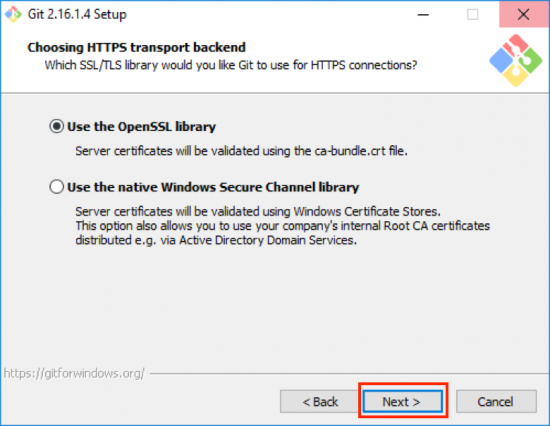
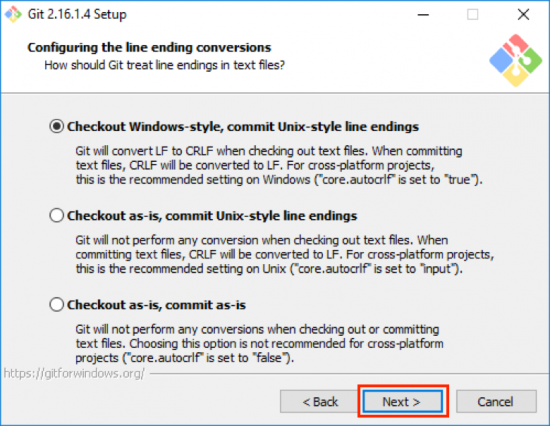
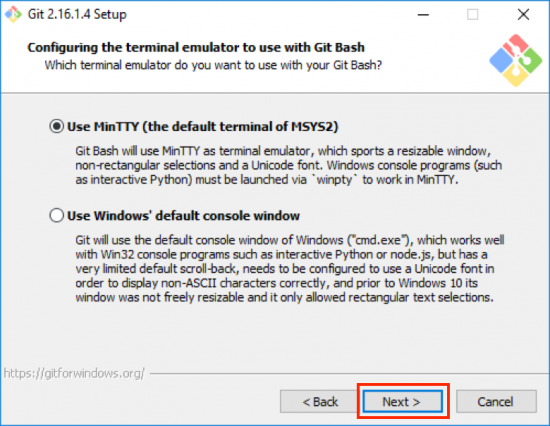
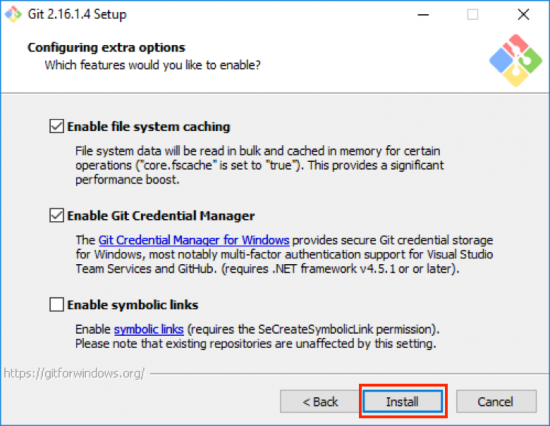
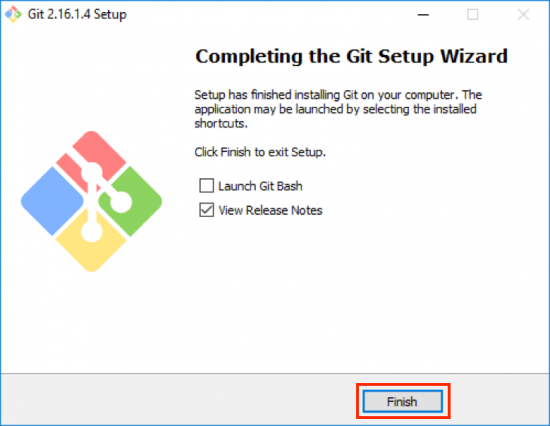
• Continue through each screen, then install.
Note: The default settings should not be changed!
Launching the Windows Command Line & Git Settings
Step 1
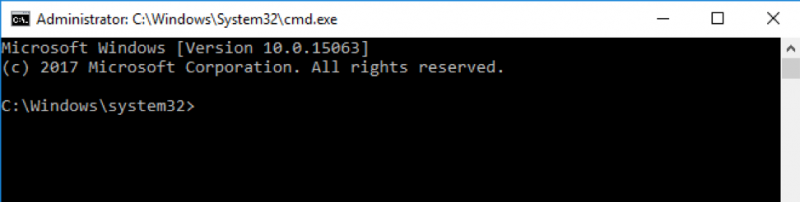
• Use the bottom right Windows search bar to search for “cmd.exe”. Right-click cmd.exe, and “Run as administrator”
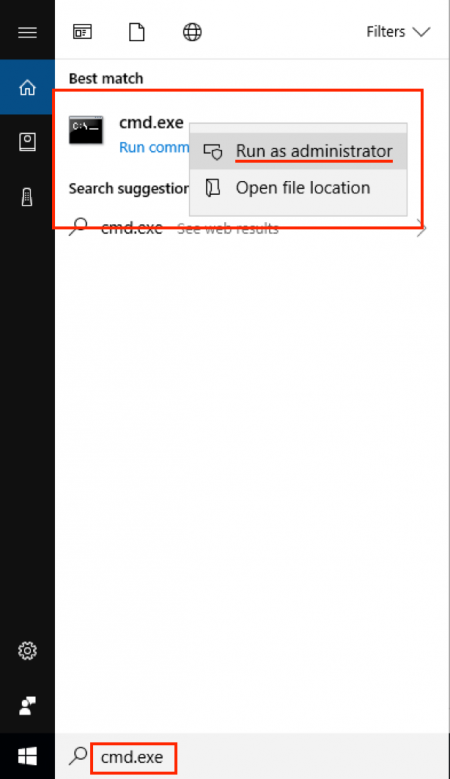
• You will see a window like the image below.
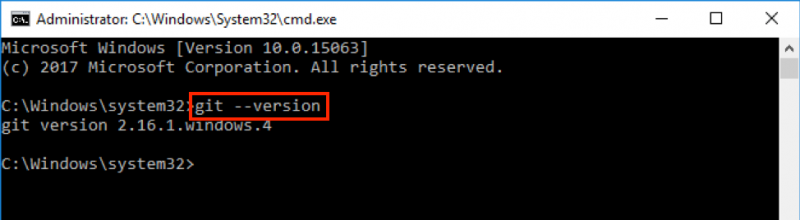
Step 2
• Type the command “git --version”, then enter/return.
• If Git was installed correctly, you will see a version number like in the image below.
Step 3
• Type the command “git config --global user.name “John Doe””, followed by enter/return. Replace “John Doe” with the user name you wish to use.
Note: This does not have to be your Sheridan user name. This is the name that will be stamped on all of your projects.
Step 4
Type the command “git config --global user.email johndoe@example.com”, then press enter/return. Replace "johndoe@example.com" with the email you wish to use.
Note: This does not have to be your Sheridan email. This is the email address that will be stamped on all of your projects.
Your Git installation is now complete, and ready to use!
Initializing Your First Git Project
Step 1
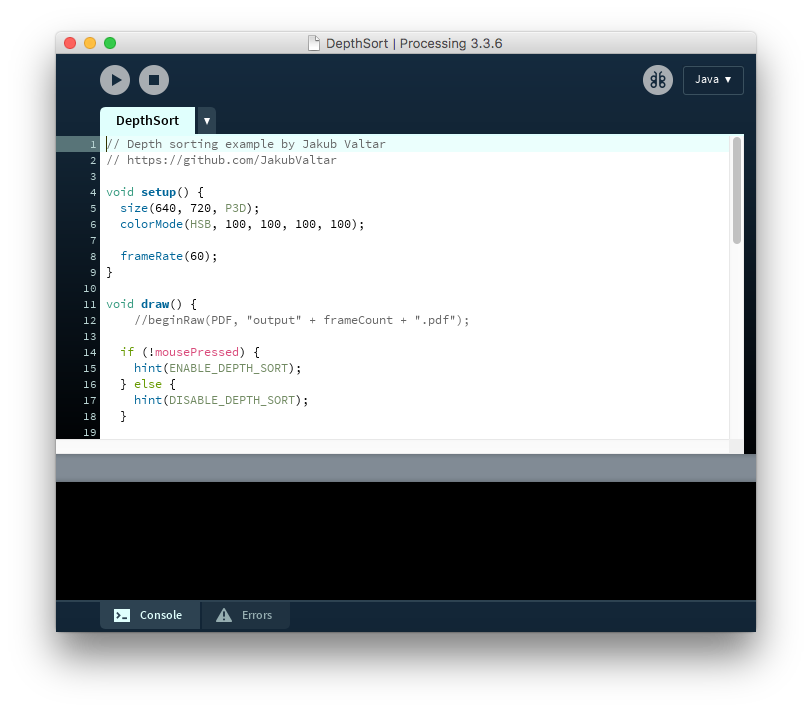
• Launch the application "Processing".
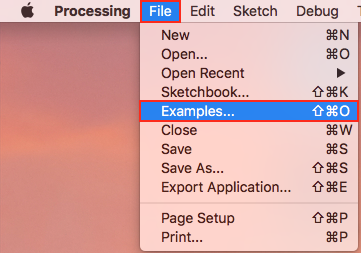
Step 2
• Select 'File > Examples…' from Processing’s top menu bar.
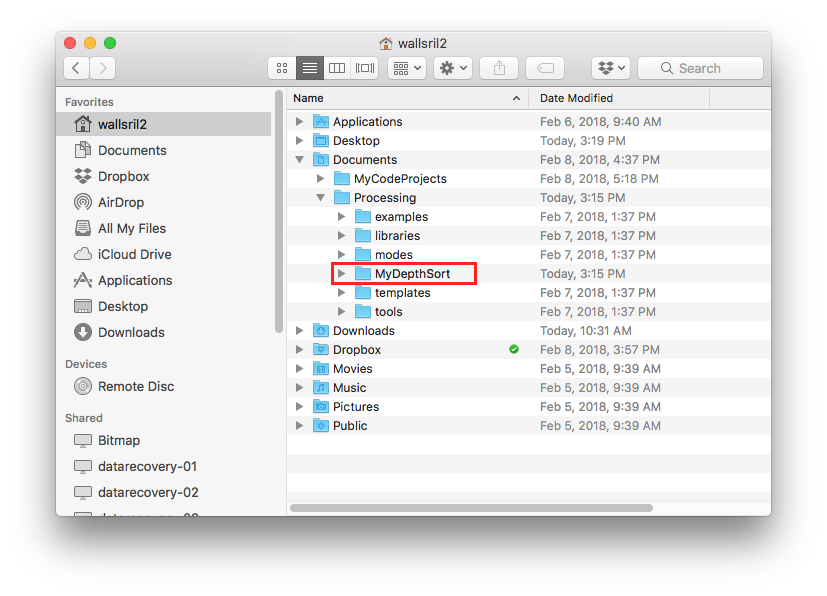
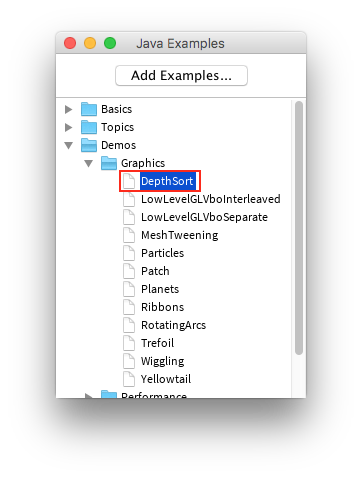
Step 3
• Select 'Demo > Graphics > DepthSort'. Double-click to open the example.
Step 4
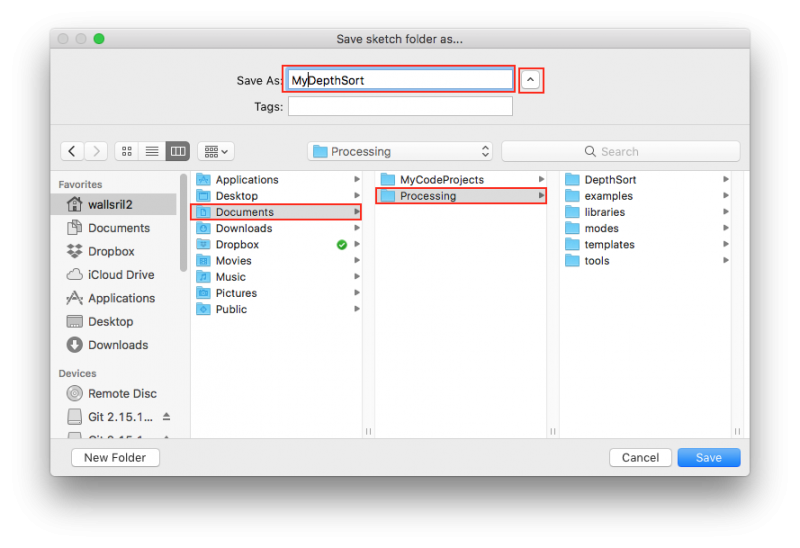
Select 'File > Save As…' from Processing’s top menu bar.
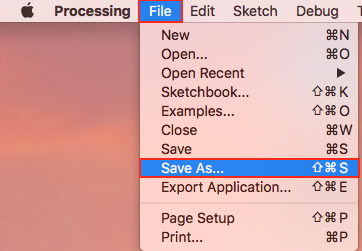
• Save the project as “MyDepthSort” under Documents > Processing
Step 5
• Launch a Terminal window.
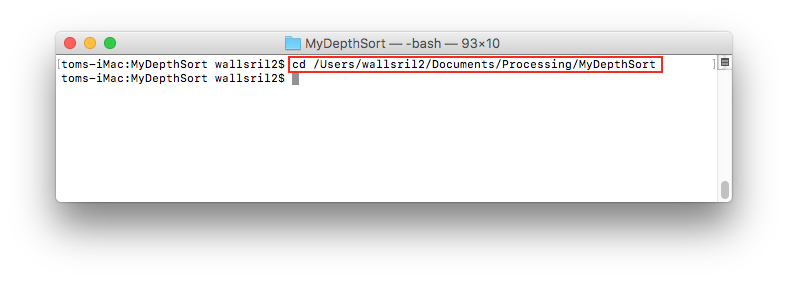
Step 6
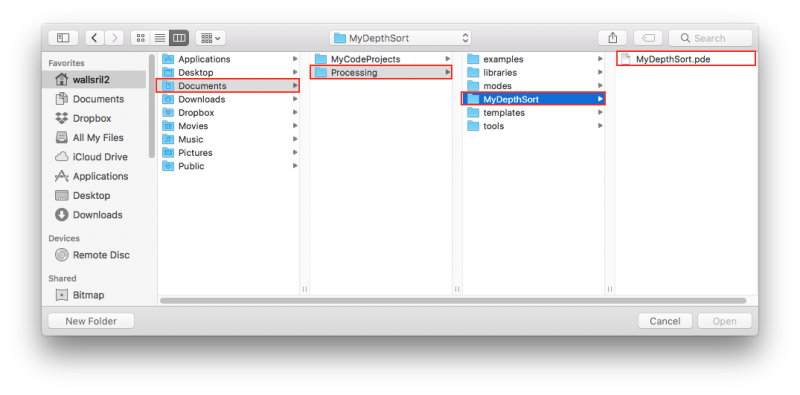
Navigate to your MyDepthSort project typing the command “cd /Users/<your_username>/Documents/Processing/MyDepthSort”, and pressing "return".
Note: <your_username> must be replaced with your local MacOS user name
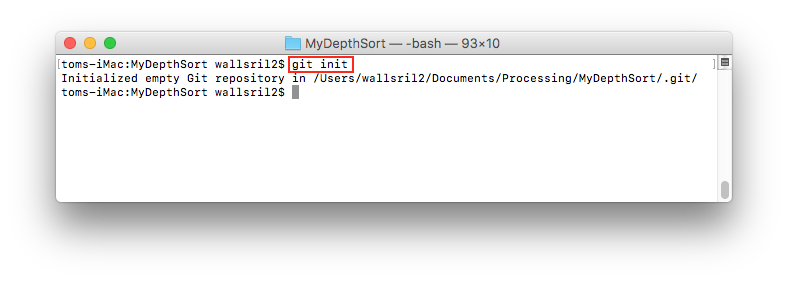
Step 7
• Now that you’re in your MyDepthSort project directory, type the command “git init”.
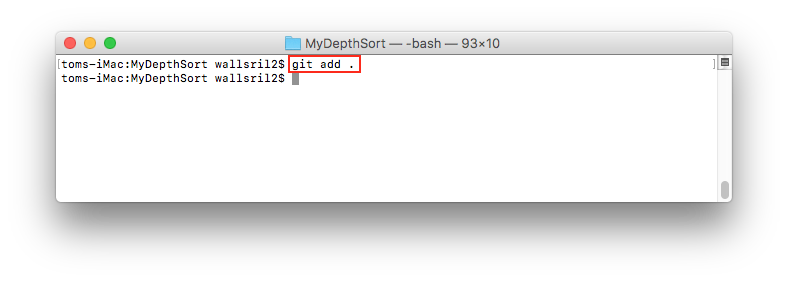
Step 8
• Type the command “git add .”
Step 9
Type the command 'git commit –m “My First Version”'.
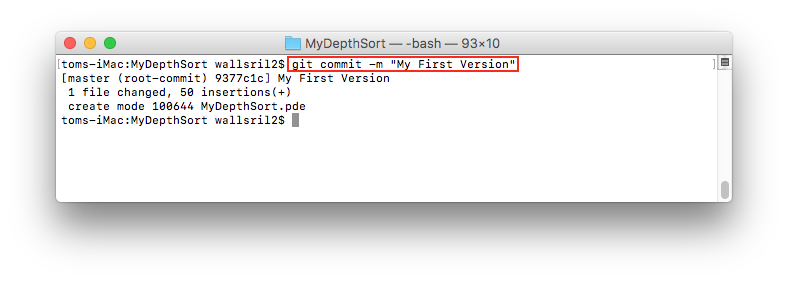
Your MyDepthSort project is now set up as a Git Project!
Uploading your Project to Sheridan’s GitLab
Step 1
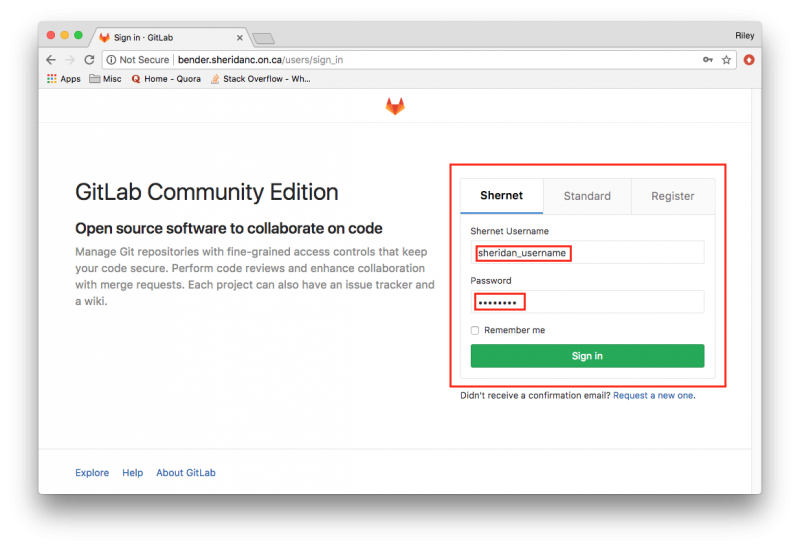
• Sheridan’s GitLab page can be accessed through the URL: bender.sheridanc.on.ca . Click the link now.
Step 2
• Log in using your Sheridan user name and password.
Step 3
• Select "New Project"
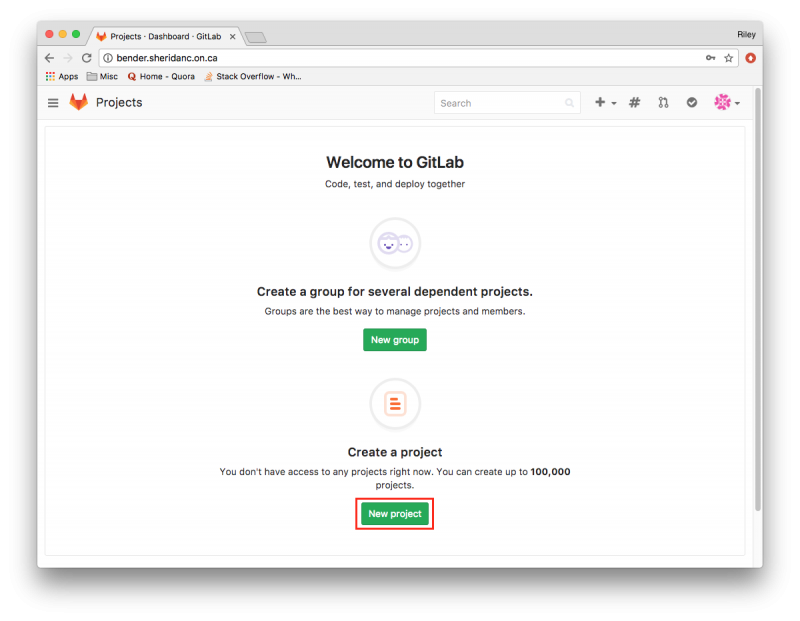
Step 4
• Set your project name to “MyDepthSort” and leave the privacy set to Private. Click “Create Project”
Note: By default, your project visibility will be set to private, meaning only you have access unless other users are given access explicitly. Internal visibility will allow your project to be viewed and cloned by any Sheridan student, and external visibility will allow your project to be viewed and cloned by any GitLab user. For school projects, make sure you leave the visibility set to private.

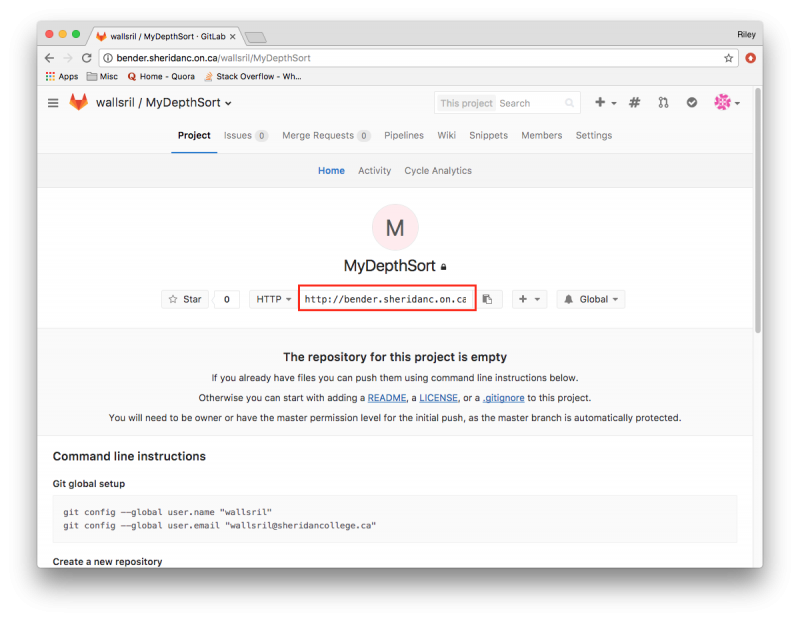
• You will see a message in blue that says “Project Created Successfully”, and you’ll be taken to your new project’s home page.
Step 5
• Copy your project’s URL, and paste it somewhere for later use.
• The URL should look like 'http://bender.sheridanc.on.ca/<sheridan_username>/MyDepthSort.git' with <sheridan_username> replaced by your personal Sheridan user name.
Step 6
Minimize your browser for now, and open your Terminal again.
Step 7
• Navigate to your local MyDepthSort project directory by typing the command “cd /Users/<your_username>/Documents/Processing/MyDepthSort”, then pressing “return”
Note: <your_username> must be replaced with your local MacOS login name
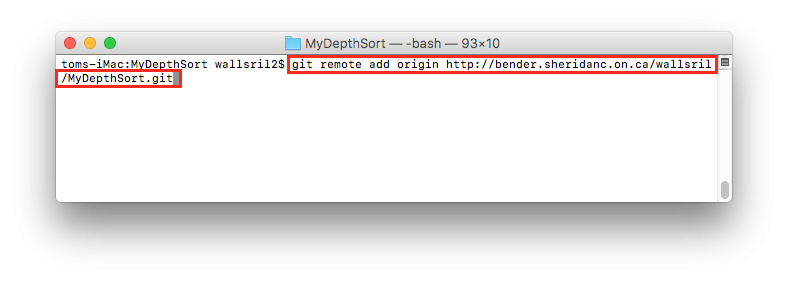
Step 8
Type the command “git remote add origin http://bender.sheridanc.on.ca/<sheridan_username>/MyDepthSort.git”. The URL in this command is the URL you saved in Step 5.
Note: The <sheridan_username> in the example URL above must be replaced with the user name you use to log in to Sheridan services.
Step 9
• Type the command “git push origin master”. You will be prompted for your Sheridan user name and password.
Note: Your password will not be visible as you enter it. Simply type your password and press “return”.
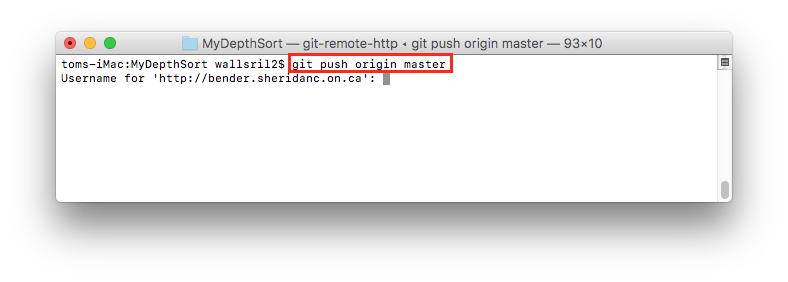
• If successful, you should receive a message similar to the one in the image below.

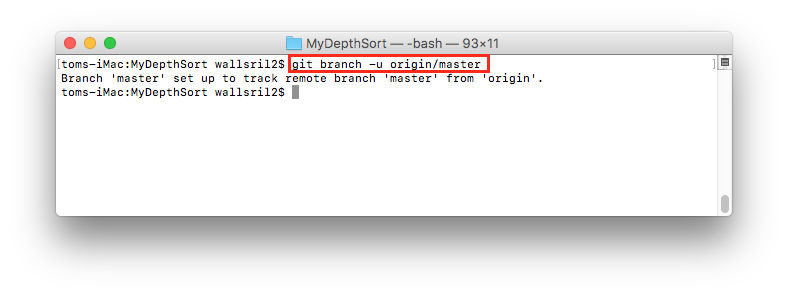
Step 10
• Type the command “git branch -u origin/master”. When successful, you should receive the message below.
Step 11
• You have now successfully uploaded your MyDepthSort project to your personal GitLab page!
• To ensure that your project has been uploaded successfully, navigate back to bender.sheridanc.on.ca.
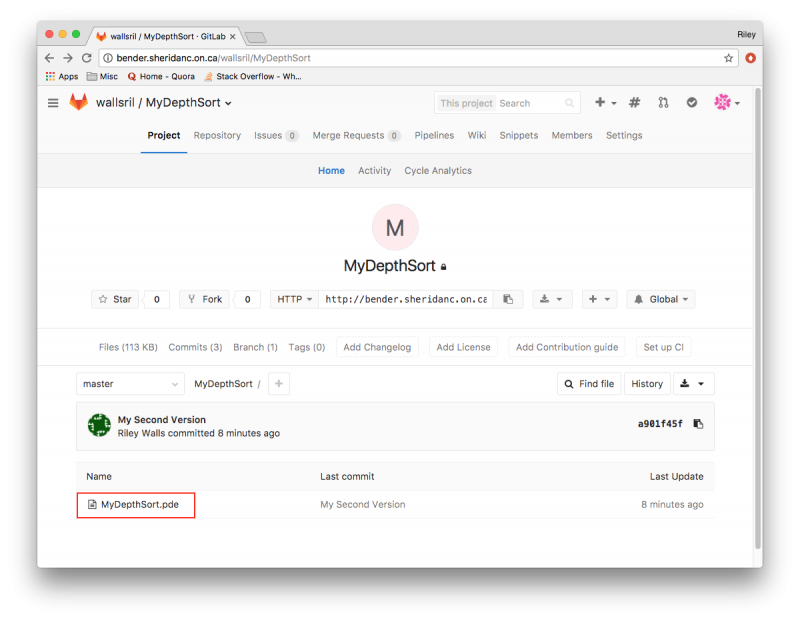
• Select your MyDepthSort project
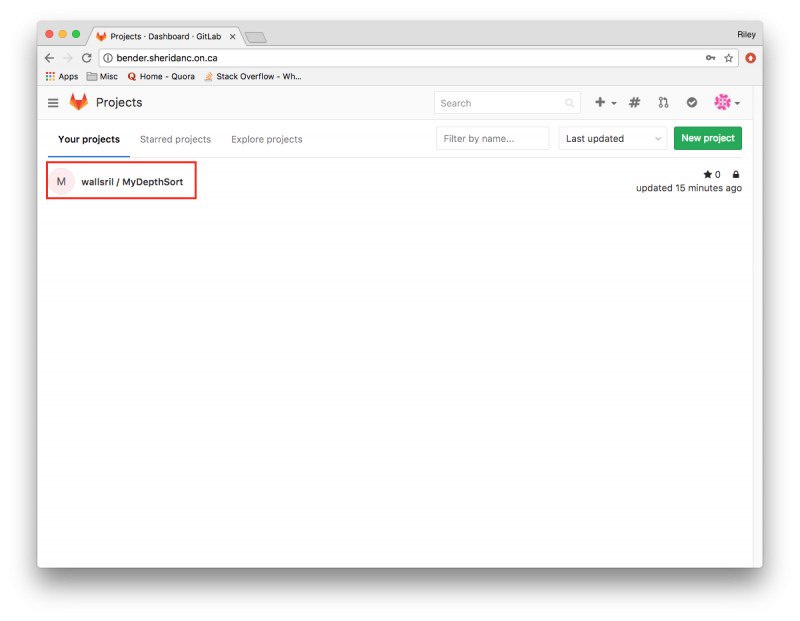
Step 12
• If your project was uploaded successfully, you should see “MyDepthSort.pde” in your project file list.

Uploading Changes to Your GitLab Project
Step 1
• Open Processing, and select 'File > Open' from the top menu bar.

Step 2
• Navigate to your MyDepthSort project directory and select “MyDepthSort.pde”. Click “Open”.
Step 3
• At the top of the script, add a new comment line “//My First Edit”.
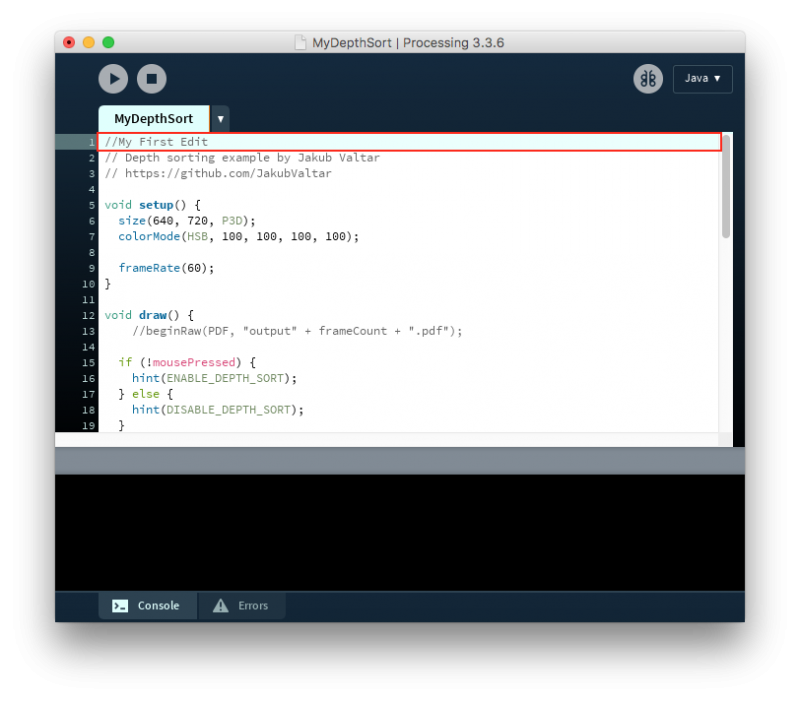
Step 4
• Select 'File > Save' from the top menu bar.

Step 5
• Close Processing.
• Open a Terminal window.
Step 6
Navigate to your MyDepthSort project by typing the command “cd /Users/<your_username>/Documents/Processing/MyDepthSort”.
Step 7
Type the command “git add .”
Step 8
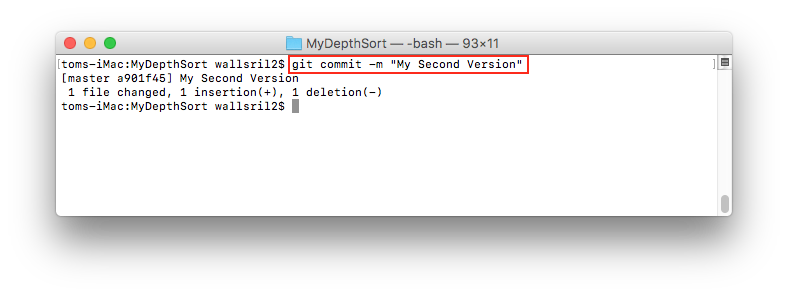
• Type the command 'git commit –m “My Second Version”'.
• If successful, you’ll see a message similar to the one below.
Step 9
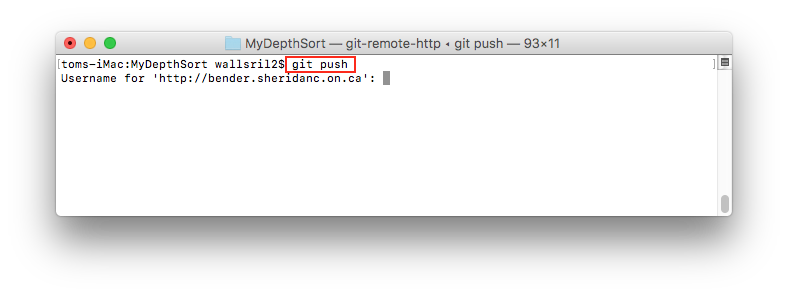
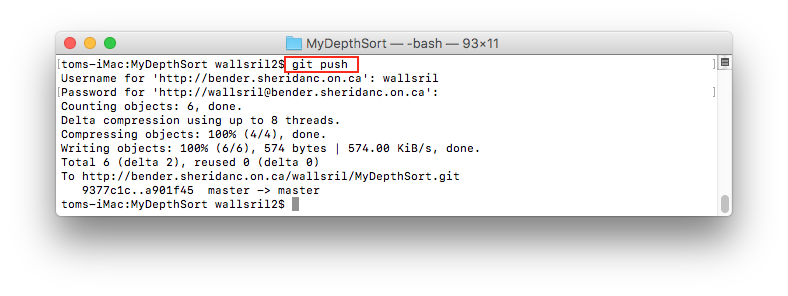
• Type the command “git push”, and press “return”. You will be prompted for your Sheridan user name and password.
• If successful, you’ll see a message similar to the one below.
Your GitLab MyDepthSort project should now be up to date!
Step 10
• To ensure that the update went through, navigate back to URL: bender.sheridanc.on.ca .
• Select your MyDepthSort project.
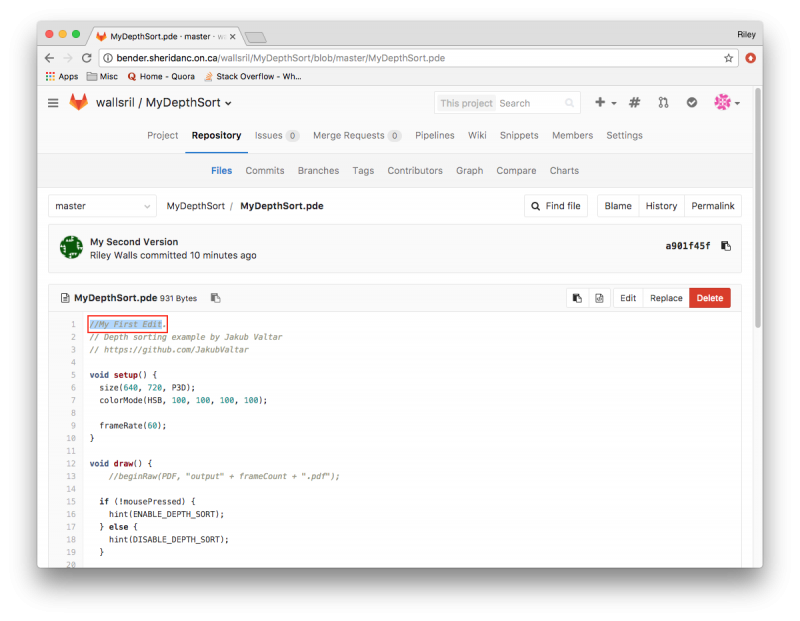
Step 11
• On your project main page, click on “MyDepthSort.pde”.
Step 12
• If your project was updated successfully, you should see the comment line “//My First Edit” at the top of the script.
Downloading Changes from Your GitLab Project
Step 1
• Navigate to: bender.sheridanc.on.ca
• Select your "MyDepthSort" project.
Step 2
• Select MyDepthSort.pde
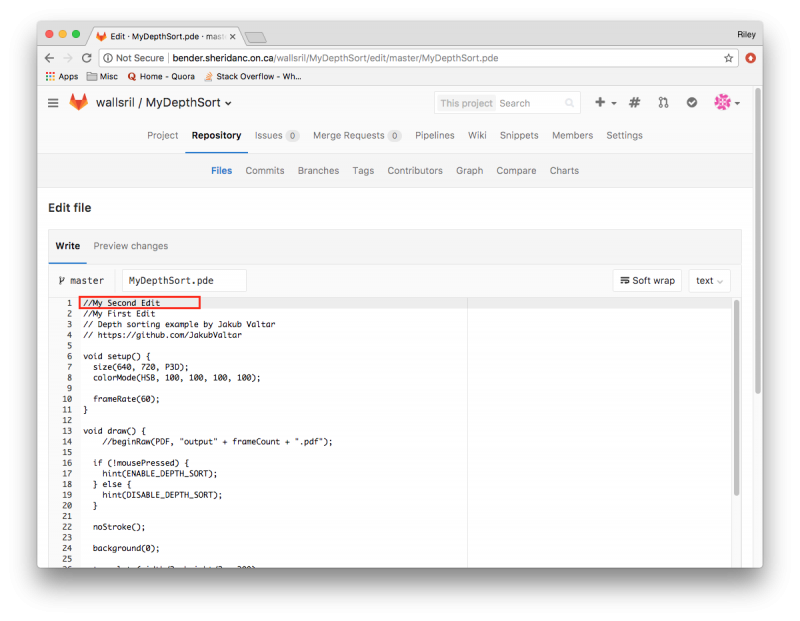
Step 3
• Select "Edit".

Step 4
• Add a new comment line with the text “//My Second Edit”
Step 5
• Scroll to the bottom of the page and select “Commit changes”.

Step 6
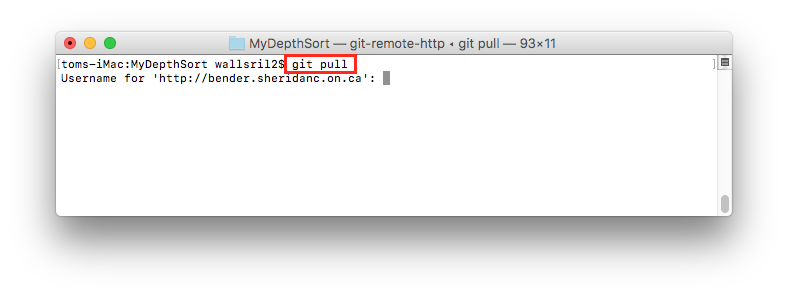
• Open a Terminal window.
Step 7
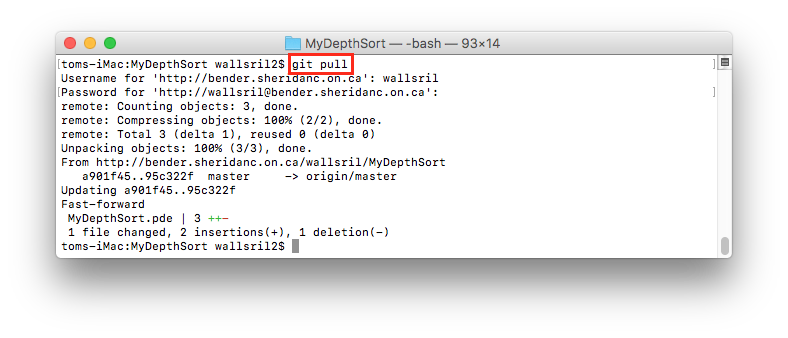
Navigate to your MyDepthSort project by typing the command “cd /Users/<your_username>/Documents/Processing/MyDepthSort”
Step 8
• Type the command “git pull”. You will be prompted for your Sheridan user name and password.
Note: Your password will not be visible as you enter it. Simply type your password and press “return”.
If successful, you should see a message similar to the one below.
Step 9
• To ensure the update went through, open Processing.
• Select 'File > Open' from the top menu bar.
Step 10
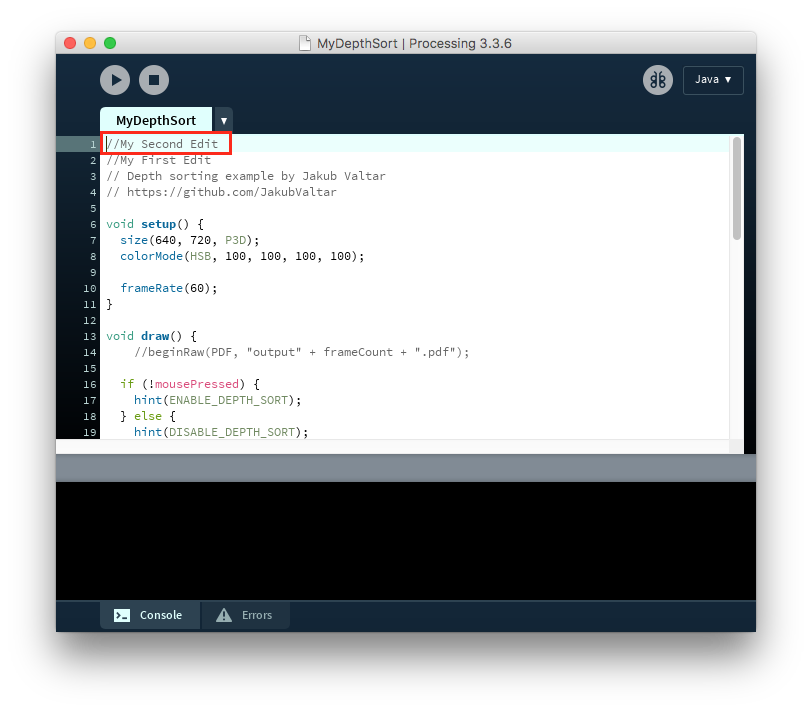
• Navigate to your MyDepthSort project directory and select “MyDepthSort.pde”. Click “Open”.
Step 11
• If the update went through successfully, you will see the comment line “//My Second Edit” at the top of the script.
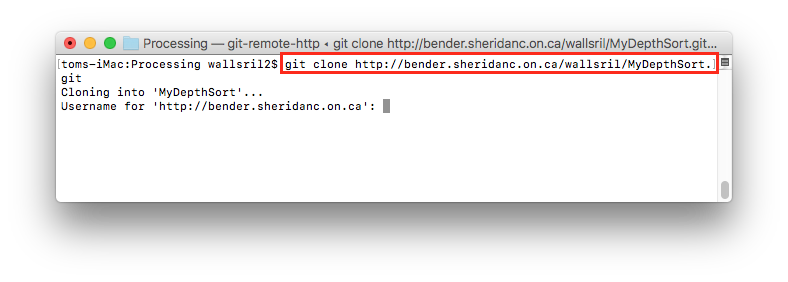
Downloading a Project from GitLab
Step 1
• Open a Finder window, an navigate to your 'Documents > Processing' directory.
• Move the entire MyDepthSort directory to the Trash.
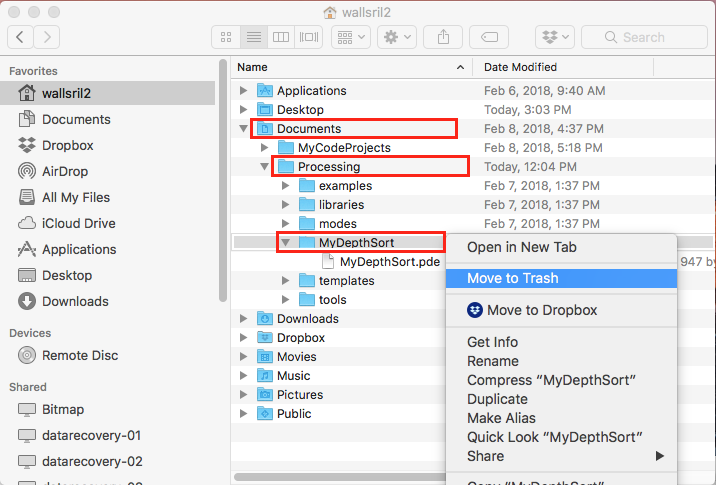
Your folder should look like the image below once MyDepthSort has been deleted.
Step 2
• Keep that finder window open in the background. Open a Terminal window.
Step 3
• Navigate to your “Processing” directory by typing the command “cd /Users/<your_username>/Documents/Processing”.
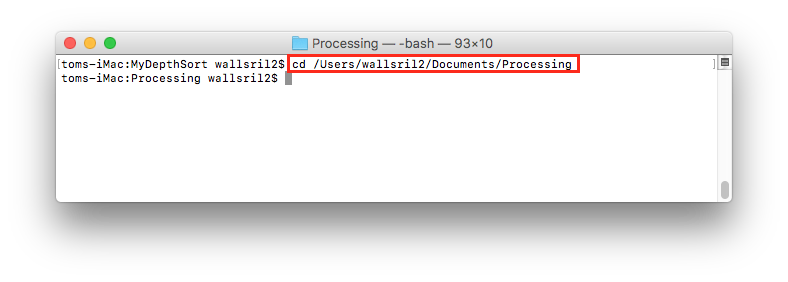
Step 4
• Type the command “git clone http://bender.sheridanc.on.ca/<sheridan_username>/MyDepthSort.git”
Note: The “<sheridan_username>” in the example URL above must be replaced with the user name you use to log in to Sheridan services.
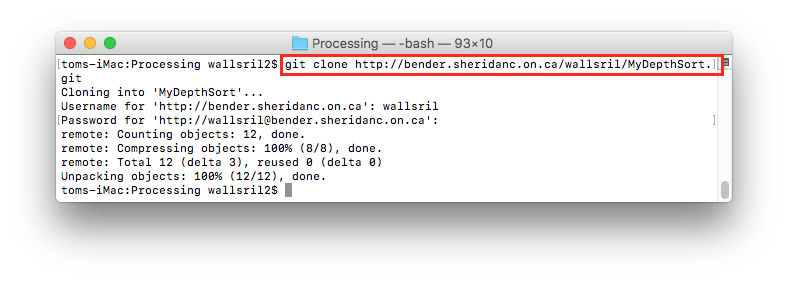
• You will be prompted for your Sheridan user name and password.
Note: Your password will not be visible as you enter it. Simply type your password and press “return”.
If successful, you’ll see a message similar to the one below.
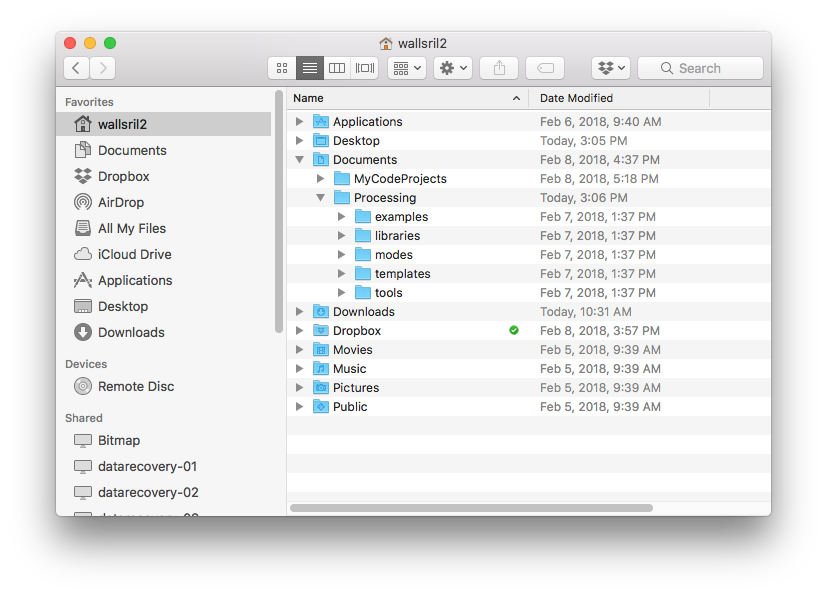
Step 5
• If you switch back to your finder window, you’ll see that the folder “MyDepthSort” has been created in 'Documents > Processing'.